***
title: Generate CLI from your collection or specification
max-toc-depth: 2
topictype: procedure
---------------------
For clean Markdown content of this page, append .md to this URL. For the complete documentation index, see https://learning.postman.com/llms.txt. For full content including API reference and SDK examples, see https://learning.postman.com/llms-full.txt.
Generate a command-line interface (CLI) tool directly from your Postman Collections or API specifications. The CLI generator creates a Go-based command-line tool that provides terminal access to every operation in your API, complete with authentication, configuration management, and AI agent integration.
The Postman CLI generator transforms your API specifications into a fully functional command-line tool that does the following:
* **Wraps your API operations** in an intuitive command structure.
* **Handles authentication** automatically (Basic, API Key, OAuth).
* **Manages configuration** through files and environment variables.
* **Provides comprehensive help** for every command and flag.
* **Generates AI agent skills** for seamless automation integration.
* **Supports all parameter types** including request bodies and file uploads.
## Permissions required to generate CLIs
You must have Editor or higher access to the collection or specification to generate a CLI. Viewers can view and download existing CLIs, but they can't generate new ones. Learn more about [Postman roles and permissions](/docs/administration/roles-and-permissions).
## Generate CLIs from collections and API specifications
You can use the Postman CLI or the Postman app to generate your CLI.
### Generate CLIs from the Postman CLI
1. Get the collection or specification ID. In Postman, open your collection or specification, then click  **Show right sidebar** on the bottom right to open the right sidebar. Click
  **Info** in the right sidebar and copy the ID to use with the [`postman sdk generate`](/docs/sdk-generator/sdk-cli/#postman-sdk-generate) command in the next step.
2. Run the `postman sdk generate` command with the pasted ID. For example, to generate a CLI, use the following command with your ID and output directory:
```bash
postman sdk generate --language cli
```
Your generated CLI is written to the directory specified by `--output-dir` (or `./sdks` by default).
You can navigate to the generated files from your terminal and build the CLI using `go mod tidy`, then `go build .`
### Generate CLIs from the Postman app
1. Expand **Collections** or **Specs** in the sidebar to select the collection or specification for which you want to generate a CLI.
2. Click
**Info** in the right sidebar and copy the ID to use with the [`postman sdk generate`](/docs/sdk-generator/sdk-cli/#postman-sdk-generate) command in the next step.
2. Run the `postman sdk generate` command with the pasted ID. For example, to generate a CLI, use the following command with your ID and output directory:
```bash
postman sdk generate --language cli
```
Your generated CLI is written to the directory specified by `--output-dir` (or `./sdks` by default).
You can navigate to the generated files from your terminal and build the CLI using `go mod tidy`, then `go build .`
### Generate CLIs from the Postman app
1. Expand **Collections** or **Specs** in the sidebar to select the collection or specification for which you want to generate a CLI.
2. Click  **View more actions** and select **More > Generate CLIs** from a collection (or just **Generate CLIs** for API specifications).
3. Name your CLI build. You can use the default name or enter a custom one.
**View more actions** and select **More > Generate CLIs** from a collection (or just **Generate CLIs** for API specifications).
3. Name your CLI build. You can use the default name or enter a custom one.
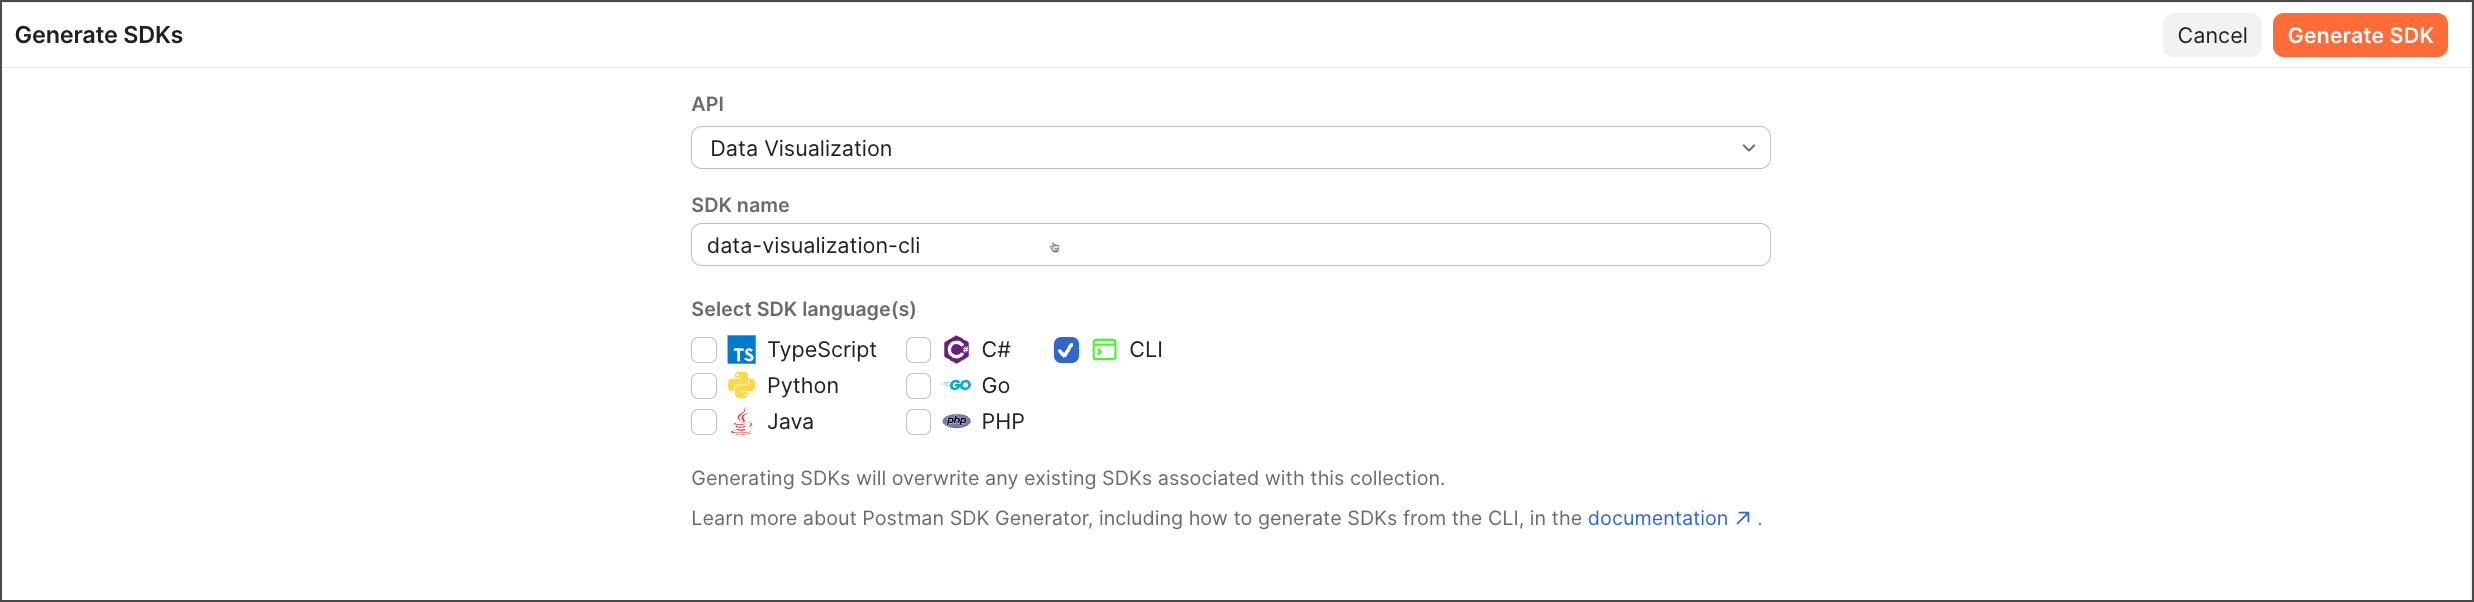 4. Select **CLI** as your generation type. This will create a Go-based command-line interface with all your API operations.
Generate CLIs using AI. Open the right sidebar and start a new chat. Ask the agent to generate a CLI for you. For example, you can say "Generate a CLI for this collection."
5. Click **Generate CLI**.
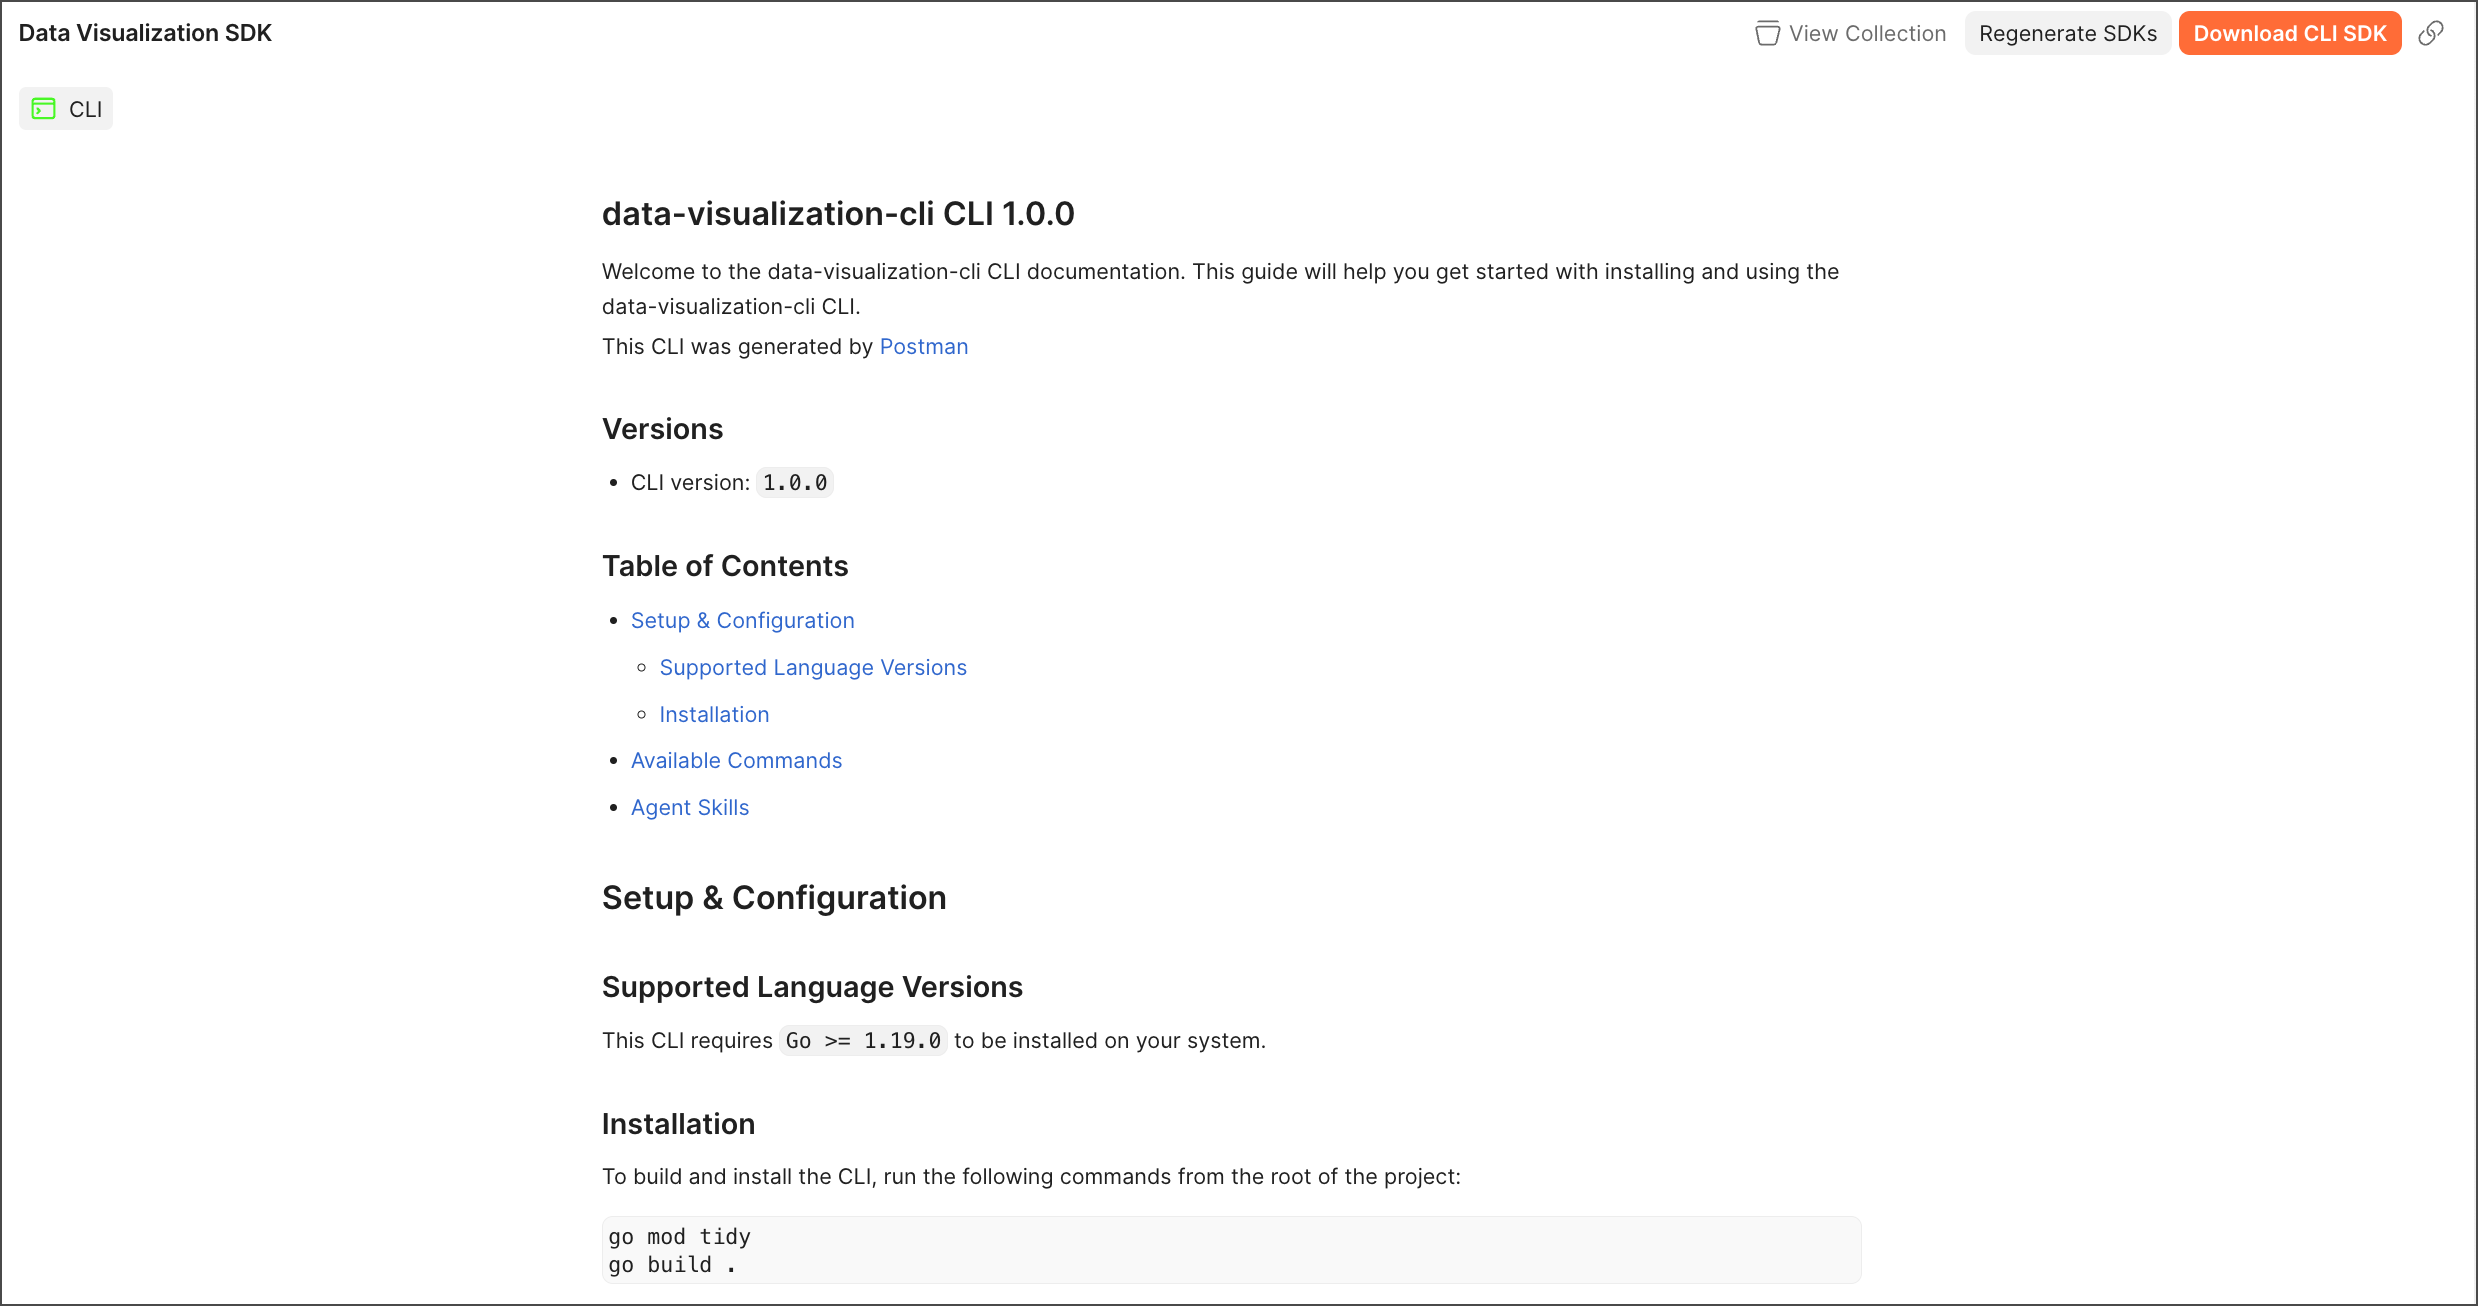
6. Click **Download** to download the generated CLI as a zip file. The zip file contains the complete CLI source code, which you can build and integrate into your workflow.
4. Select **CLI** as your generation type. This will create a Go-based command-line interface with all your API operations.
Generate CLIs using AI. Open the right sidebar and start a new chat. Ask the agent to generate a CLI for you. For example, you can say "Generate a CLI for this collection."
5. Click **Generate CLI**.
6. Click **Download** to download the generated CLI as a zip file. The zip file contains the complete CLI source code, which you can build and integrate into your workflow.
 The CLI generator creates a complete project structure containing:
* **Executable CLI binary** with your API commands.
* **Go source code** for customization and building.
* **AI agent skills** for each command in Markdown format.
* **Authentication setup** for all supported auth methods.
* **Configuration management** with file and environment variable support.
* **Comprehensive documentation** including usage examples.
To regenerate your CLI or generate new ones with different configurations, click **Regenerate SDKs**.
You can access your CLIs in the left sidebar. Click **SDKs** to see all your generated SDKs and CLIs.
## Next steps
After generating your CLI:
1. **[Install and build](/docs/cli-generator/generated-cli/#installation)** your generated CLI from the source code.
2. **[Set up authentication](/docs/cli-generator/generated-cli/#authentication)** using the `setup-auth` command for your API.
3. **[Configure settings](/docs/cli-generator/generated-cli/#configuration)** like base URLs using the `config` command.
4. **[Learn CLI commands](/docs/cli-generator/generated-cli/#command-usage)** and use `--help` to explore available operations.
5. **[Explore AI agent skills](/docs/cli-generator/generated-cli/#ai-agent-skills)** for automation and integration workflows.
6. **[Learn about AI agent integration](/docs/cli-generator/cli-ai/)** to understand how agents can use your CLI autonomously.
The CLI generator creates a complete project structure containing:
* **Executable CLI binary** with your API commands.
* **Go source code** for customization and building.
* **AI agent skills** for each command in Markdown format.
* **Authentication setup** for all supported auth methods.
* **Configuration management** with file and environment variable support.
* **Comprehensive documentation** including usage examples.
To regenerate your CLI or generate new ones with different configurations, click **Regenerate SDKs**.
You can access your CLIs in the left sidebar. Click **SDKs** to see all your generated SDKs and CLIs.
## Next steps
After generating your CLI:
1. **[Install and build](/docs/cli-generator/generated-cli/#installation)** your generated CLI from the source code.
2. **[Set up authentication](/docs/cli-generator/generated-cli/#authentication)** using the `setup-auth` command for your API.
3. **[Configure settings](/docs/cli-generator/generated-cli/#configuration)** like base URLs using the `config` command.
4. **[Learn CLI commands](/docs/cli-generator/generated-cli/#command-usage)** and use `--help` to explore available operations.
5. **[Explore AI agent skills](/docs/cli-generator/generated-cli/#ai-agent-skills)** for automation and integration workflows.
6. **[Learn about AI agent integration](/docs/cli-generator/cli-ai/)** to understand how agents can use your CLI autonomously.