Get started
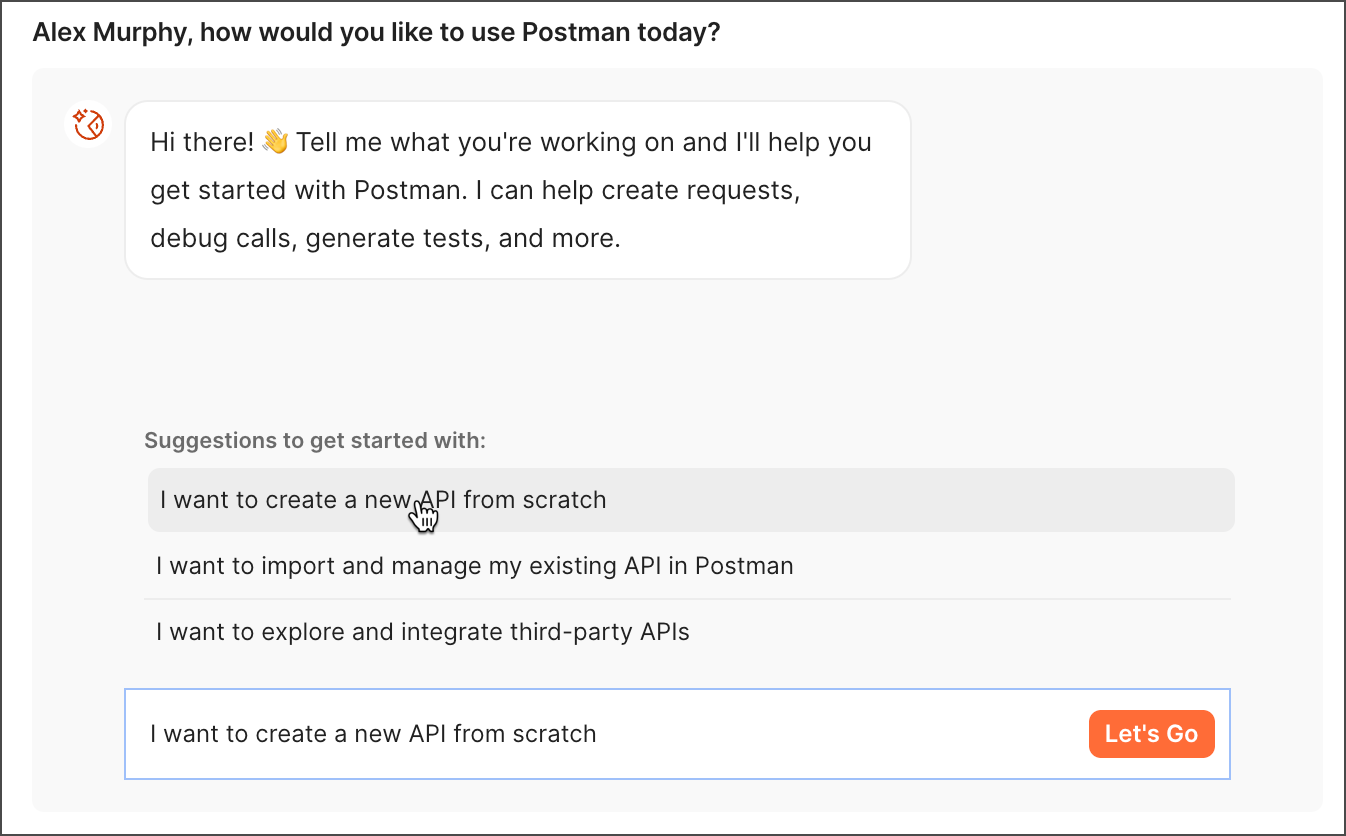
You can access Agent Mode directly from the Homepage. Type in your query or use one of the suggestions. Click Let’s go, and you’ll be taken to your most recently visited workspace with edit access. When the workspace opens, Agent Mode will already be loaded with your query.
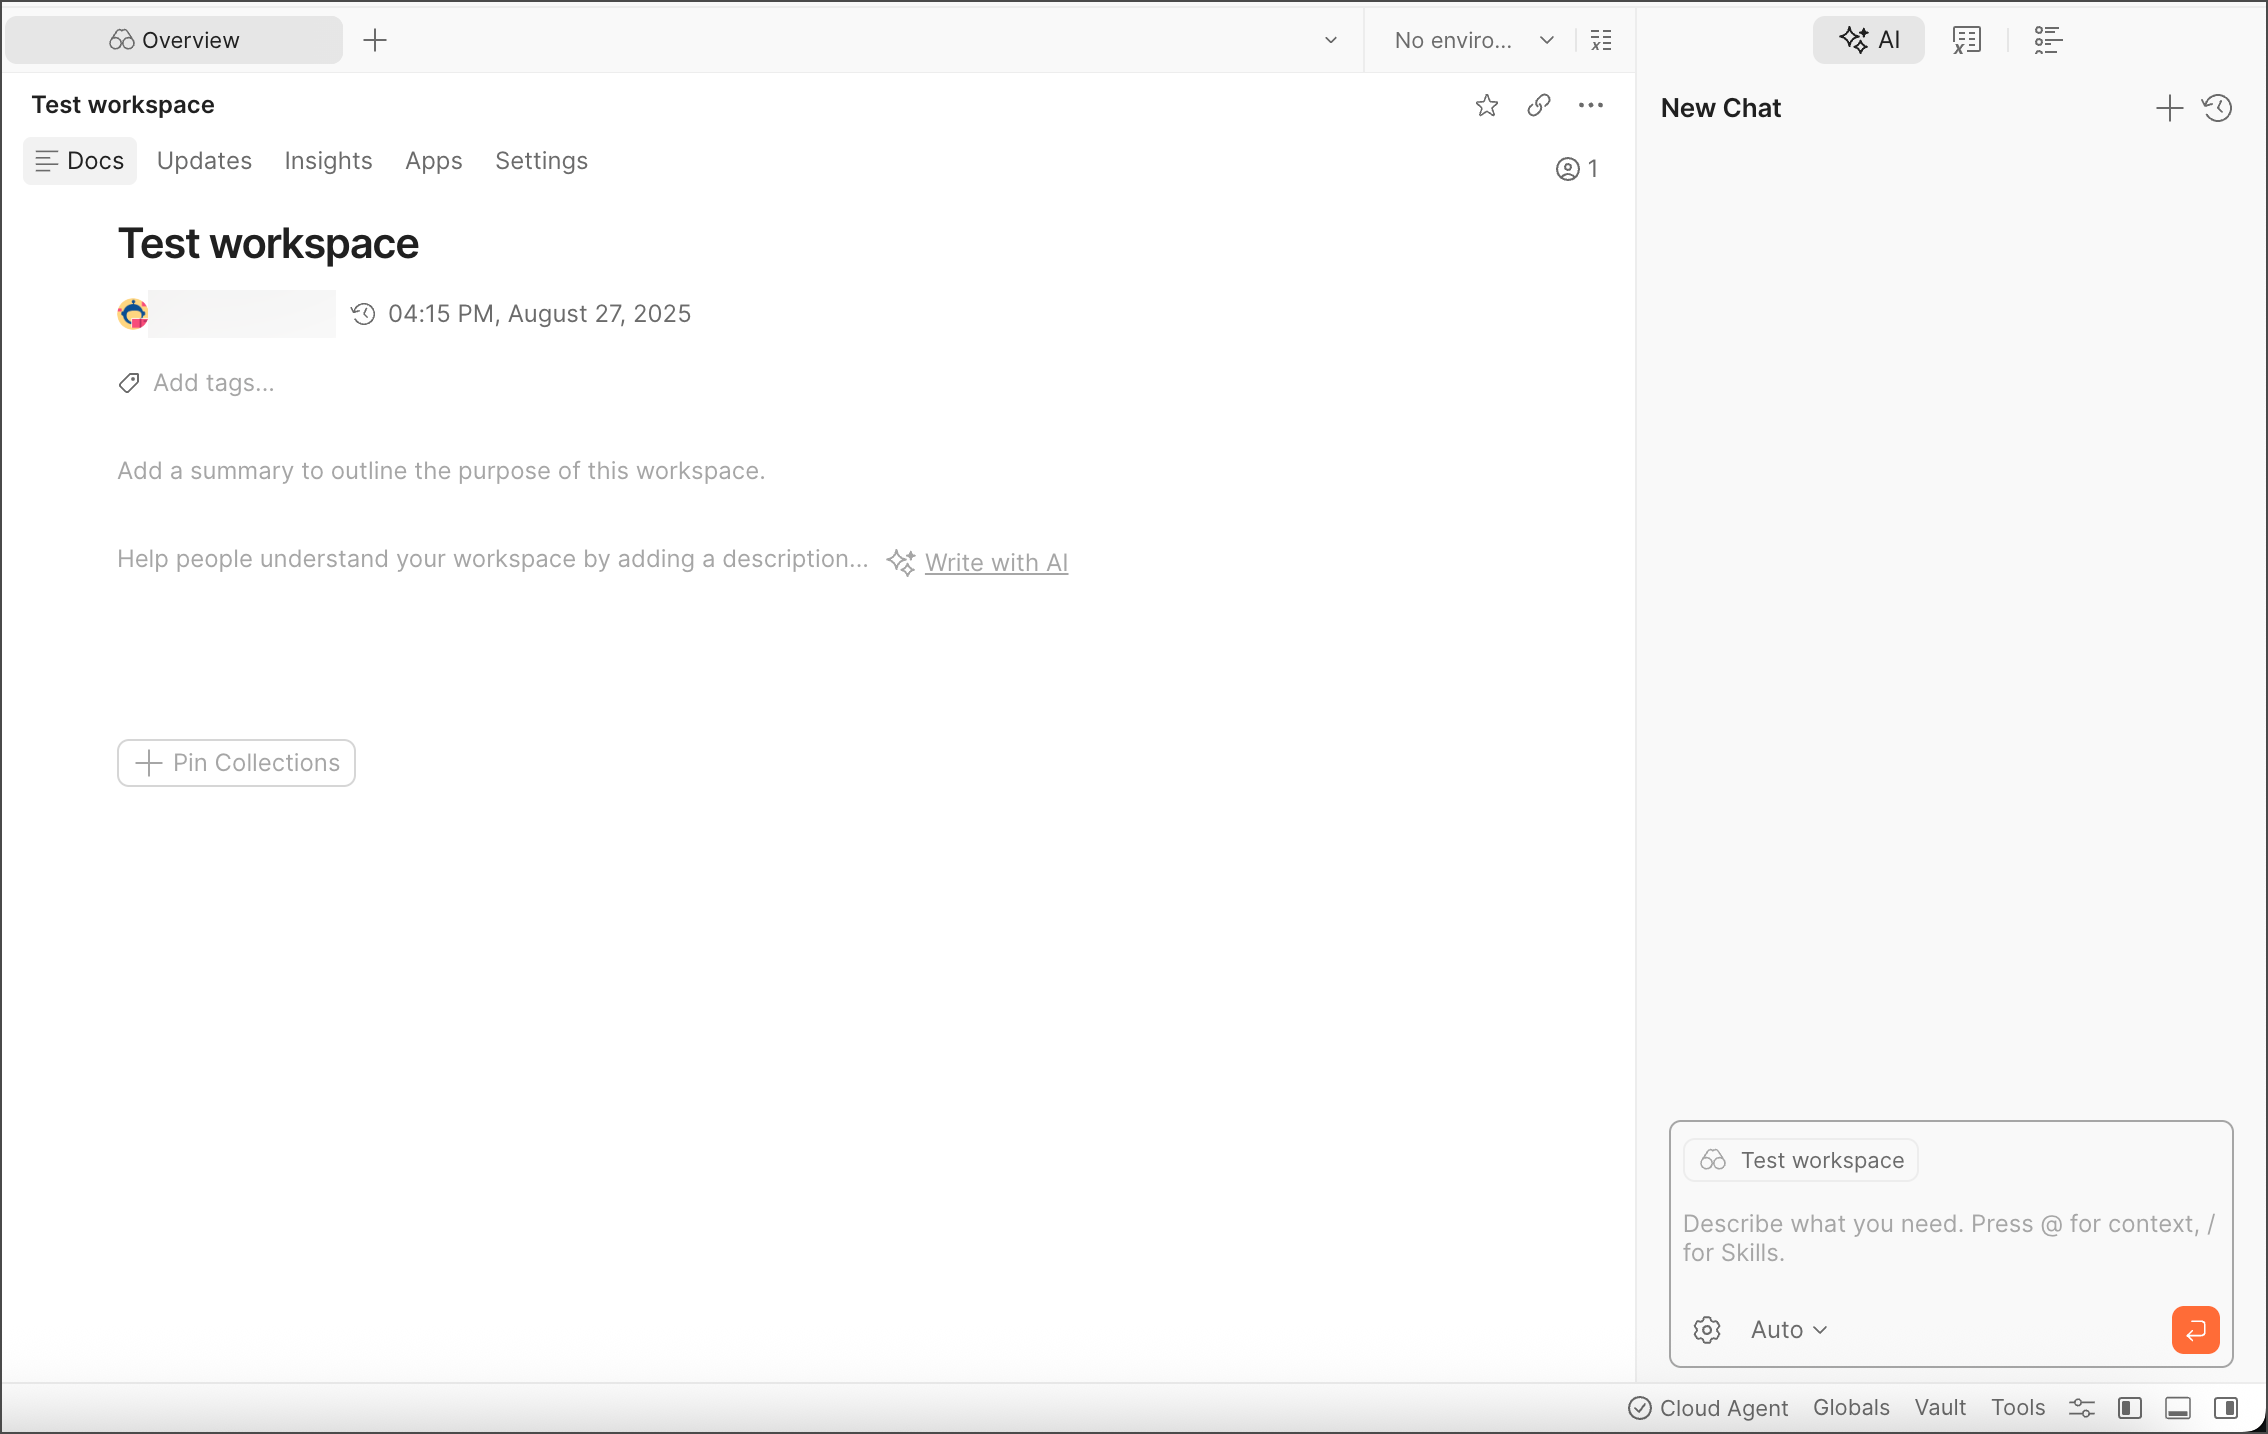
You can also get started from a workspace by opening the right sidebar from the bottom-right corner, and switching to the ![]() AI tab. For more information on how to use Agent Mode, see Postman Agent Mode.
AI tab. For more information on how to use Agent Mode, see Postman Agent Mode.
Start your chat
Based on the task you want to perform. Agent Mode will ask clarifying questions or request your approval before performing an action.
You can do any of the following:
-
Select a suggestion — For blank conversations, Agent Mode will show suggestions relevant to the workspace. Use these to get started with common workflows.
-
Type ”@” to select the context for your work — For example, select Collections and find a request in a collection to modify.
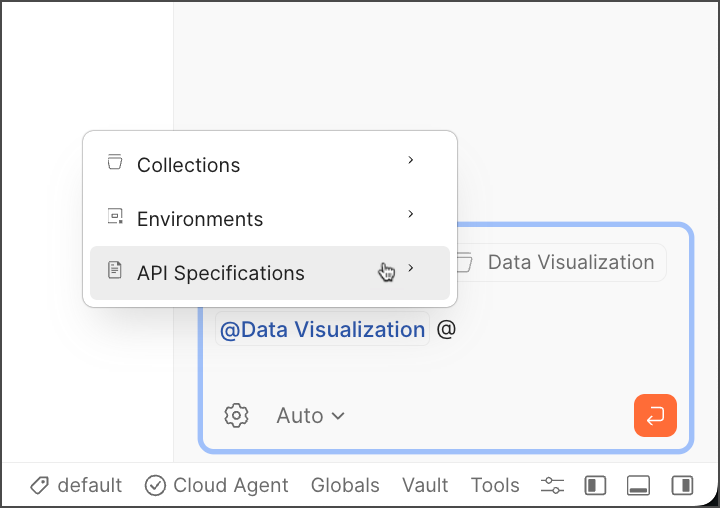
Postman lets you add collections, folders, requests, environments, and API specifications as context. Your active tab shows in the chat and also serves as context.
-
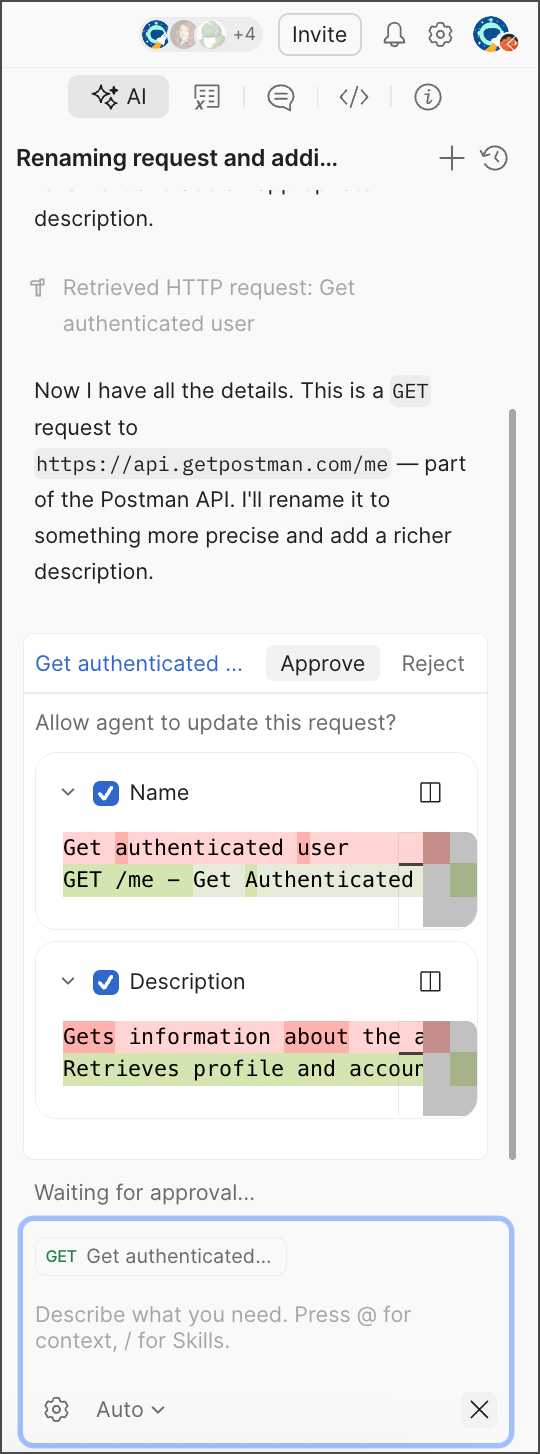
Describe your task in natural language — For example, ask Agent Mode to name and describe a simple request, and watch Agent Mode carry it out.
Not sure what to do? Try asking “What tasks can I do in Agent Mode?” for a full list of its capabilities and common tasks you can use to work more efficiently with your API development and testing workflows.
Agent Mode options
To switch your AI model, click the model dropdown (Auto by default) and select a specific AI model.
Postman recommends Auto as an optimized model based on Postman’s heuristics. But if you see suboptimal output, try selecting a different model.
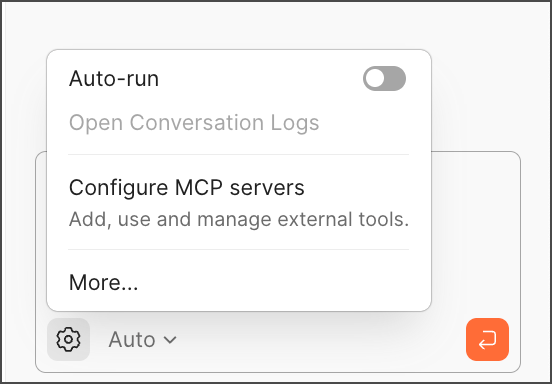
The ![]() Settings menu also gives you options to run tools automatically and configure MCP servers. Setting Auto-run to false will require your approval before any actions are taken by Agent Mode.
Settings menu also gives you options to run tools automatically and configure MCP servers. Setting Auto-run to false will require your approval before any actions are taken by Agent Mode.
To learn more about using MCP servers in Postman, see Create MCP requests and add them to your collections.