Document a collection with Fern
When you publish a Postman Collection with Fern, Fern automatically generates your API reference documentation from your collection. Your site is deployed live and backed by a GitHub repository that your team owns.
From there, you can add guides, overview pages, tutorials, and other content alongside your API reference to build a complete documentation site.
Publish a collection with Fern
To publish your collection documentation with Fern, do the following:
-
In the sidebar, click
 Items, then expand Collections and select a collection.
 -
In the collection’s Overview tab in the workbench, click View complete documentation.
-
Click
 Publish docs, select Fern, then click Get started.
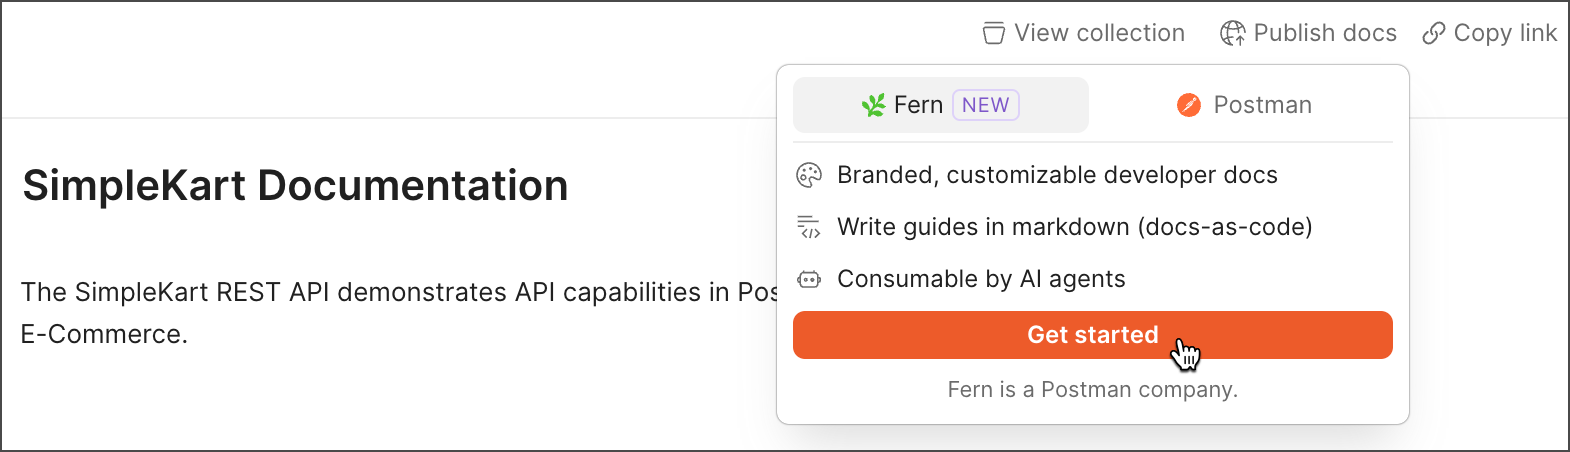
-
Configure your documentation site:
- Site name — Enter a name for your documentation site.
- Primary color — Select a primary color scheme for your site’s branding.
- Logo — Upload a logo for your site, or paste a URL (like a marketing site or blog), and Fern automatically extracts your brand information. If you’ve previously published documentation with Postman, your existing logo and color scheme is imported automatically.
-
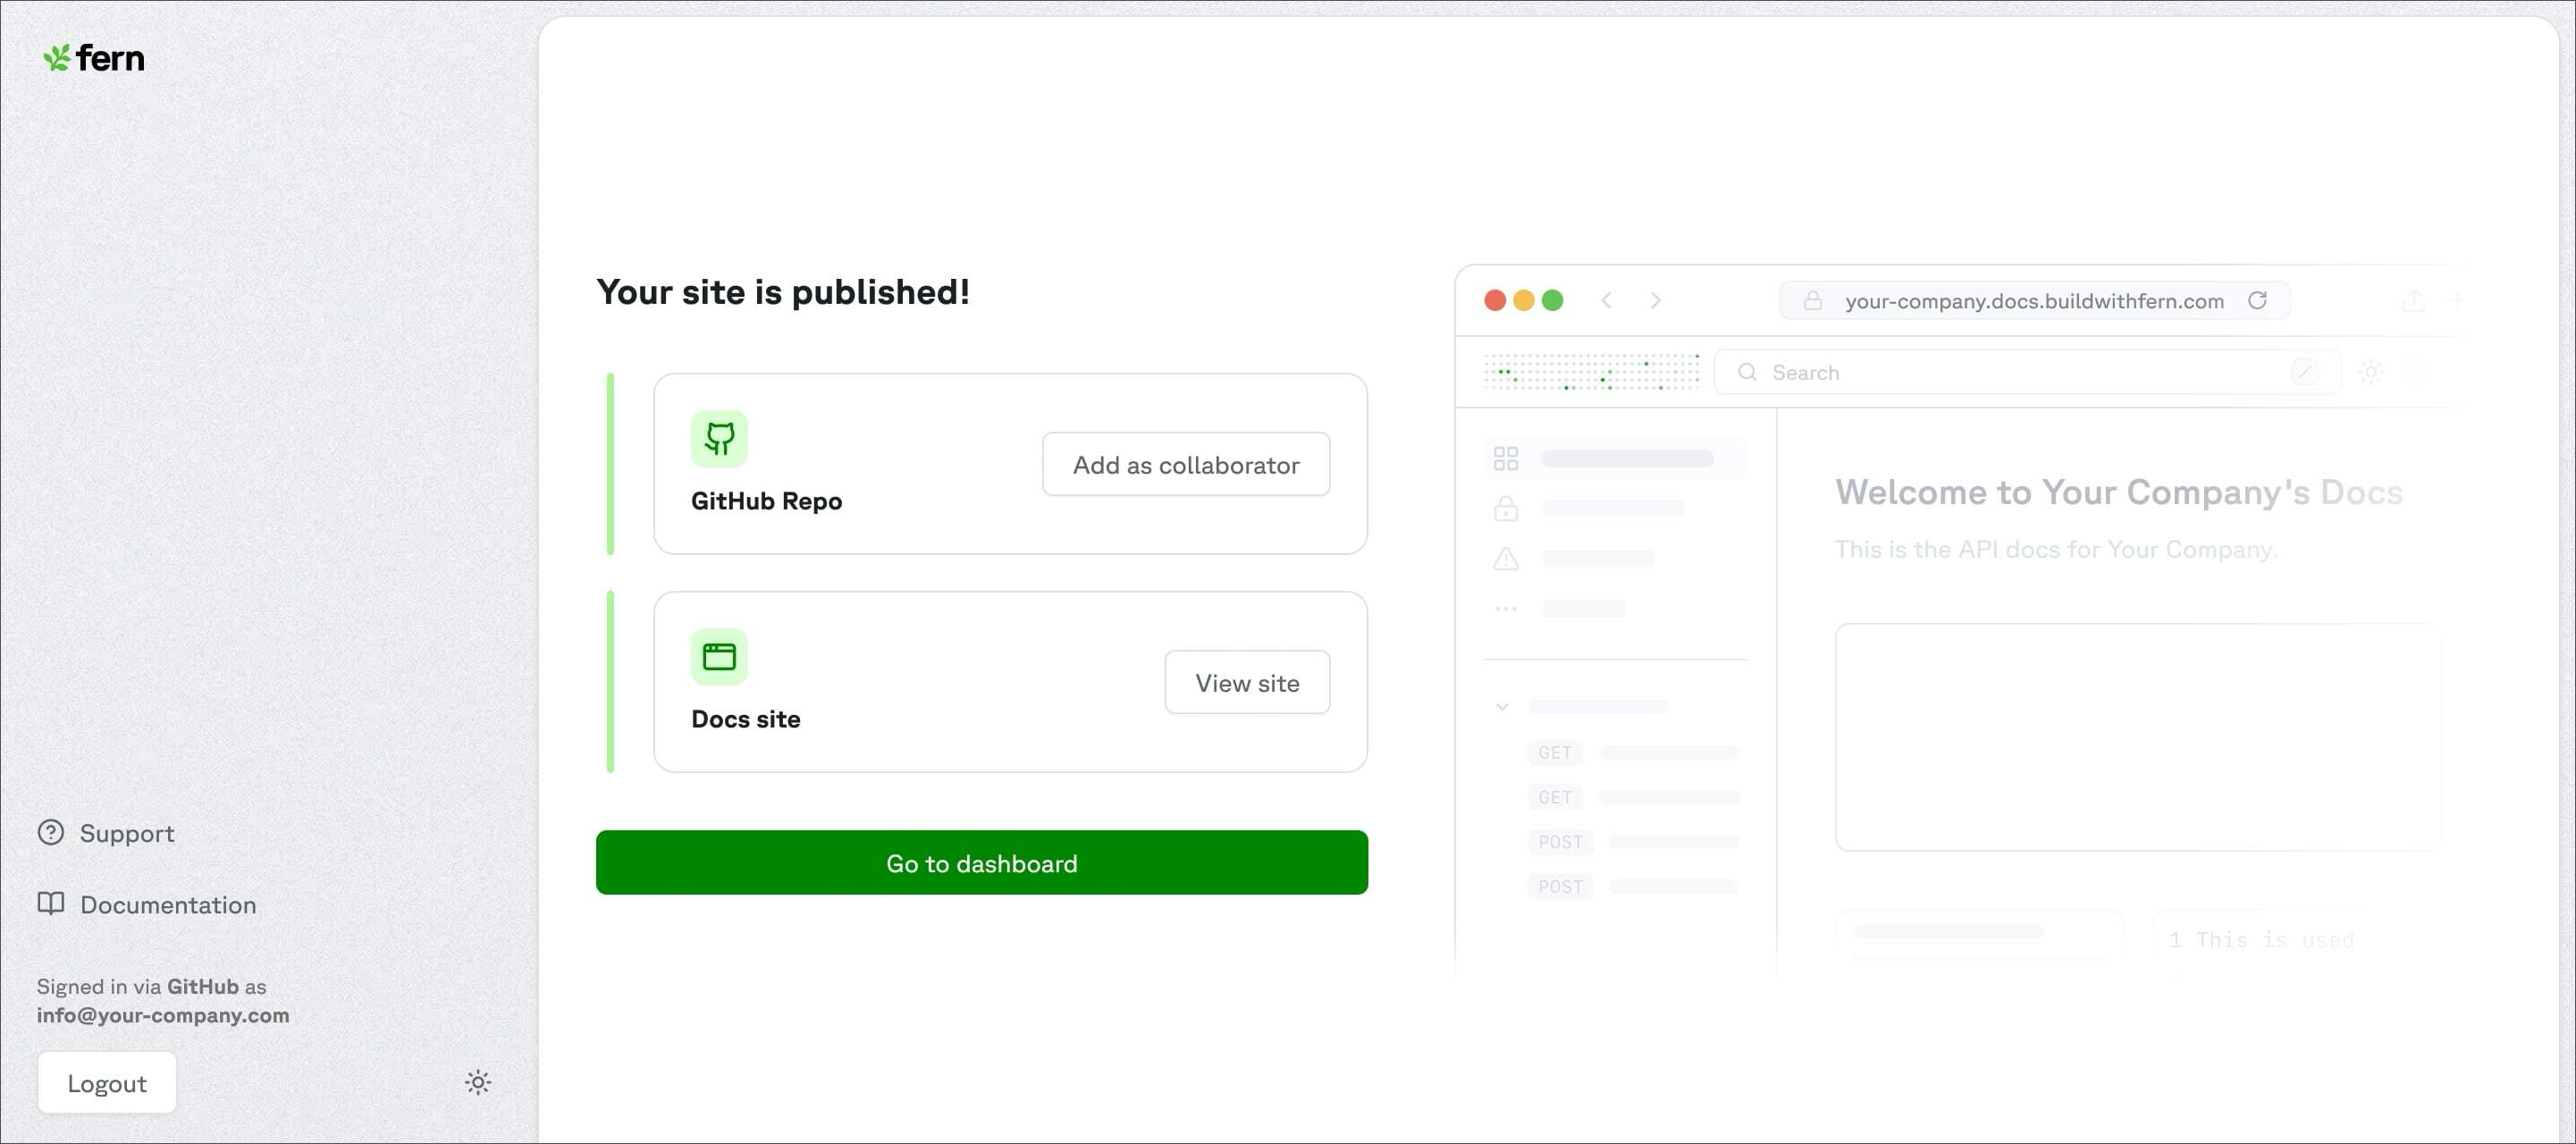
Click Publish. Your documentation is published to a GitHub repository that your team owns and deployed live onto a new documentation site. You can modify all of these settings later.
Each collection can only be published once through Fern. If you try to publish a collection already published by another team member, you’ll receive an error.
View your published documentation
After Fern publishes your site, your documentation is deployed live and backed by a GitHub repository. You can edit the documentation, take ownership of the repository, navigate to your live site URL, or share with your team.
To view your published documentation from your collection, do the following:
- In the sidebar, click Items, then expand Collections and select a published collection.
- Click
 Docs published, then click the link to open your live documentation site.
Unpublish your documentation
If you no longer want your documentation to be publicly available, you can unpublish it.
- In the sidebar, click Items, then expand Collections and select a published collection.
- Click Docs published, then click
 Unpublish to unpublish your docs with Fern. Your auto-generated documentation in Postman won’t be affected.
Manage your Fern documentation
After your collection is published, the Fern Dashboard provides a central place to manage your projects, team members, and settings. You have full edit rights and ownership of your documentation.
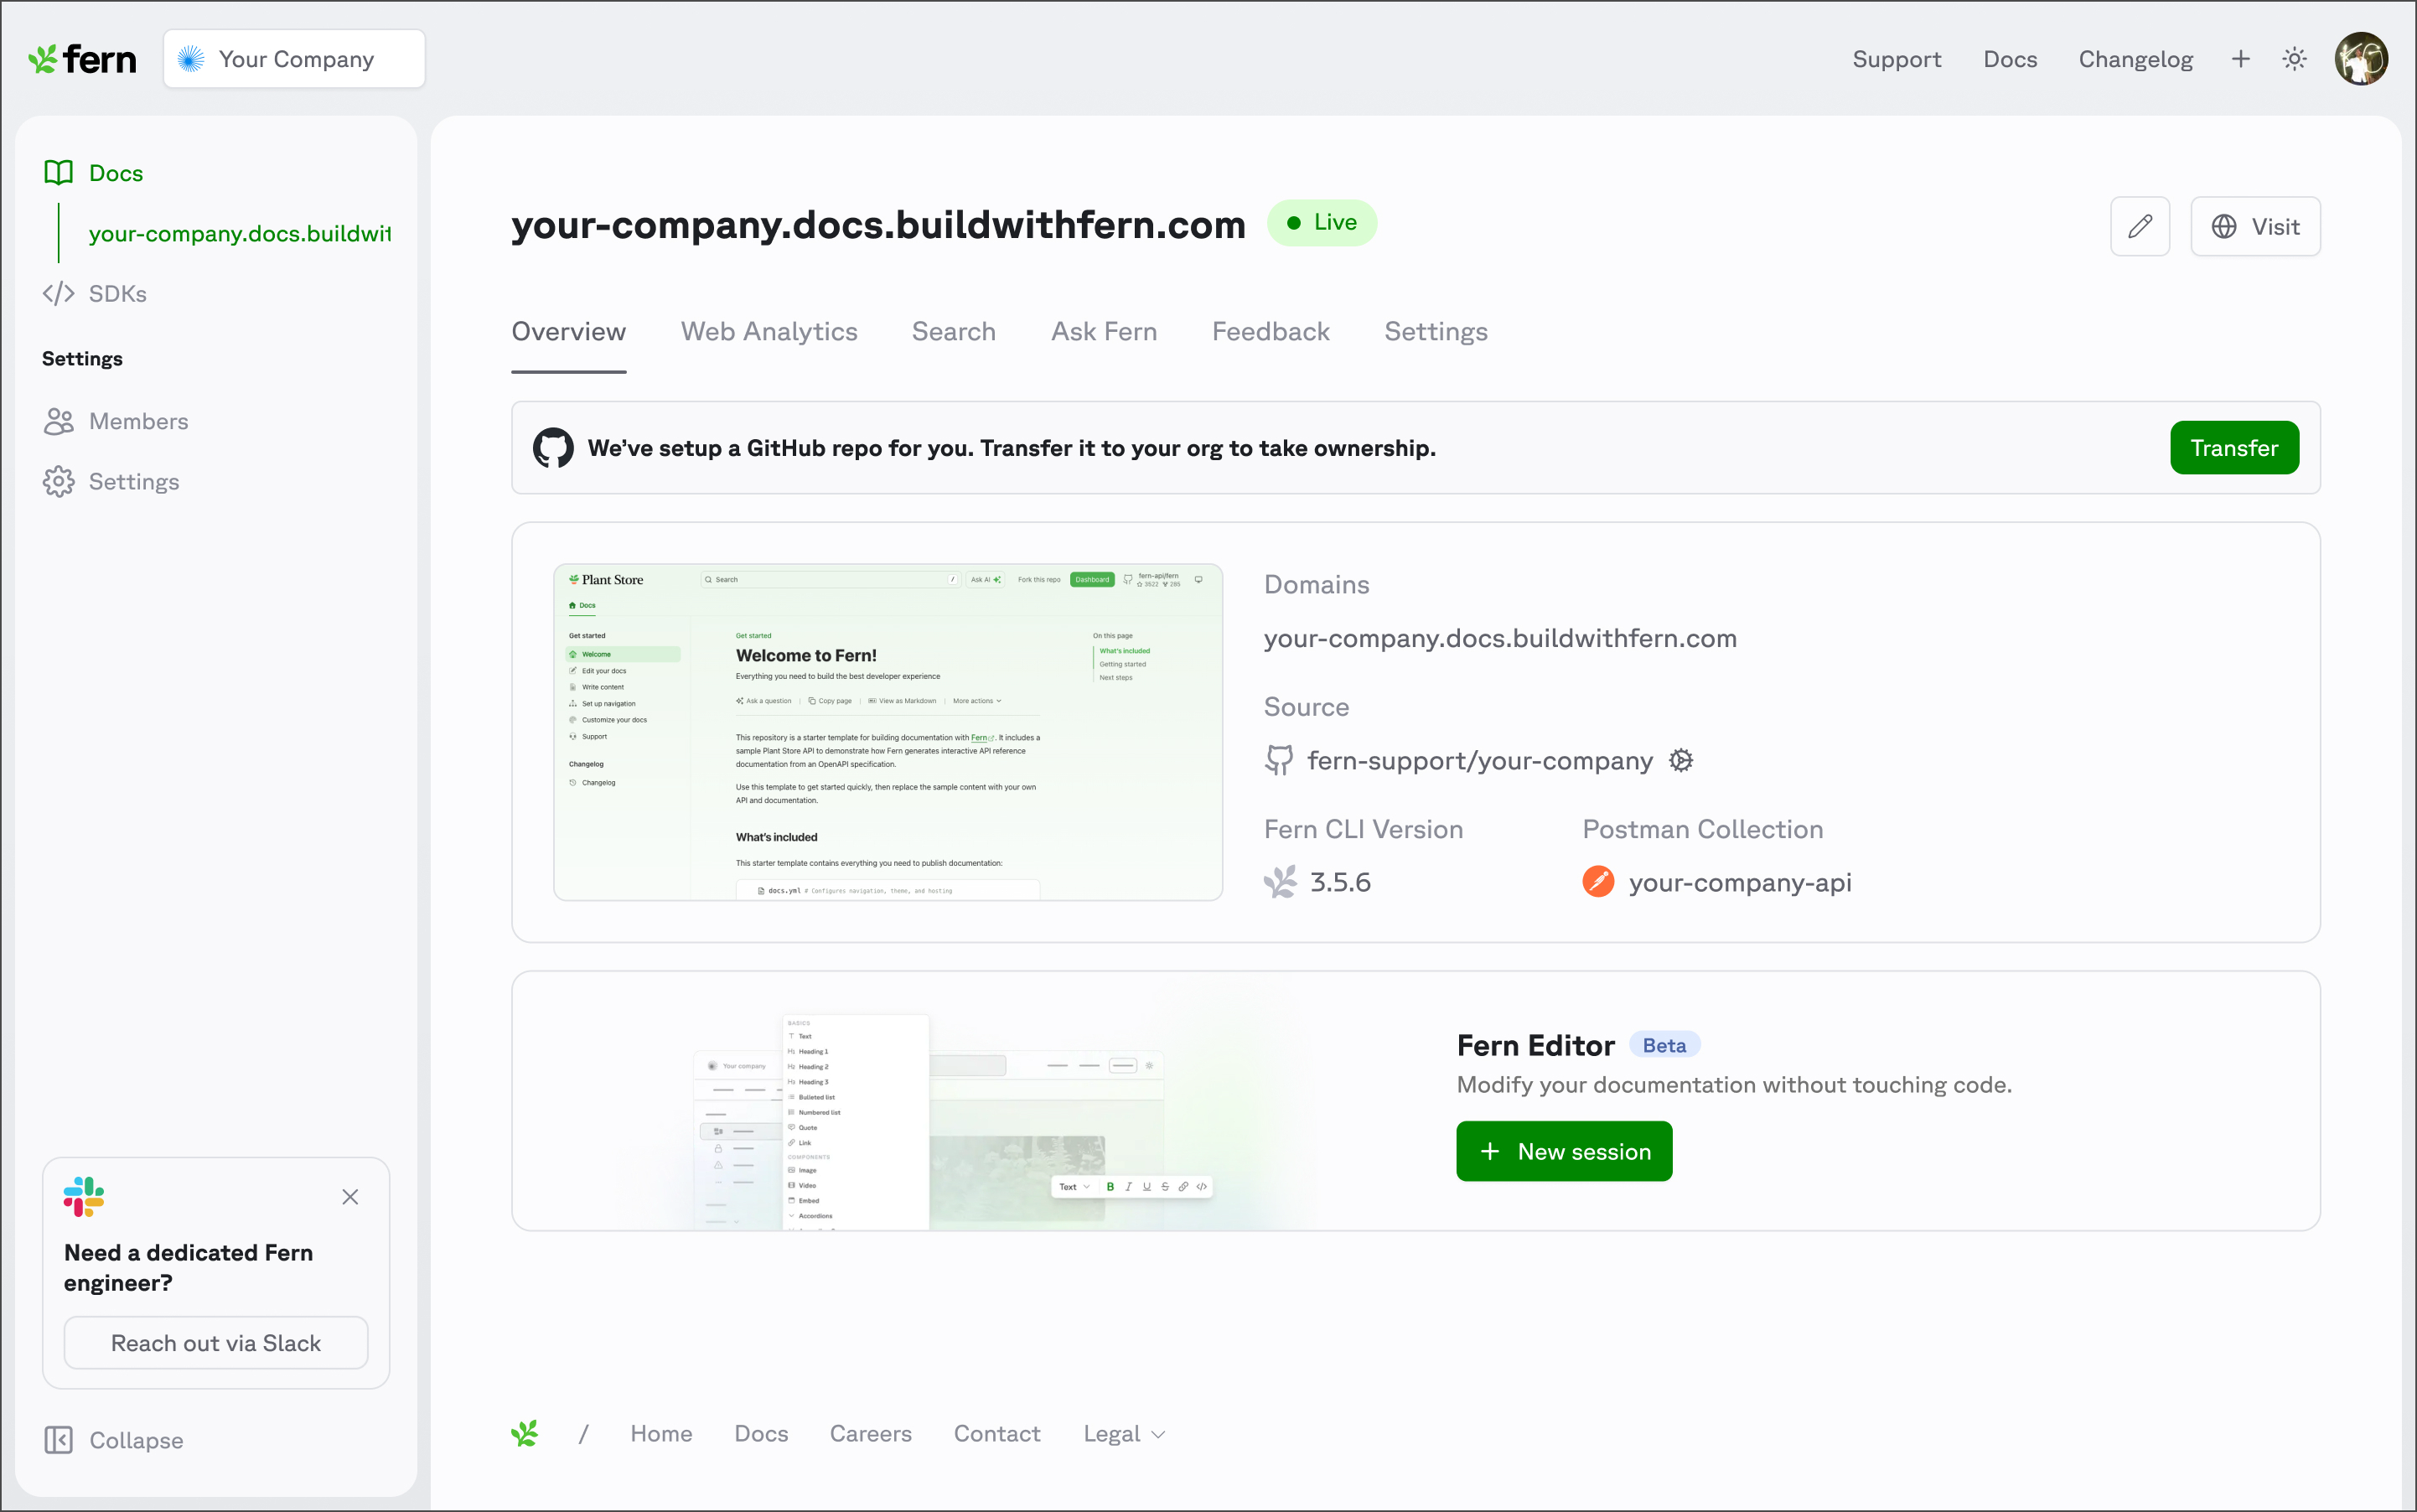
You can configure the following features and settings in the Fern Dashboard:
- Set up custom domain — Configure your custom domain with automatic DNS record provisioning.
- Member permissions — Assign Admin, Editor, or Viewer roles to manage Dashboard and CLI access.
- Integrate GitHub — Connect your GitHub repository to your project.
- Enable Ask Fern — Set up AI-powered chat for your documentation.
- View web analytics — Track how developers and bots interact with your documentation.
- Manage site information — View deployment status, domains, CLI version, and GitHub repo details.
Edit published documentation
After Fern generates your API reference, you can edit your documentation to add guides, overview pages, tutorials, and other content alongside it.
To edit your published documentation, do the following:
- In the sidebar, click Items, then expand Collections and select a published collection.
- Click Docs published, then click
 Edit published documentation. You can make a PR and edit in your code environment. Alternatively, you can edit using Fern Editor, a browser-based editor backed by GitHub.
You can preview changes in your local development environment and publish them to production when you’re ready using the Fern CLI.
Explore Fern features to get more out of your documentation site:
- Fern Writer — A Slack-based AI agent that drafts and updates your documentation with GitHub pull requests.
- API Explorer — Let users make real API calls directly from your documentation to reduce time to first successful request.
- Ask Fern — An AI-powered search that helps users find answers instantly and reduces support burden.
- Component library — Use built-in components like accordions, callouts, tabs, code blocks, and interactive API snippets in your docs.