Manage runners for internal APIs
This feature is available on Postman Enterprise plans. For more information, see the pricing page.
As an Admin or Super Admin, you can view and manage runners from Runner settings. This enables you to view all of your team’s runners in one place. You can view the Postman CLI commands again for setting up each runner in your internal network, update each runner’s name and description, and delete runners you’re no longer using. You can also reset a runner key for a runner if you it.
Manage runners from Runner settings
View and manage your team’s runners from Runner settings. Click your profile icon in the Postman header, click your organization or team name, then click Runners in the left sidebar.
From Runner settings, you can review each runner’s name, health status, last ping date, workspace visibility, creator, creation date, and modified date. Search by runner name, filter by health status in the Status dropdown list, and filter by user in the Created by dropdown list. You can also click a runner’s name to view more details about a runner, including monitors configured with a runner and each instance of a runner.
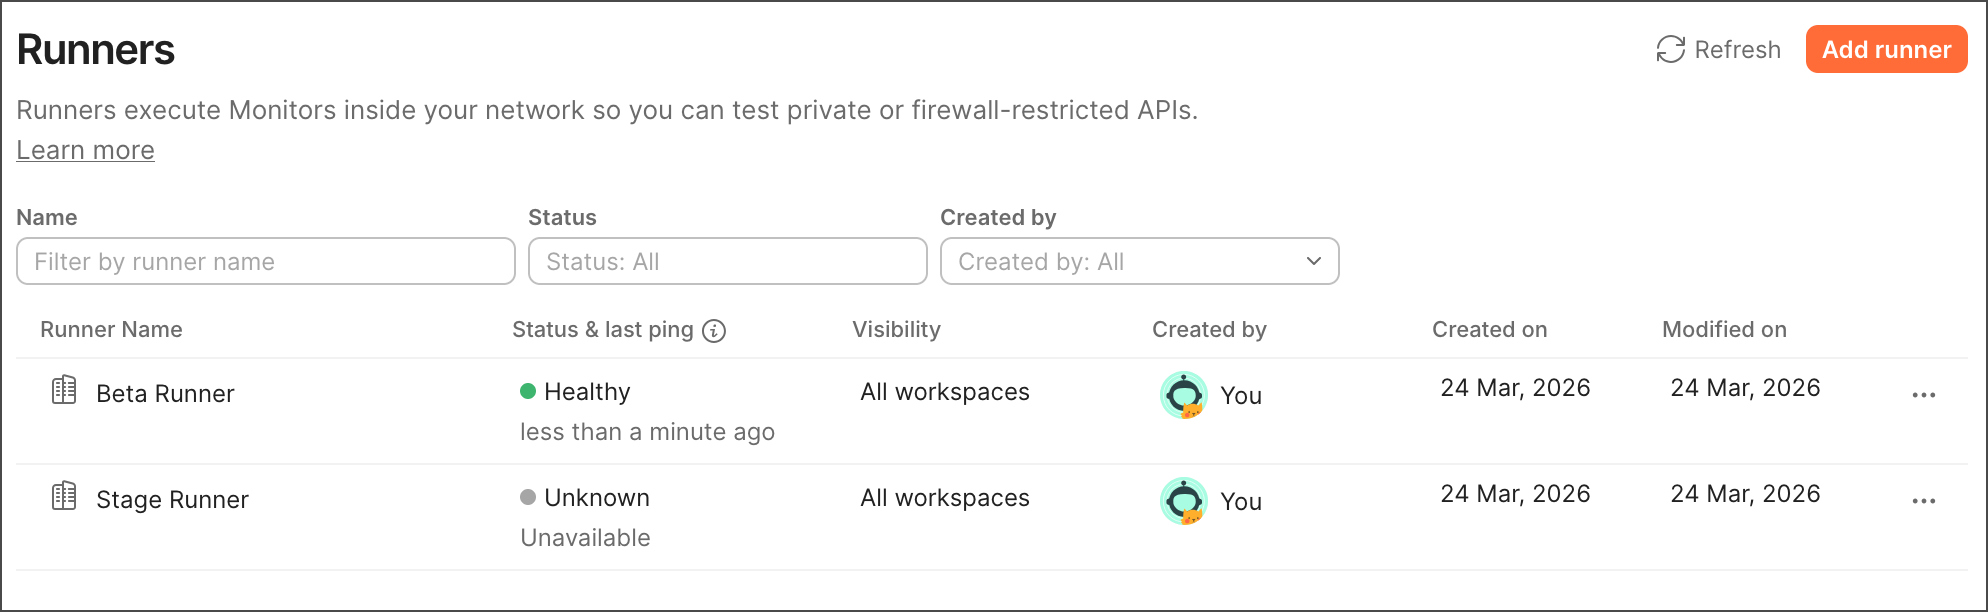
In the Status & last ping column, you can view the health status and last ping date for each runner. The colored dot shows whether a runner has sent test results to the Postman cloud, providing insight about the health status of the runner:
- Healthy — A green dot means the runner recently sent results.
- Unhealthy — An orange dot means the runner hasn’t recently sent results.
- Unknown — A gray dot means the runner hasn’t sent results yet.
You can also click ![]() next to a runner to take additional actions:
next to a runner to take additional actions:
-
Install — Get the commands for setting up the runner in your internal network, including the runner ID.
-
Edit — Update the runner’s name and description. You can also update internal workspaces where the runner is visible:
-
All internal workspaces in team — The runner is visible in all internal workspaces in your team.
-
Selected workspace — Click the Select workspace dropdown list and then select the internal workspace where the runner is visible.
You can change this later when you’re ready to make the runner visible in all your team’s internal workspaces.
-
-
Delete — Delete a runner. Click Delete Runner to confirm.
View details about a runner
From Runner settings, you can click a runner’s name to view more details about a runner.
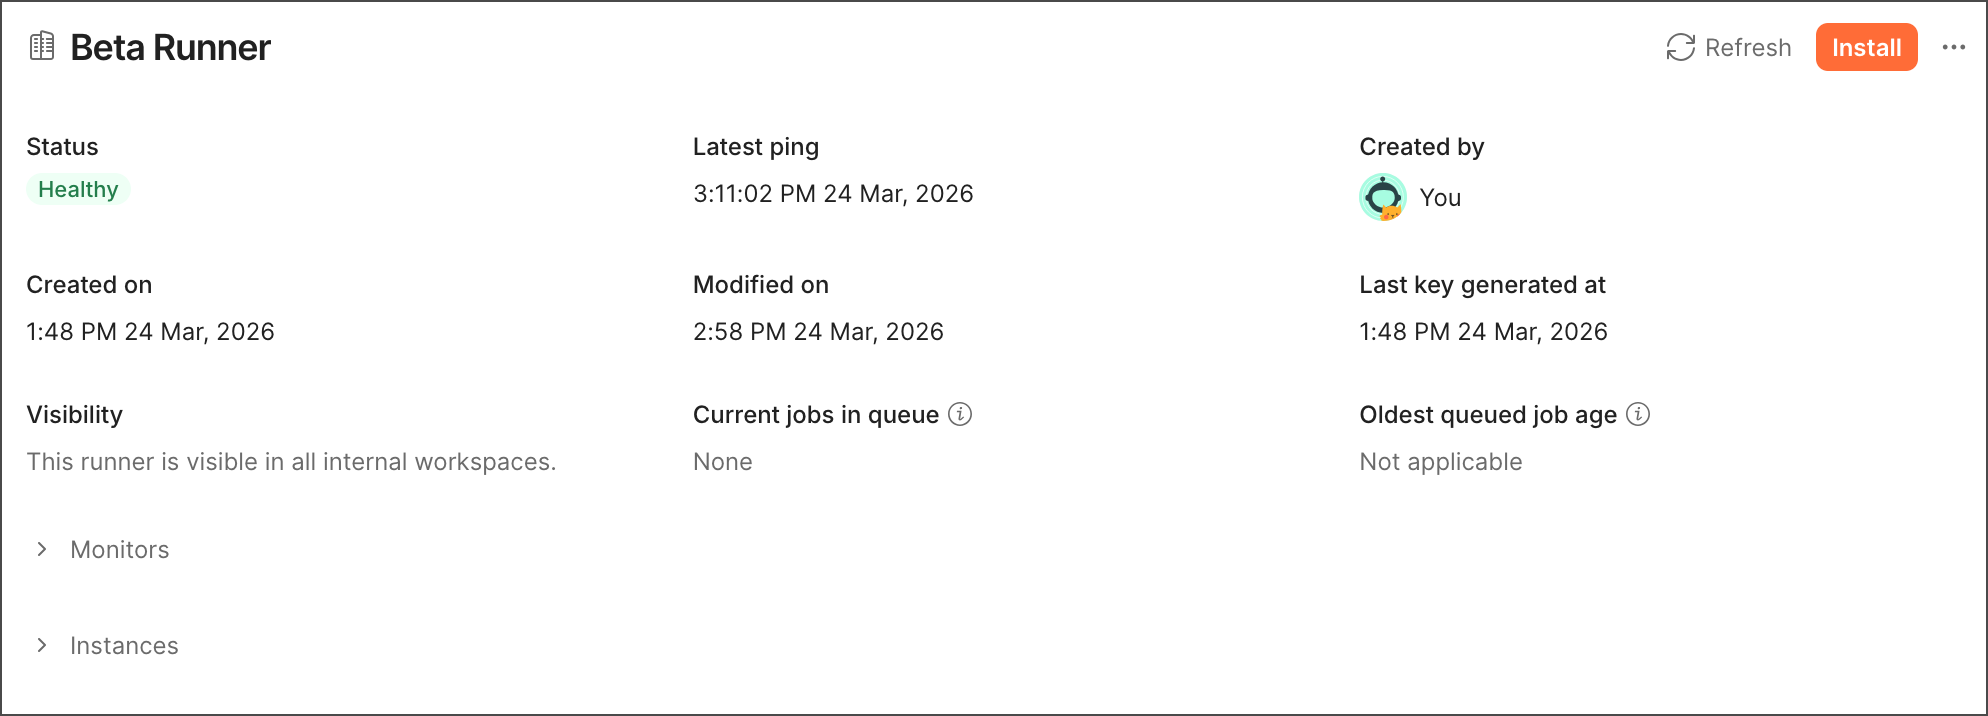
View the following details about a runner:
-
Status — Shows whether the runner has sent test results to the Postman cloud.
- Healthy — The runner recently sent results.
- Unhealthy — The runner hasn’t recently sent results.
- Unknown — The runner hasn’t sent results yet.
-
Latest ping — The last date and time the runner sent results to the Postman cloud.
-
Created by — The teammate who created the runner.
-
Created on — The date the runner was created.
-
Modified on — The date the runner was last modified.
-
Last key generated at — The date the runner key was last generated.
-
Visibility — The internal workspace where the runner is visible.
-
Current jobs in queue — The number of monitors waiting to run in the runner.
-
Oldest queued job age — The age of the monitor (in seconds) that has been waiting the longest to run in the runner.
You can also view monitors configured with a runner and each instance of a runner.
View runner monitors
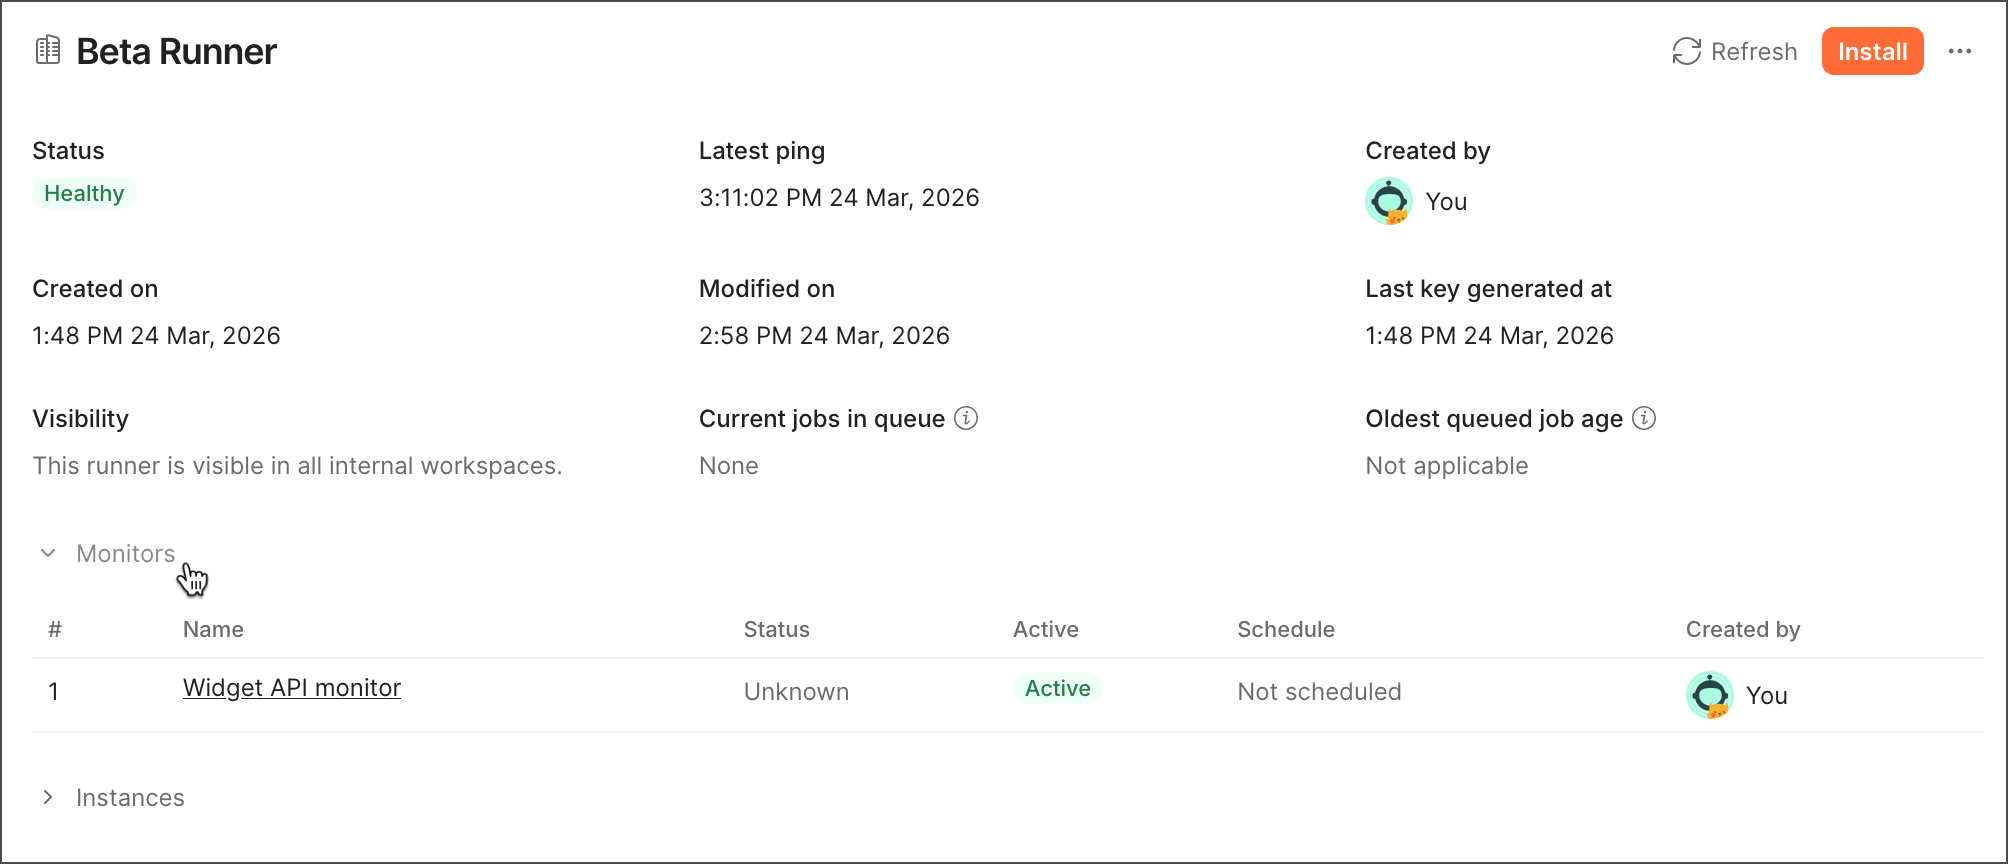
Click Monitors to view monitors configured with the runner:
- Name — The name of the monitor.
- Status — The health status of the monitor.
- Active — Shows whether the monitor is active or paused.
- Schedule — Shows how often Postman is scheduled to run the monitor. If the monitor is only configured to run when triggered by the Postman CLI, the value is Not scheduled.
- Created by — The teammate who created the monitor.
View runner instances
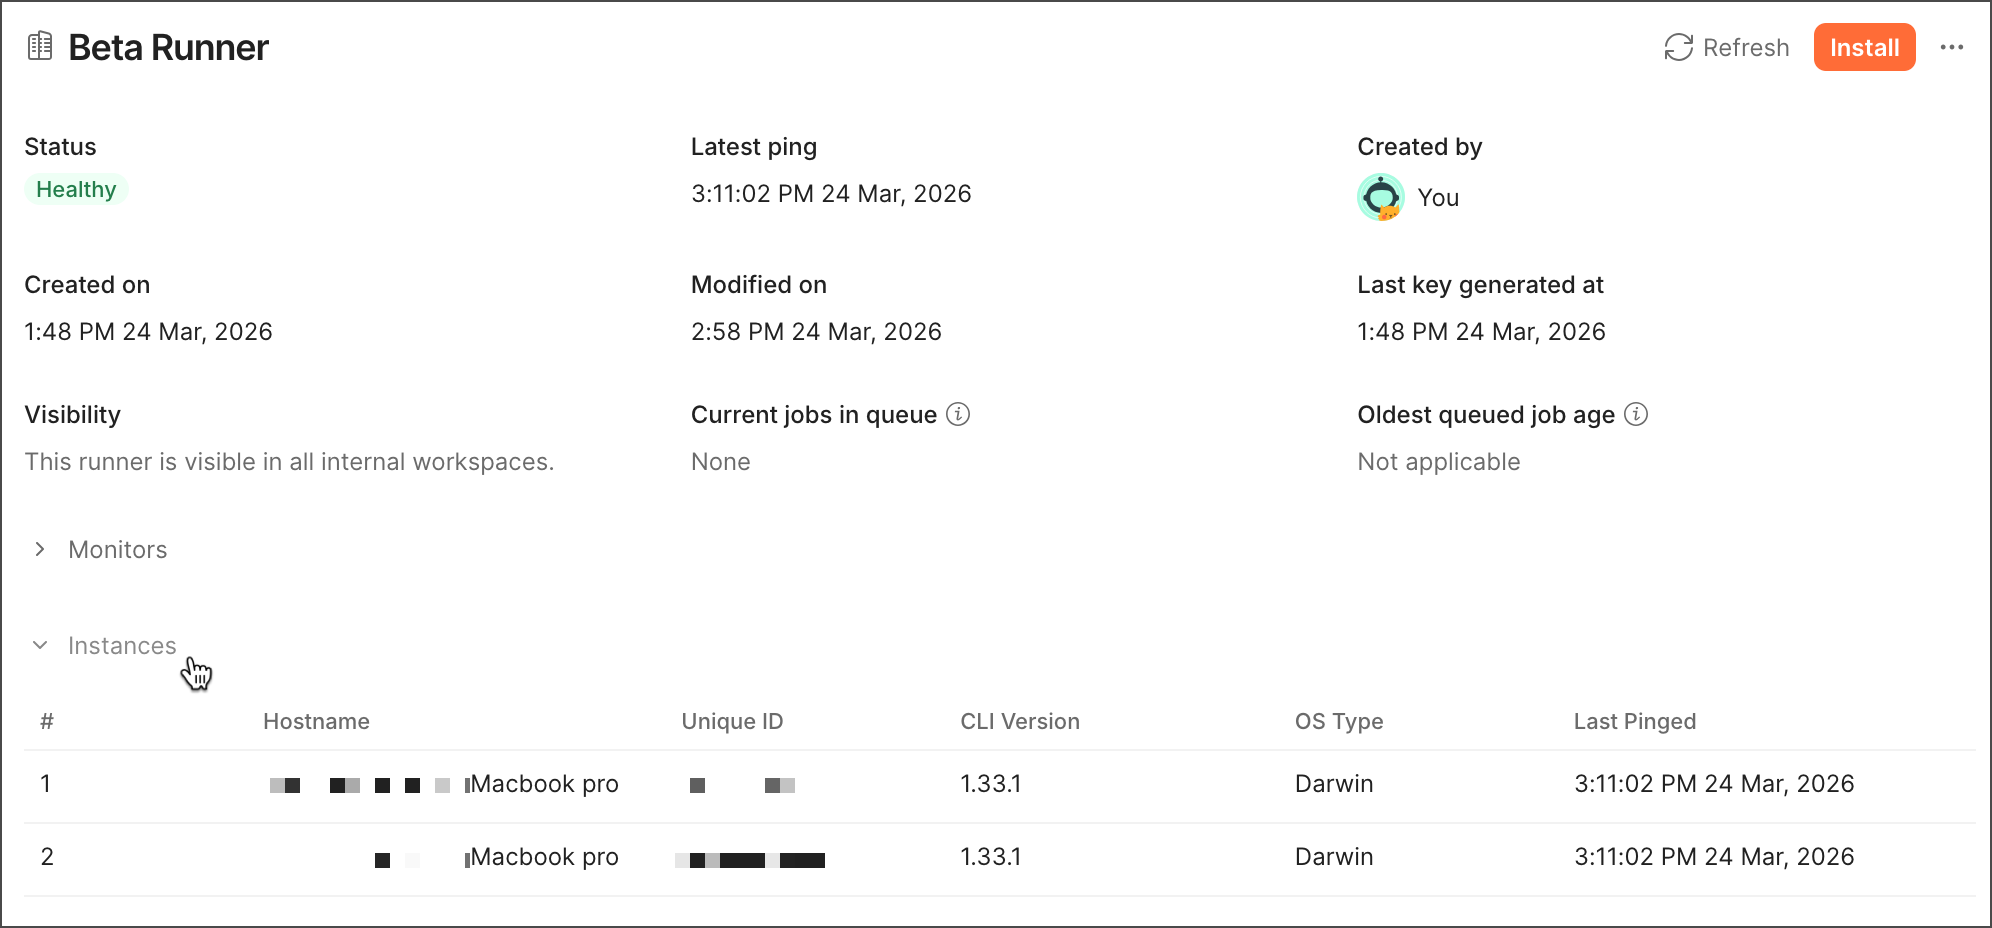
Postman identifies a runner using its ID, and a runner uses the ID and key to authenticate with Postman. Any runner started through the Postman CLI using the same ID and key is an instance of that runner. Each instance runs in the background, increasing the number of pollers available to run the monitor. Learn how to scale your runner instances.
Click Instances to view all instances of the runner polling Postman for upcoming monitor runs:
- Hostname — The hostname of the machine where the runner instance is running.
- Unique ID — The unique ID associated with the runner instance.
- CLI Version — The version of the Postman CLI used to start the runner instance.
- OS Type — The operating system of the machine where the runner instance is running.
- Last Pinged — The last date and time the runner instance sent results to the Postman cloud.
Reset a runner key
If you lose your runner key, you can reset it when you configure a monitor or from Runner settings.
To reset a runner key, do the following:
- Click
 next to a runner then select Install.
 - Click Reset Runner Key.
- Click
 Copy to clipboard to copy the
 runnercommand with the new runner key. - If the runner is running in your internal network, update the command to use the new runner key.