The Git-connected experience is available on the Postman desktop app only. If you don’t see the option to connect to a Git repository, you’re in the web app. Switch to the Postman desktop app to access this feature.
With Postman’s file system support (Native Git), API iterations are authored and iterated locally in Git, alongside code, and intentionally not synced to Postman Cloud until the API reaches a stable, deployable state.
In Postman, you can open the local instance of your remote Git repository where your API is implemented. Your work on Postman API elements - including collections, environments, API specifications, SDKs, mocks, and flows - are saved as a folder inside the source code folder. You keep your collection and project files in sync, then commit your local changes to Postman Cloud.
Local View vs. Cloud View
- Local View represents the Postman elements stored in your local Git repository. This is your editable workspace, where all API changes are made.
- Cloud View represents the Postman elements stored on Postman Cloud. It is recommended to be used as the read-only source that other teams rely on. Cloud View should mirror the state of the API that’s deployed.
In Local View, you can edit the collection file directly in your IDE or in Postman. You can also make changes to your local files using Agent Mode or the LLM in your IDE. All development changes flow through the Local View → Git → automated CI sync → Cloud View pipeline.
Native Git benefits
As a developer, you can work in a branch on a feature, like adding a new endpoint or changing the implementation, while the rest of your team works on something else. When your feature is ready, the PRs can contain code and collection changes and be version controlled together.
You can use the Postman CLI to run tests as part of the CI/CD pipeline before merging changes. Collections stored in a branch can have tests specific to the branch code.
Set up your workspace with Native Git
Follow these recommendations to ensure access to both the collection and the underlying implementation code. The Postman Agent’s capabilities, such as AI-assisted debugging and test generation, are significantly more efficient with such setup.
Repos with a single service
For repos with a single service, connect your Postman workspace to a root folder that contains both your API collections and your application code.
Example: Workspace setup for a single-service repo
single-service-repo (Root)
.git
.github
.husky
.log
.npm
.postman
.vscode
api
bootstrap
config
node_modules
postman
schemas
scripts
src
test
…
Mono-repos with multiple services
For mono-repos containing multiple services, connect each individual service folder to a separate Postman workspace rather than connecting the entire repo to a single workspace.
Example: Workspace setup for a mono-repo with multiple services
multiservice-mono-repo
.circleci
.github
cli-postman
cli_plugin
dbs
lib
postman
services
service_1 (Root1/Workspace1)
service_2 (Root2/Workspace2)
service_3 (Root3/Workspace3)
…
Sync with Postman Cloud
While you as a developer may work primarily with local Git collections, maintaining an up-to-date Cloud View is essential for collaborating with teammates (like frontend developers) who may not have or may not want to have the local repository cloned. Consider local mode to be the builder’s view, and cloud mode to be the consumer’s view.
To ensure smooth collaboration, everyone working on the project should be on the same Postman team and same Postman workspace. Personal workspaces can’t be used for Native Git workflows.
Push and pull changes in Postman
If you have existing workspaces, you can transition to the local Git setup by connecting your current workspace to a repository and pulling the cloud elements down into your local file system.
Push to Postman Cloud
You can edit your Local Items before you push them to Postman Cloud. If you’re in Cloud View, in the footer, click  Switch to Local.
Then, in the left sidebar, open the  Local Items tab and edit your Local Items. For example, edit your Collections, Environments, and Specs.
To push to Postman Cloud, do the following:
-
Open your workspace.
-
In the footer, click
 Push to Postman Cloud.
 -
Review your changes.
-
(Optional) Edit the list of items to push to Postman Cloud:
- Select the items you want to push to Postman Cloud.
- Clear the items you don’t want to push to Postman Cloud.
-
When you’re ready to push your changes, click Push to Cloud.
Postman pushes your Local Items to Postman Cloud, where they’re available to anyone in your workspace.
Pull from Postman Cloud
You can edit your Cloud Items before you pull them from Postman Cloud. If you’re in Local View, in the footer, click your branch name. Then, click  Postman Cloud.
Then, in the left sidebar, open the Items in Cloud tab, and edit your Cloud Items. For example, edit your Collections, Environments, and Specs.
To pull from Postman Cloud, do the following:
-
Open your workspace.
-
In the footer, click
 Pull from Postman Cloud.
 -
(Optional) Choose another workspace.
-
Edit the list of items to pull from Postman Cloud:
- Select the items you want to pull from Postman Cloud.
- Clear the items you don’t want to pull from Postman Cloud.
-
When you’re ready to pull your changes, click Pull from Cloud.
Postman pulls your Cloud Items from Postman Cloud, where they’re available to you locally.
Push and pull changes in your CI/CD pipeline
To avoid manual errors and outdated cloud collections, automate the synchronization process using the Postman CLI push command within a CI/CD pipeline, triggered by events like merging a pull request.
Integrate your service with Postman’s Native Git
To integrate your service with Postman’s Native Git, ensure you have write access to the collection and its associated environments. Then you can do the following:
- Select the service you want to integrate.
- Identify the blueprint collection for this service and verify write access.
- Ensure the corresponding environments are pinned.
- Verify the secrets aren’t shared with the cloud.
- Create a new workspace for this service and add a workspace tag.
- Move the blueprint collection and its pinned environments to the new workspace.
- Check out a new branch from
develop. - Connect the new project workspace to the repo. Validate this step by ensuring
.postman/resources.yamlappears in your root directory. This file maps your local files to specific Postman Cloud entities. - Pull the collection and environments into your file system. This step brings the your collection’s available cloud elements to your local Git repo.
Connect your Git project to your workspace
To connect your Git project to your workspace, do the following:
-
Open your project workspace.
-
From the Postman sidebar, click
 Files.
 -
Click Open Folder.
-
Open the Git project you want to connect to your workspace.
-
Click Connect. Postman connects your local Git project to your workspace. Now you have the option to see the branch in Local View or access Cloud View in the bottom left.
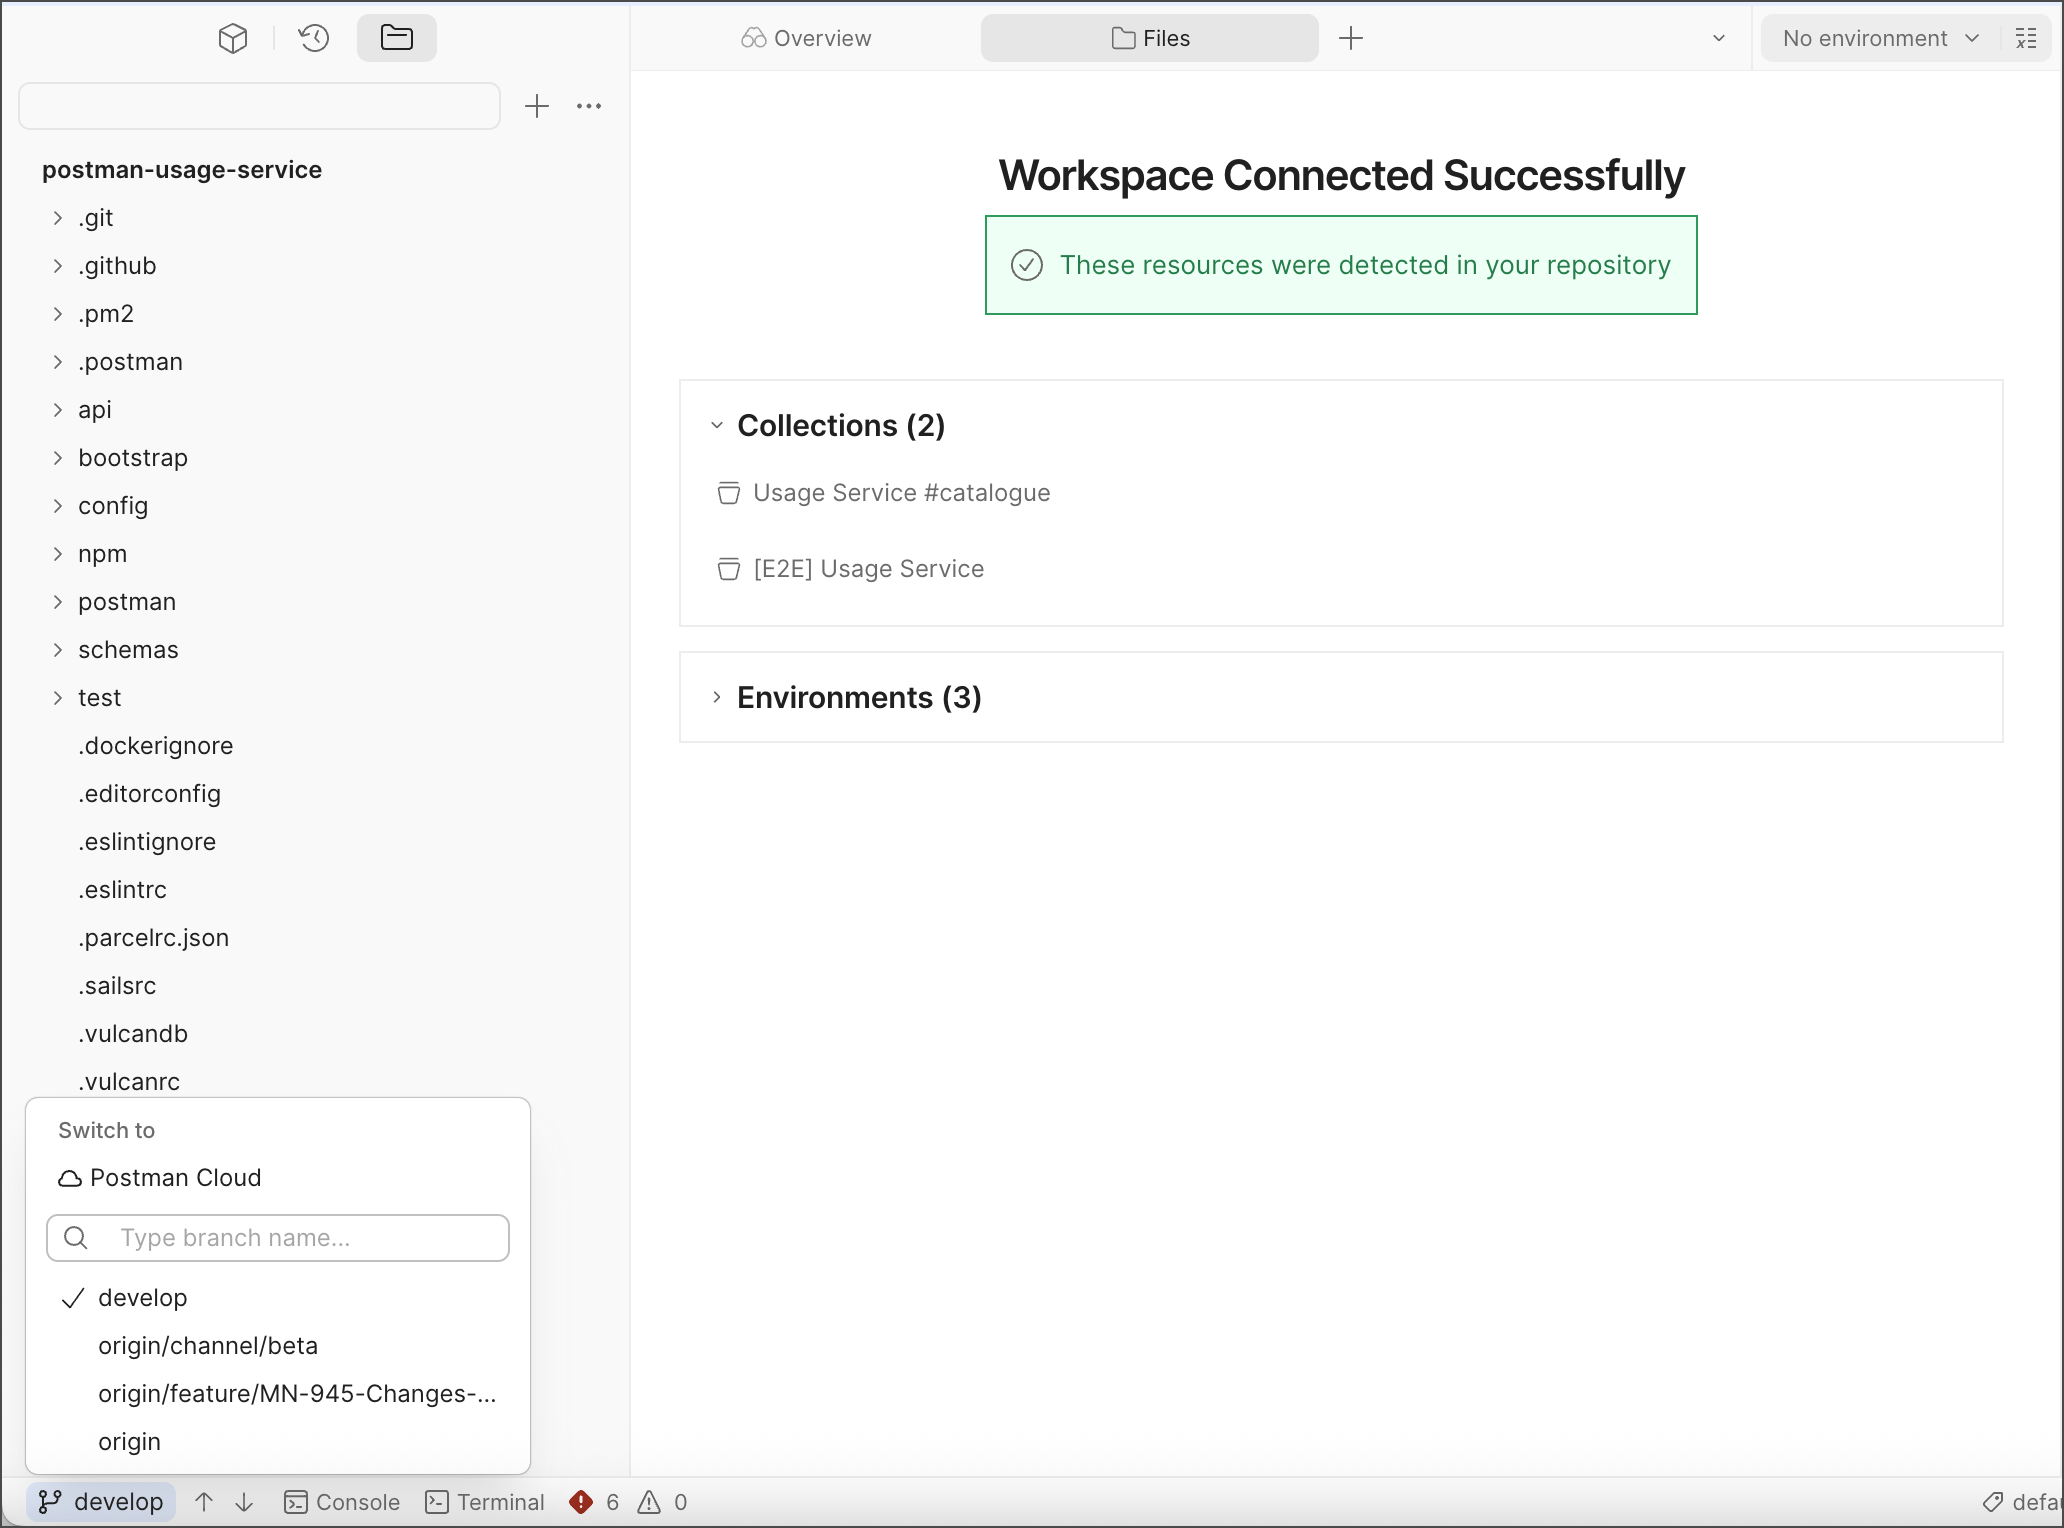
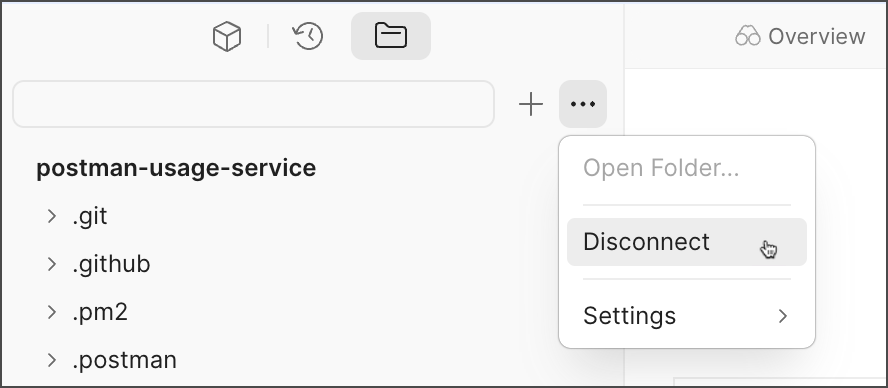
You can only connect one folder in your filesystem to a workspace at a time. To open your files in a different workspace, you must disconnect from the workspace your file are connected to. Select File viewer options > Disconnect.
When you connect to a workspace, Postman automatically adds two directories: .postman (hidden) and postman. The visible postman directory includes subfolders for your collections and environments.
You can sync and push local elements to workspaces in the cloud with the Postman CLI. To learn more, see Sync local elements with workspaces.
View your project workspaces in Postman
Your Git-connected project workspaces appear in the workspaces dashboard.
To view all project workspaces in the workspaces dashboard, do the following:
- Click Workspaces in the Postman header, and then click View all workspaces.
- Select the Project Workspaces tab.
Add a GitHub workflow to publish to Postman Cloud
-
Set up your CI/CD Secret. To generate an API Key, create a Postman API key from your Postman account settings. Add this key as a protected secret (for example,
POSTMAN_API_KEY) in your repository’s settings (for example, GitHub Secrets, GitLab Variables, and so on). -
Add the synchronization step to your pipeline. The primary command recommended for this workflow is
postman workspace push. This command validates and synchronizes your local files with the cloud workspace.
Example: GitHub Actions workflow
Create or update your .github/workflows/postman-publish.yml file with the following steps:
Recommended best practices
-
Use the
--yesflag: In a CI/CD environment, use the-yor--yesoption to skip manual confirmation prompts. -
Mono-repo Support: If you follow the team’s recommendation for mono-repos, use the
--collections-dirand--environments-dirflags to specify paths for each service. -
Validation: The push command automatically performs a “prepare” step to validate your files before syncing. You can skip this with
--no-prepareif needed, though it’s not recommended for production pipelines.
Merge and validate your integration
To complete your setup, do the following:
- Commit the Postman files + GitHub workflow and push your branch.
- Create a PR to
developand merge it. - Trigger a release to
main.
Develop with Native Git
-
Open the service-specific project workspace. This workspace contains your blueprint collection and its pinned environments, and is already connected to your Git repo.
-
Switch Postman to Local View. This ensures you are editing the local YAML files generated by the Git-backed connection.
-
(One-time per machine) Set the repo directory. Point Postman to the root of your service’s Git repository. This enables the app to read/write the collection dumps under
postman/. -
Create a new feature branch. From your terminal or Git client:
The branch switch is automatically reflected inside the Postman App.
-
Make API changes in the Postman App. Edit the blueprint collection or its pinned environments from Local View only.
Examples:
-
Adding new endpoints
-
Updating request structures
-
Updating test scripts
-
Editing
STAGE/BETAenvironment variables
All edits are saved directly into the Postman Collection V3 YAML files under
postman/.Any changes made directly in Cloud View will get deleted upon subsequent invocation ofpostman workspace pushdue to absence of corresponding changes in local files. -
-
Commit and push the YAML diff. Your changes will appear as modified .yaml files. Commit the changes and push the feature branch:
-
Raise a PR and merge to
main. Review and merge the changes like any other code change.Cloud View is still not updated at this stage. -
Understand what’s not synced yet. After the merge, the project workspace still shows previous data in Cloud View, and the catalog workspace forks (used by PAN) also show previous data. This is expected because updates only propagate to Cloud after a release.
-
Create a new release. Follow your usual service release process. Creating a release merges the branch to
main, triggers a push tomain, and kicks off the Postman sync GitHub Action. -
Validate release creation in your usual communication channels.
-
Verify the GitHub Action run. Open your repository’s Actions tab and look for “Publish Changes to Postman Cloud”. Ensure it completed successfully.
-
Confirm Cloud sync. Your blueprint collection and environments should now show updated content. Forked copies should reflect the same updates.