Customize Postman settings
Postman automatically chooses default values for some settings so you can get right to work. Make changes to settings at any time based on your use case or to customize your Postman experience.
To change settings in Postman, click Settings in the header and then click Settings. In the Postman desktop app, you can also click ⌘+Comma (,) or Ctrl+Comma (,).
General
Use the settings on the General tab to configure how Postman sends requests or to customize the Postman user interface.

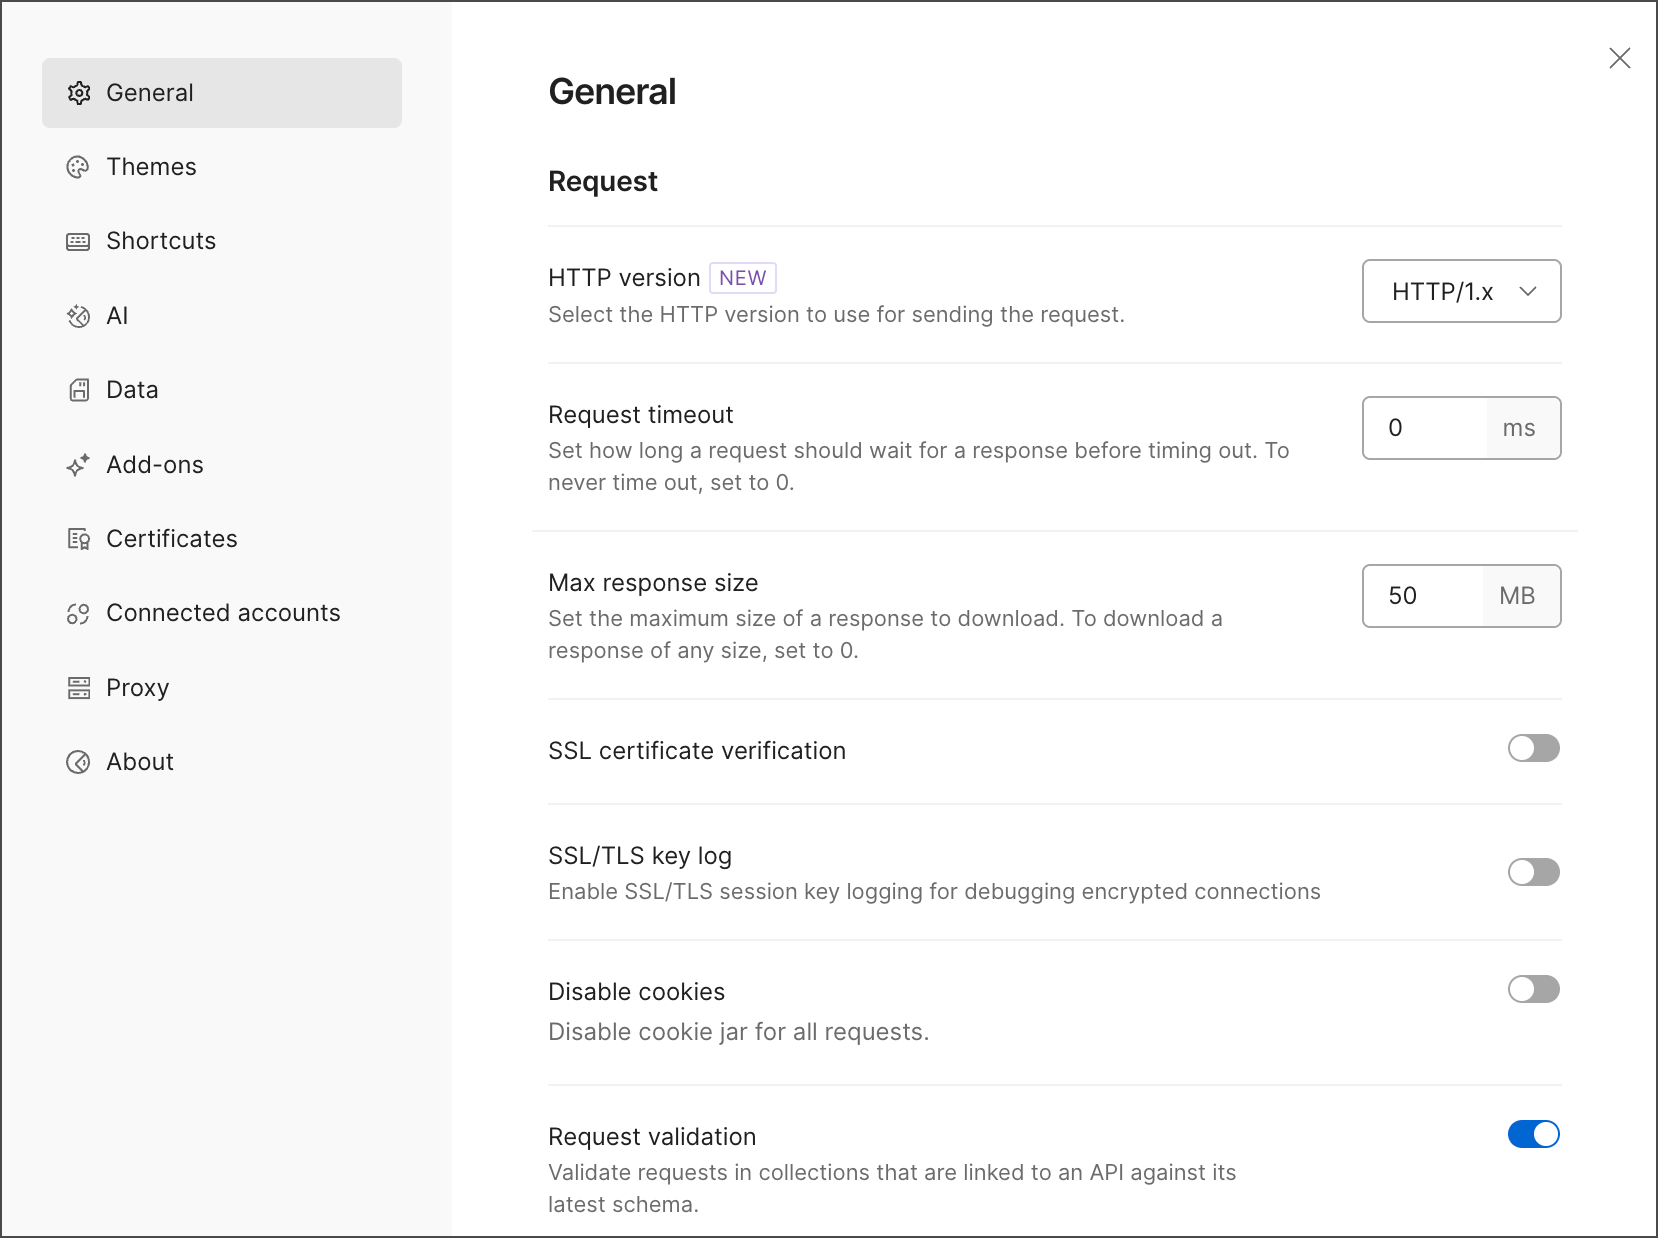
Request
- HTTP Version - Select the HTTP version to use when you send requests. This enables you to test and debug requests by HTTP version. You can also specify the HTTP version for an individual request. Learn more about specifying an HTTP version.
- Request Timeout - Enter how long (in milliseconds) Postman will wait for a response before timing out. If you enter 0, Postman will wait for a response forever.
- Max response size - Enter the largest response size (in megabytes) that Postman will download. For responses that exceed this limit, Postman asks if you want to increase the size limit or download the response. If you enter 0, Postman downloads responses of any size. Rendering large responses may affect Postman’s performance.
- SSL certificate verification - Turn this off to prevent Postman from checking the validity of SSL certificates when making requests.
- SSL/TLS key log - Turn this on to enable SSL/TLS session key logging for debugging encrypted connections. You can export a SSLKEYLOGFILE and use it to decrypt secure traffic locally for inspection with tools like Wireshark.
- Disable cookies - Turn this off to stop using the Postman cookie jar.
- Request validation - When this is turned on, Postman automatically validates requests in collections linked to an API. Postman compares requests to the API definition and alerts you to any inconsistencies. Learn more about validating requests and responses.
- Response format detection - By default, Postman automatically detects the correct media type for the response body based on the
Content-Typeheader. Select JSON to always use JSON rendering for the response body.
Working directory
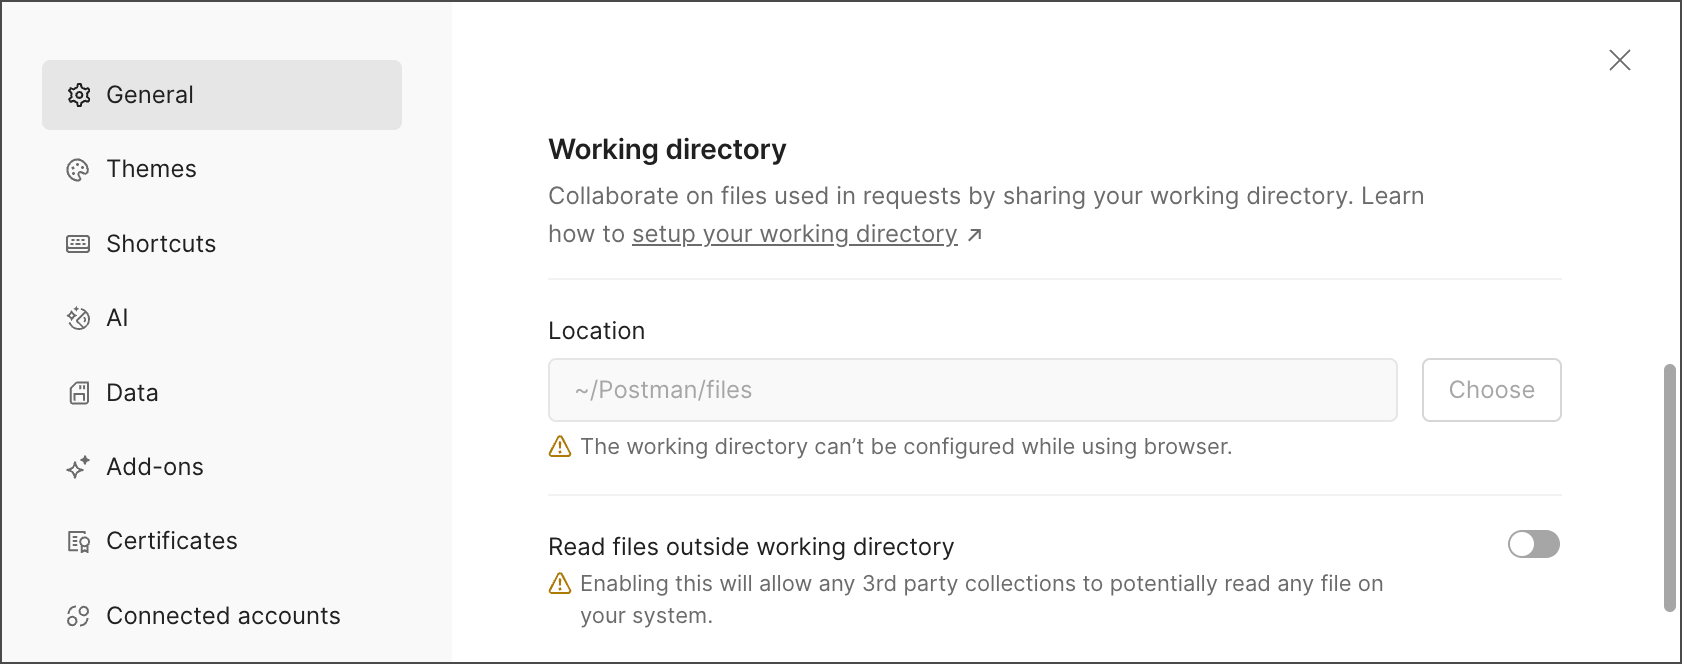
When you send a form-data or binary file with a request body, Postman saves a path to the test file as part of the collection. The file path is relative to your working directory. On macOS and Linux, you can find the default working directory at ~/Postman/files. On Windows, you can find the default working directory at %userprofile%\Postman\files (File Explorer and Command Prompt) or ~/Postman/files (PowerShell). To use a different working directory, click Choose and then select the directory you want to use.
Storing files in your working directory ensures that requests in shared collections always work. As long as you and your teammates use the same files and working directory location, shared requests will run across everyone’s systems. Learn more about sending body data.

To make collaboration easier, upload test data files to your Postman team. You can used files uploaded to your team as form data or binary data when sending a request. If you share the request in a workspace, other team members can send the shared request without needing to copy the files to their local working directory. Learn more about uploading files for shared requests.
You can’t change the working directory in the Postman web app. When you send a file with a request, the Postman web app creates a new folder with a random name in the ~/Postman/files directory. Postman stores a copy of the file in the new folder so you can use it when sending requests. To automatically sync files from the Postman web app with your local working directory, make sure you are using the Postman Desktop Agent.
If you choose a different working directory than ~/Postman/files for the Postman desktop app, you will still be able to work between the Postman desktop app and the Postman web app by taking the following steps:
- To access a file from the Postman desktop app using the web app, copy it from the desktop app’s working directory into
~/Postman/filesso the web app has access to it. - To access a file from the Postman web app using the desktop app, find the file in
~/Postman/files. When you add a file to a request using the web app, it creates a folder with a random name in~/Postman/files. Copy this folder into your desktop app’s working directory so the desktop app has access to it. - If you’re sharing a request with others, each team member must have the files present in the correct working directory. If one team member adds a file to a request using the Postman web app, they need to share the folder and file that’s created with everyone who wants to use the request, and this folder must be copied to each team member’s working directory.
- Instead of copying files to your local system, you can upload test data files to your Postman team to make collaboration easier. All team members can use the uploaded files to send requests without needing to place the files in their working directory. Learn more about uploading files for shared requests.
The working directory is also used by Newman. Store files you want to use with Newman in the working directory path saved in the collection. Learn more about file uploads in Newman.
Use caution with files located outside your working directory. To use files located outside your working directory when sending requests, turn on Read files outside working directory. This option gives third-party collections the ability to read any file on your system. Use caution, and make sure you trust all third-party collections you are using before enabling this option.
Headers
- Send no-cache header - (Recommended) Turn this on to send a
Cache-Control: no-cacheheader with each request. Theno-cachedirective forces the server to revalidate each request and ensures you get an up-to-date (not stale) response. - Send Postman Token header - (Recommended) Turn this on to send a random Postman token with an XMLHttpRequest. Sending a random token ensures the receiving server handles one request at a time, even when the requests send with the same parameters. The token can also aid debugging and help you distinguish between requests on the server side.
- Retain headers when clicking on links - When you click a link in a response, Postman creates a new
GETrequest with the link URL. Turn this on to keep the headers from the earlier request in the new request. Retaining headers is useful if you mainly access protected resources. - Automatically follow redirects - Turn this off to prevent requests that return a 3xx series response from automatically redirecting.
User interface
- Remove tabs - (Postman web app) Use tabs in your browser to navigate Postman instead of in-app tabs. For more information, see Browser tabs in the Postman web app.
- Always open sidebar item in new tab - By default, when you click a sidebar item, Postman opens it in the preview tab. Turn this on to always open sidebar items in a new tab.
- Always ask when closing unsaved tabs - By default, Postman asks if you want to save any unsaved changes when closing a tab. Turn this off to always discard unsaved changes when closing a tab.
- Show icons with tab names - Turn this off to hide the icons that appear next to tab names.
- Two-pane view - By default, Postman displays responses below requests. Turn this on to display the response and request panes side by side.
- Variable autocomplete - Turn this on to enable autocomplete when typing variable names.
- Default documentation editor - Select the default editor you want to use for editing documentation descriptions in Postman (Postman editor or Markdown editor).
Editor settings
Editor settings affect code-related text such as request and response bodies, pre-request scripts, and tests. To revert to default text settings, click Reset.
- Font family - Enter one or more font family names separated by commas. Postman uses the first available font family to display code text.
- Font size - Enter the font size in pixels to use for code text.
- Indentation count - Enter the number of indentation characters to use for each code level.
- Indentation type - Select the indentation character type to use (Space or Tab).
- Auto close brackets - Turn this on to automatically add a closing bracket when you enter an opening bracket.
- Auto close quotes - Turn this on to automatically add a closing quotation mark when you enter an opening quotation mark.
Application
-
Open in desktop app - Automatically open workspace-related links in the Postman desktop app. If not turned on, links open in the browser.
-
Language - Select your preferred language for the Postman app and email notifications.
-
Autosave - Turn this on to automatically save your changes to requests. Turn this off to manually save your changes.
Autosave is in beta with Postman Free, Basic, and Professional plans.
If autosave is turned on, and you create a request by clicking or by clicking New in the workbench, you must manually save the request to a collection before your changes are autosaved.
- Send anonymous usage data to Postman - Postman gathers basic, anonymous usage data to help with product improvement. Turn this off to stop sending anonymous usage data to Postman.
Themes
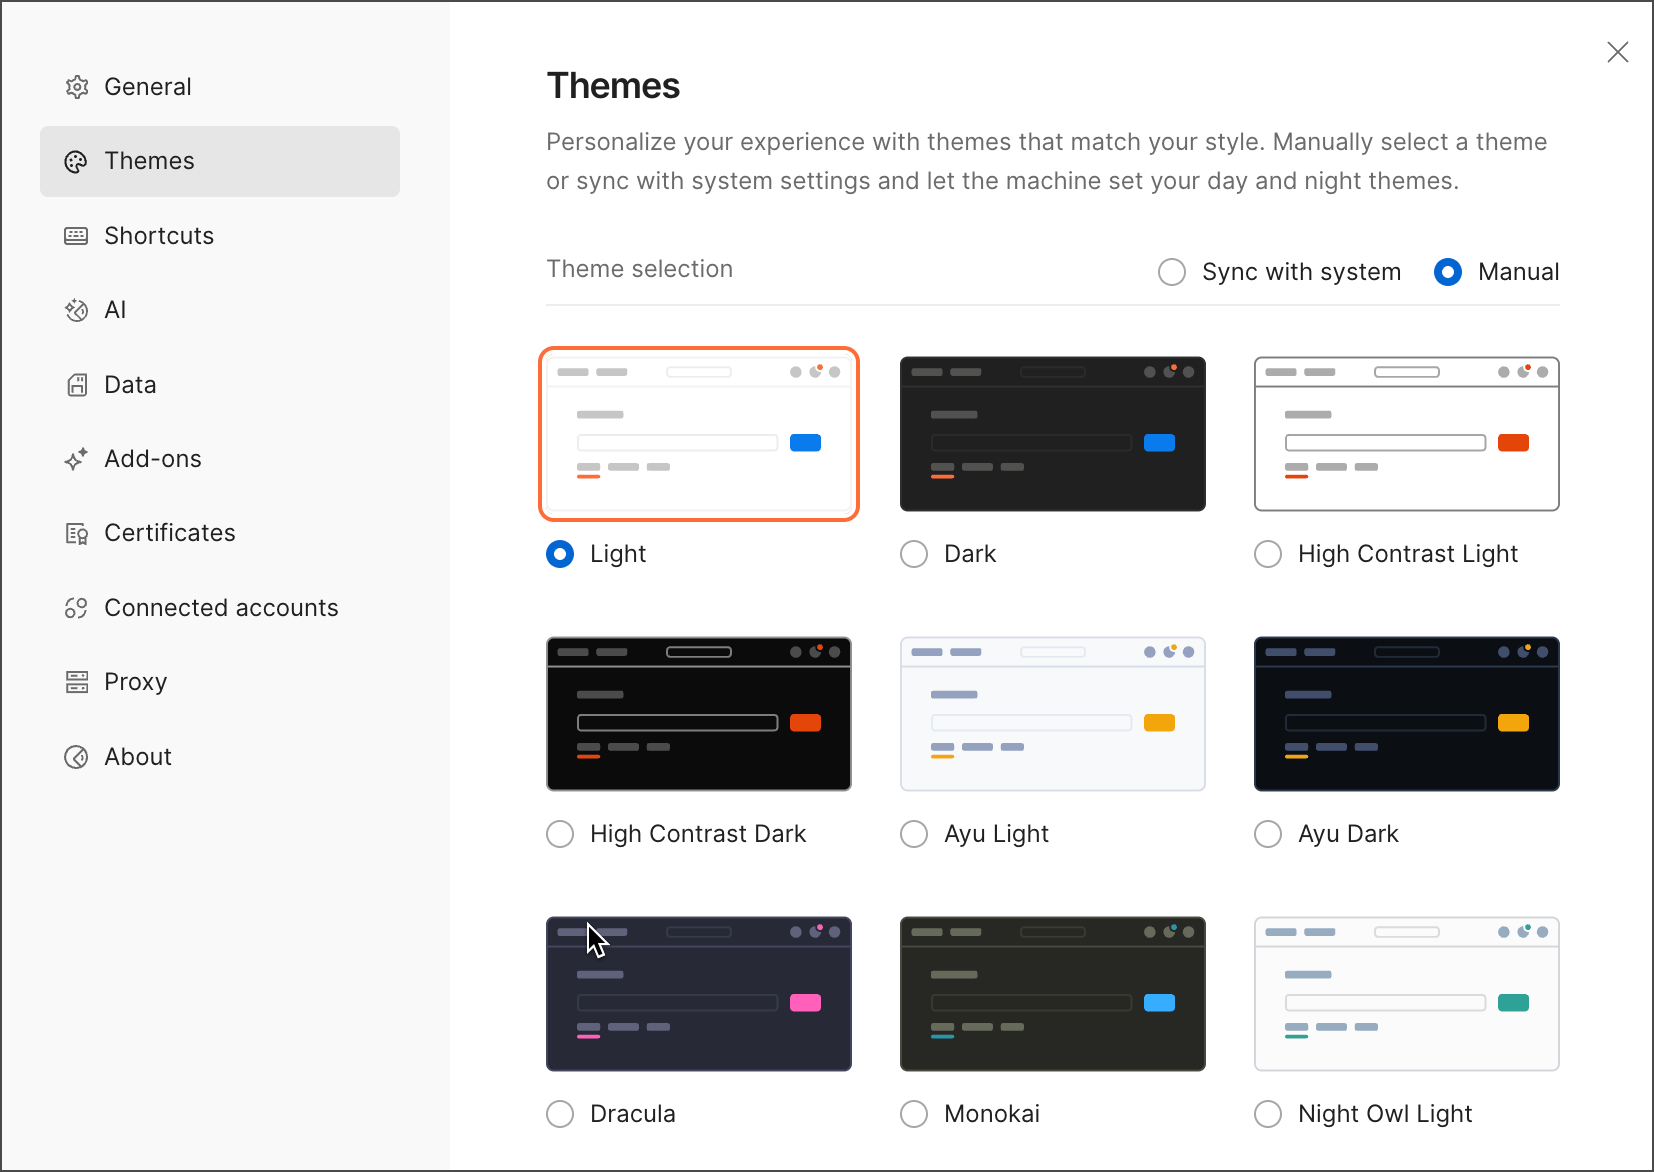
Postman enables you to adapt Postman to your visual preferences in two ways. You can set the theme manually or sync it with the operating system’s appearance settings. Themes auto-sync by default.
Note
If the Workspace Admin customizes the workspace theme colors, this will override the colors in the application theme you set. Your application theme colors are restored when you leave the workspace.
To apply a theme across the Postman app, click Settings in the header and then click Settings. Click Themes.
You can select a single theme to be applied in light or dark mode at all times.

You can also switch the themes based on your system settings, and have a different theme for day and night, respectively.
Note
Not all themes have a light/dark counterpart.
Shortcuts
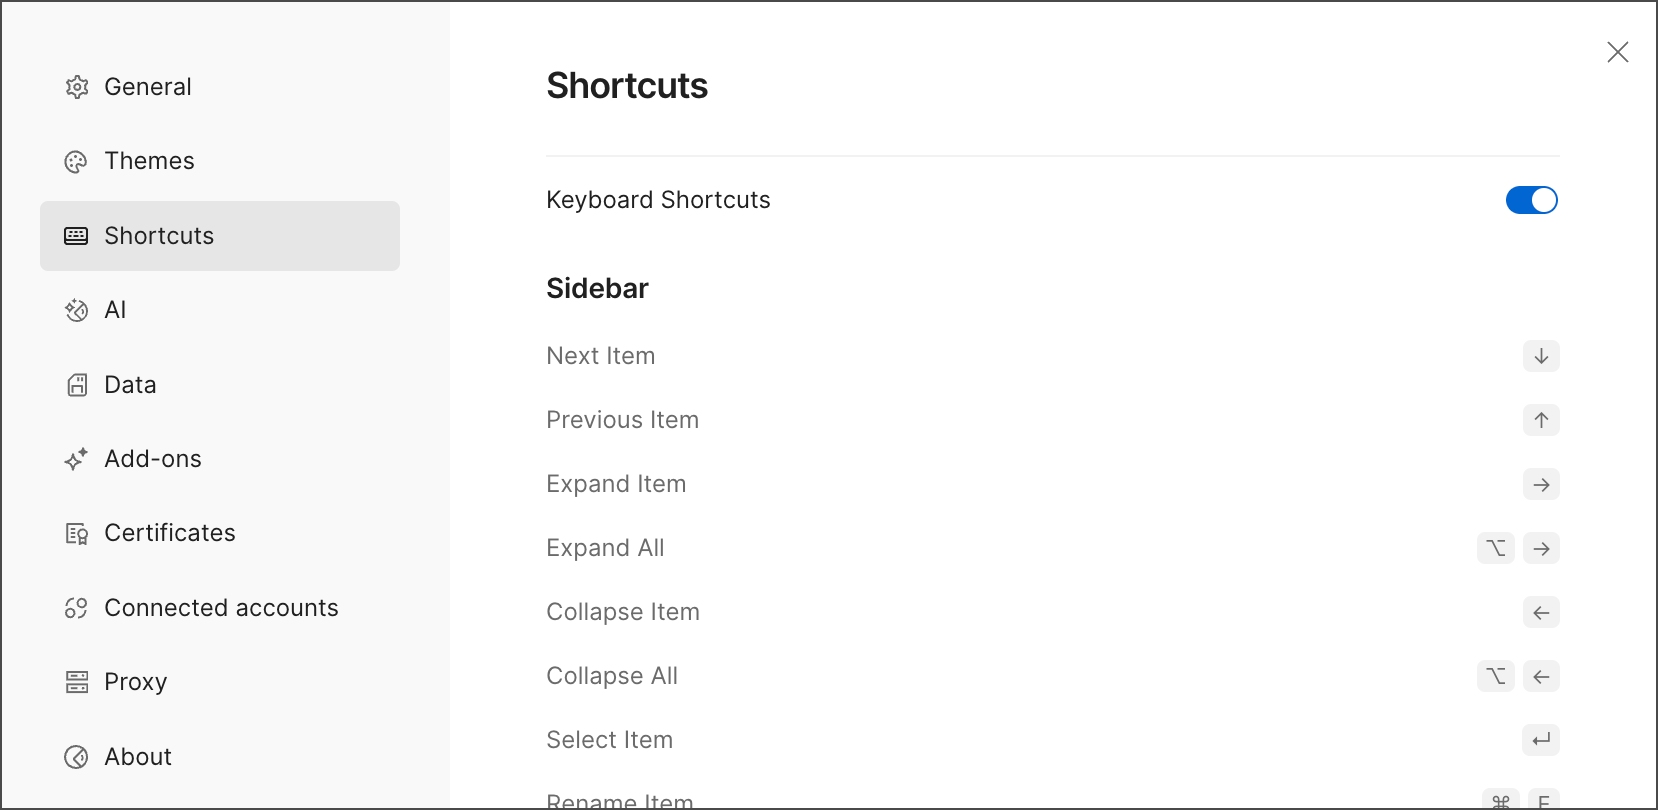
The Shortcuts tab displays all the keyboard shortcuts available in Postman. You can use the default shortcuts, or customize them if you’re using the Postman desktop app.
To customize a shortcut, click it and then enter your preferred shortcut. Custom shortcuts must meet the following requirements:
- Shortcuts can’t overlap with system shortcuts.
- Shortcuts can’t overlap with existing Postman shortcuts.
- (macOS) Shortcuts must include the Control (⌃), Option (⌥), Shift (⇧), or Command (⌘) key.
- (Windows) Shortcuts must include the Ctrl, Alt, or Shift key.
You can revert to the default shortcuts by clicking Restore Defaults. To turn off keyboard shortcuts entirely, turn off the Keyboard shortcuts toggle.

Some shortcuts aren’t available in the Postman web app. Also, shortcut modifier keys in Postman may differ depending on your operating system. For example, to open a new tab click ⌘+T on macOS or Ctrl+T on Windows or Linux.
AI
You can control AI-powered features in the AI tab. Toggle on AI to use AI in Postman. To use AI, you need to agree to Postman AI terms.
Agent Mode
Agent Mode turns your words into action across the API lifecycle, enabling you to use natural language to send requests, fix errors, update tests, and more. To open Agent Mode on startup, toggle on Open on startup.
If you purchased Postbot on a Free, Basic, or Professional plans before December 1, it’ll continue to work for you. Otherwise, it’s available as an add-on in Enterprise plans. To turn it on or off, toggle Keep using legacy chat.
Code editing assistance
You can configure AI assistance when editing scripts, JSON payloads, or example responses in Postman.
-
To show autocomplete suggestions while working with scripts, toggle on Code Autocomplete.
-
To display an AI icon when selecting parts of scripts or payloads, toggle on Inline Selection Icon.
Data
Use the Data tab to import data. To begin the import process, click Import Data File and select a Postman data dump file in ZIP format.
Importing a dump file may overwrite your existing collections and environments, so use caution. Always make a backup before importing files. Learn more about importing and exporting data.
Add-ons
Download add-ons to enhance your Postman experience:
-
Postman CLI - Run collections, automate tests, and integrate with CI/CD workflows from your command line. Click Download from npm to go to the npm website and install the Postman CLI. To learn more about the Postman CLI, see Explore Postman’s command-line companion.
-
Postman VS Code Extension - Send requests, test APIs, and manage collections, all from within your code editor. The Postman VS Code Extension is also available for Cursor, Windsurf, and other compatible editors. Click Install on VS Code to learn more.
-
Postman Interceptor - Capture and sync cookies and requests directly from your browser to Postman. Use Postman Interceptor to test authenticated APIs and debug browser-based workflows seamlessly. Click Install on Chrome to go to the Google Chrome Web Store and install Postman Interceptor. To learn more, see Capture traffic from a web browser using Postman Interceptor.
Certificates
Use the Certificates tab to add and manage CA certificates and client certificates in Postman. Learn more about managing certificates.
Connected accounts
You can use the Connected accounts tab to manage the accounts and tokens used to authorize Postman with third-party services. For example, when you connect an API in the Postman API Builder to a Git repository, Postman stores your authorization details. You can then use the connected account to add other integrations to the same service.
You can manage your saved accounts and tokens on the Connected accounts tab:
- To view a saved token, click
.
- To edit a saved token, click
. For example, if a token expired, you can edit it and enter a new valid token.
- To remove a saved account or token, click
Delete authentication. Any integrations that use the account or token will stop working until you reauthorize them.

If you don’t have any connected accounts, this tab doesn’t appear in the Postman settings.
Proxy
Use the Proxy tab to configure proxy settings for connecting to online services and sending API requests. Learn more about configuring a proxy.
Feature previews
Use the Feature previews tab to preview early iterations of features and turn them on and off at the user level. Be aware that these features are designed for early adopters and may not always work as expected.
App updates
Use the Update tab to check for updates to the Postman desktop app or to enable automatic updating. Learn more about updating Postman.
About
The About tab displays the current version of Postman, along with links to helpful information and support.