You can add and manage certificates in Postman to enable authentication when sending requests. Certificates added to Postman are stored locally and aren’t synced to the Postman cloud.
To connect to an API that uses Mutual TLS (mTLS), you need to add a client certificate to Postman. Mutual TLS is an authentication method that requires both the client and the server to confirm their identity with a certificate. Once the identity of both parties is confirmed, an encrypted connection is established.
You can also add a custom CA certificate to Postman. If an endpoint uses a certificate that’s registered with an internal certificate registry, requests sent from Postman will fail with the “SSL Error: Self signed certificate” error message. Adding a custom CA certificate will enable you to send requests to the endpoint without needing to turn off SSL verification.
If you’re using the Postman web app to add and manage certificates, you must use the Postman Desktop Agent. Postman recommends you use the latest version of the Postman Desktop Agent to receive recent changes and improvements.
Manage certificates
In the Postman settings, you can view installed certificates, add a new certificate, or remove a certificate.
To access settings for certificates, do the following:
-
In the header, select
 Settings > App settings.
 -
Select the Certificates tab.

You can also use the Postman VS Code extension to manage CA and client certificates.
Add a CA certificate
To avoid “Self signed certificate” errors when sending requests, add your custom CA certificate to Postman.
-
Turn on the CA certificates toggle.
-
Select the PEM file for your CA certificate. (The PEM file can contain multiple CA certificates.)
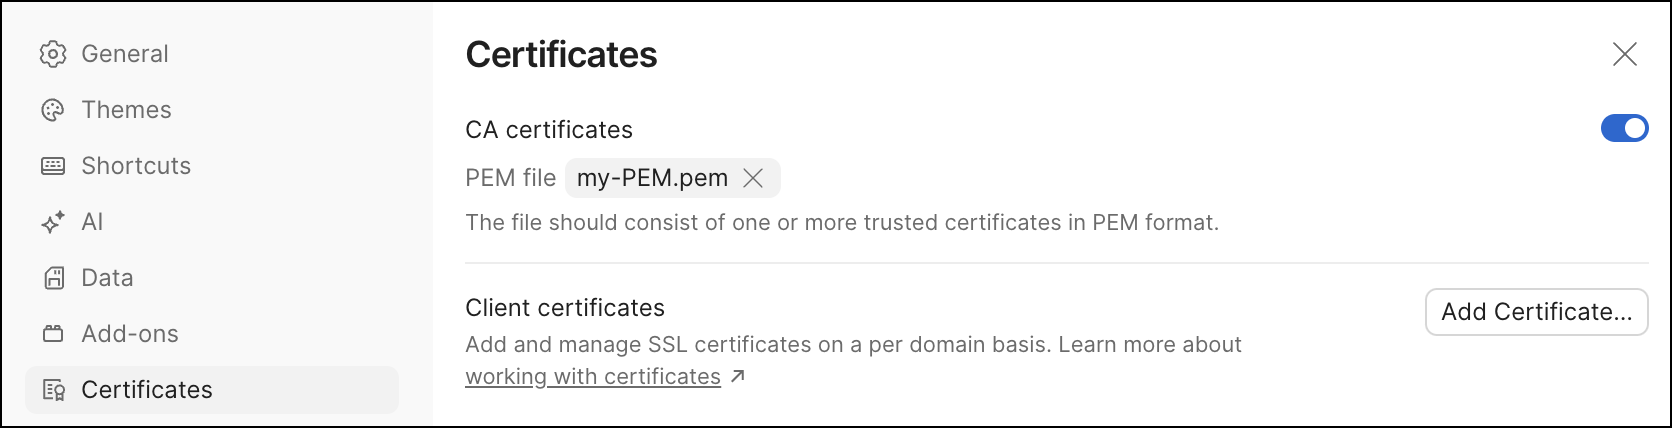
Add a client certificate
To send requests to an API that uses mutual TLS authentication, add your client certificate to Postman.
-
Select Add Certificate.
-
Enter the Host domain for the certificate (don’t include the protocol). For example, enter “postman-echo.com” to send requests to the Postman Echo API.
The Host field supports pattern matching. If you enter “*.example.com”, the same client certificate will be used for all example.com subdomains.
-
(Optional) Enter a custom port number to associate with the domain. If you don’t specify a port, Postman uses the default HTTPS port (443).
-
Select the CRT file and the Key file for your certificate, or select the PFX file for your certificate.
-
If you used a Passphrase when generating the client certificate, enter it in the box. Otherwise, leave the box blank.
-
Select Add.
Each client certificate is specific to a domain. To send requests to more domains, add the appropriate certificate for each domain. Don’t add more than one certificate for the same domain. If you add more than one certificate for a domain, Postman will use the last certificate added.
Edit a certificate
You can’t edit a certificate after adding it. To make changes, first remove the certificate, then generate a new certificate and add it to Postman.
Let’s Encrypt SSL certificates have a lifetime of 90 days. Let’s Encrypt recommends using an ACME client to automatically renew your certificate every 60 days.
Remove a certificate
Remove a certificate if you no longer need it to send requests from Postman.
- To remove a CA certificate, click
 Remove next to the certificate.
 - To remove a client certificate, click
 Delete next to the certificate.
Use a certificate
After adding a client certificate, you don’t have to perform any extra steps to use the certificate in Postman. When you make an HTTPS request to a specified domain, Postman automatically sends the client certificate with the request. The certificate is sent using OpenSSL handling, and Postman doesn’t change the certificate.
Postman won’t send the certificate if you make an HTTP request.
Confirm a certificate was sent
You can confirm that a certificate was sent using the Postman Console. Open the Postman Console by selecting Console in the Postman footer, then send a request.
You can expand the request to view details about the certificate that was sent with the request.
View certificate details
You can view more certificate details in the response pane. The ![]() Network icon includes a padlock if a request was sent using HTTPS. Hover over
Network icon includes a padlock if a request was sent using HTTPS. Hover over ![]() Network to view information about the certificate that was sent with the request, and any warnings or errors for self-signed or expired certificates.
Network to view information about the certificate that was sent with the request, and any warnings or errors for self-signed or expired certificates.
Troubleshoot certificate errors
If certificate verification fails when sending a request, Postman displays an error message in the response pane. To fix the error, turn off SSL verification for the request.
To turn off SSL verification for the request, do the following:
- Open the request and click the Settings tab.
- Set the Enable SSL certificate verification toggle to OFF.
- Send the request again.
You can turn off SSL verification globally in Postman settings on the General tab.
If SSL verification is turned off, you can hover over ![]() Network in the response pane to get details about any certificate errors or warnings.
Network in the response pane to get details about any certificate errors or warnings.
You can also find more information about certificate errors in the Postman Console.