Manage Postman workspaces
Whether you’re a team or admin user of Postman workspaces, you have many options to establish and enhance collaboration in your workspaces. Learn more about managing the workspace roles, editing and sharing workspaces, responding to requests to create workspaces, and moving elements and whole workspaces.
To learn how to make a new workspace, go to Create a workspace in Postman. For more information about workspace usage, see Use Postman workspaces. For guidance on using workspace types to enable collaboration, see Postman Best Practices for types of workspaces.
If you’re on a Postman Enterprise plan, see Create an Organization in Postman for slight differences in the user experience of creating workspaces in organizations.
Edit workspace details
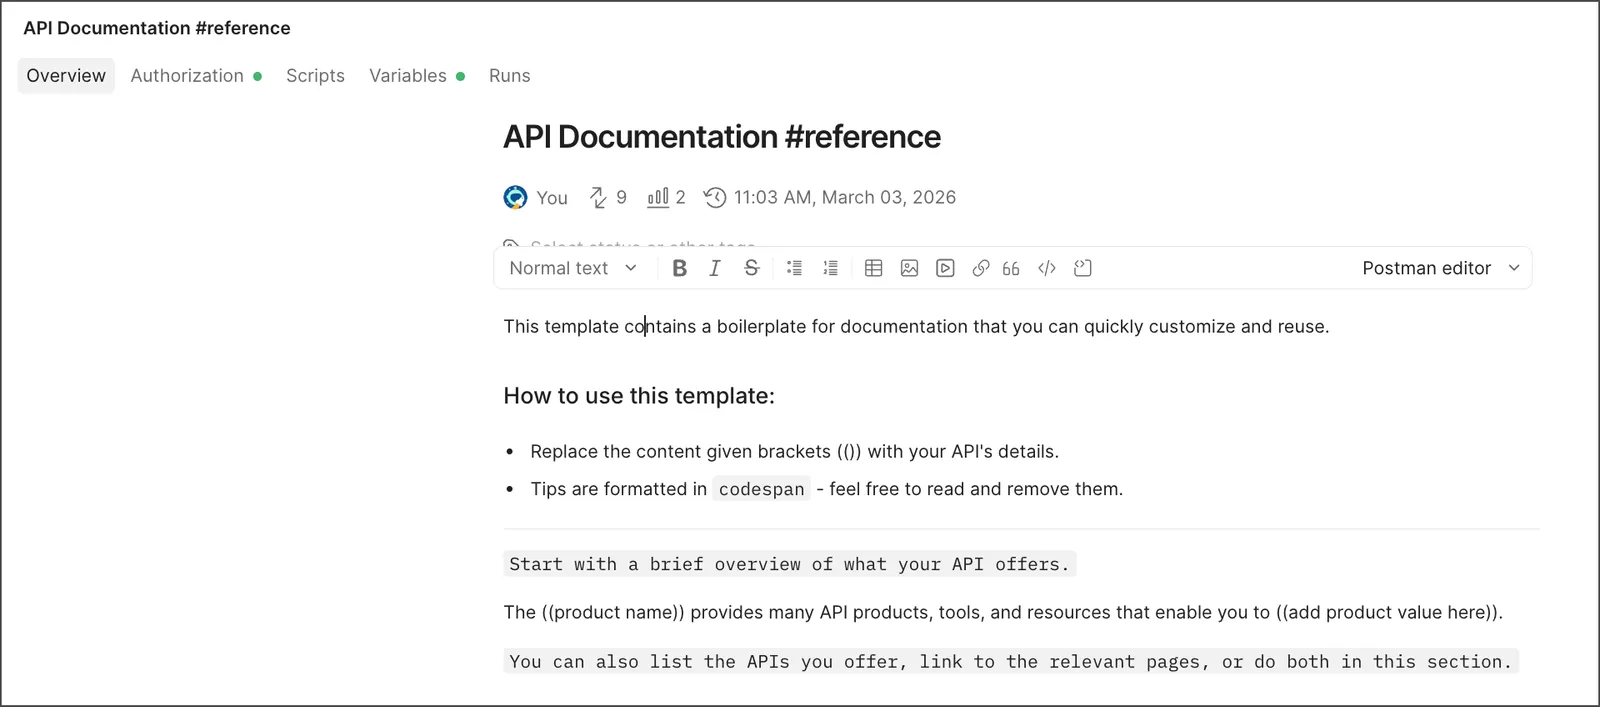
A summary and description help others understand what your workspace is for. You must be a workspace Admin to edit workspace details. Changes are automatically saved.
- On the workspace’s Overview tab, click Docs.
- Select the workspace name and enter a new name.
- Select the summary and description to describe your workspace in Markdown, or use Write with AI to automatically generate content.
- Add tags (available on Postman Solo, Team, and Enterprise plans) to make your workspace more distinct.
Change workspace visibility
The visibility setting for a workspace determines who can access it. You must be a workspace Admin to change the visibility for a workspace.
-
Click Workspaces in the Postman header, and then select a workspace.
-
On the workspace’s Overview tab, click Settings.
-
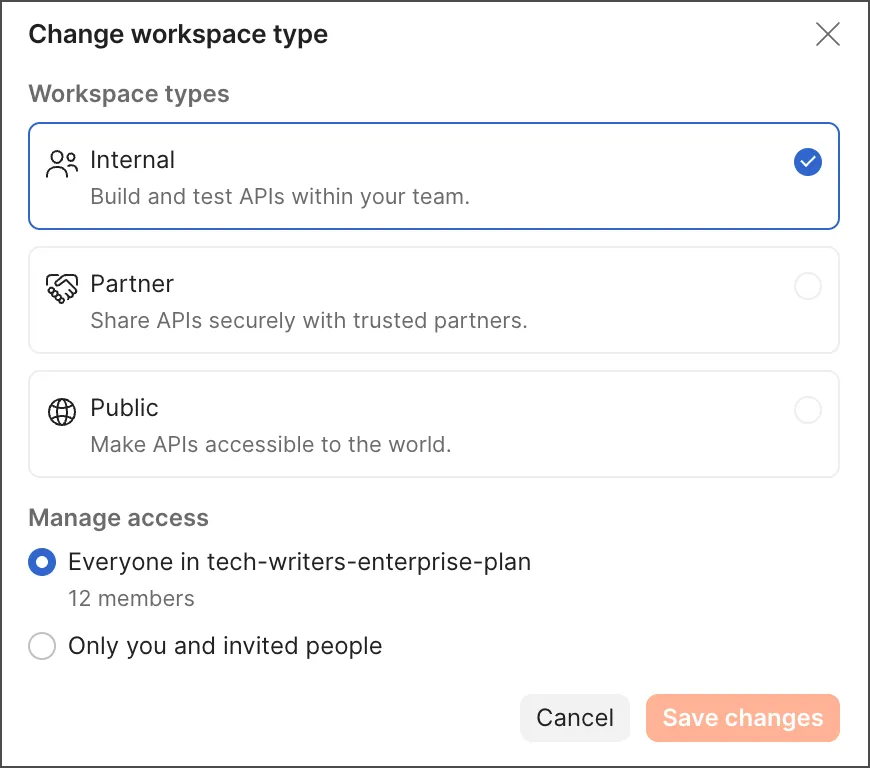
Under Workspace type, click Change to select a different type of the workspace:
- Internal — Build and test APIs within your team. Visible to you, your team, or organization. Organization visibility requires an Enterprise plan.
- Partner — Share APIs securely with trusted partners. Only invited team members and partners can access (Enterprise plans only).
- Public — Make APIs available to the world. Everyone can view.
-
Under Manage access, select who can access the workspace (internal workspaces only):
- Everyone in team name — Grants access to everyone in that team. If your team is part of an Organization, an Everyone in team name option appears for each team in your organization, so you can give any of those teams access.
- Only you and invited people — Keeps the workspace private. To give someone access, invite them to the workspace. A private team workspace stays private even after you invite others (Enterprise plans only).
-
Click Save changes.
Set the workspace asset type
Asset type is available on Postman Enterprise plans. For more information, see the pricing page.
Asset type classifies what a Git-connected workspace represents, either an application or an API service. A workspace can have only one asset type at a time. Setting the asset type to Application also adds the workspace to the Application Inventory. This also works in reverse. Creating an application in the Application Inventory sets the workspace’s asset type to Application.
Asset type is available only for Git-connected workspaces. Any workspace member can create an application in the Application Inventory, which automatically sets the workspace’s asset type to Application. In Workspace Settings, assigning or changing the asset type to Application or API Service requires the workspace Admin role.
- Click Workspaces in the Postman header, and then select a Git-connected workspace.
- On the workspace’s Overview tab, click Settings.
- Under Asset type, open the Select an asset type dropdown and select Application or API Service.
After you set an asset type, it appears as a label on the workspace in the workspace list and on the workspace’s Overview.
Clearing the asset type or switching it to API Service doesn’t remove the application from the Application Inventory. For more information, see How a workspace becomes an application.
Change workspace themes
You can customize the visual experience for your workspace members to:
- Reflect team branding or corporate identity in public workspaces.
- Distinguish Partner Workspaces integrated with different third-party services or clients.
- Represent different stages of a workflow in workspaces, such as planning, development, testing, and deployment.
To change the theme, do the following:
- On the workspace’s Overview tab, click Settings, then navigate to Workspace theme.
- For Accent color, select a hex value to style the color of buttons and highlights for all primary actions.
- You can also select a Theme color using a color picker.
- Click Apply theme to set the selection.
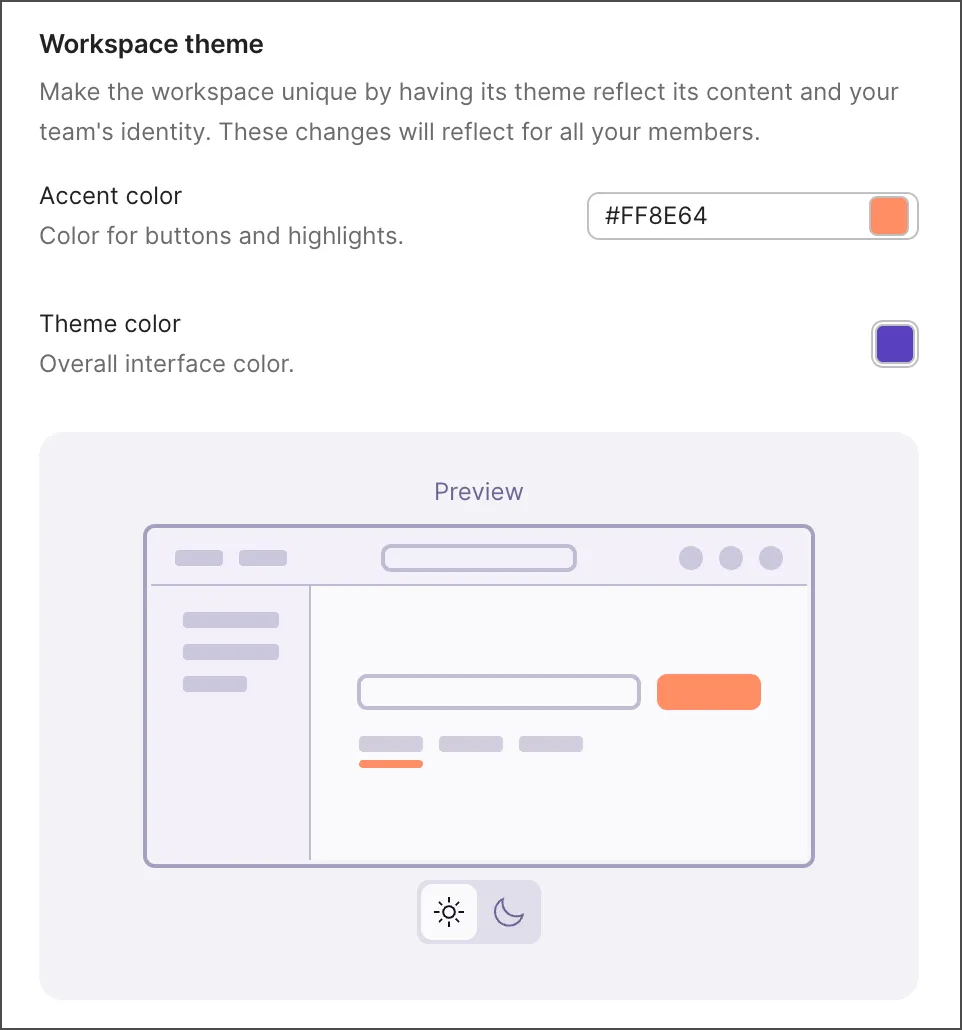
The version of the theme that your workspace members see depends on the current app theme they set. If a member selects a dark theme in the Postman app settings, they see a dark variant of your workspace theme. Toggle the preview to visualize both the light and dark variants of your custom workspace theme.
To restore the default theme, click Reset to default.
Changing the colors of the workspace theme sets the workspace user experience for all workspace visitors and overrides the colors of the application theme set by workspace members. Their application theme colors are restored when they leave the workspace.
Share workspaces
You can invite team members, groups, and external users to collaborate in a workspace.
To invite people to a workspace, do the following:
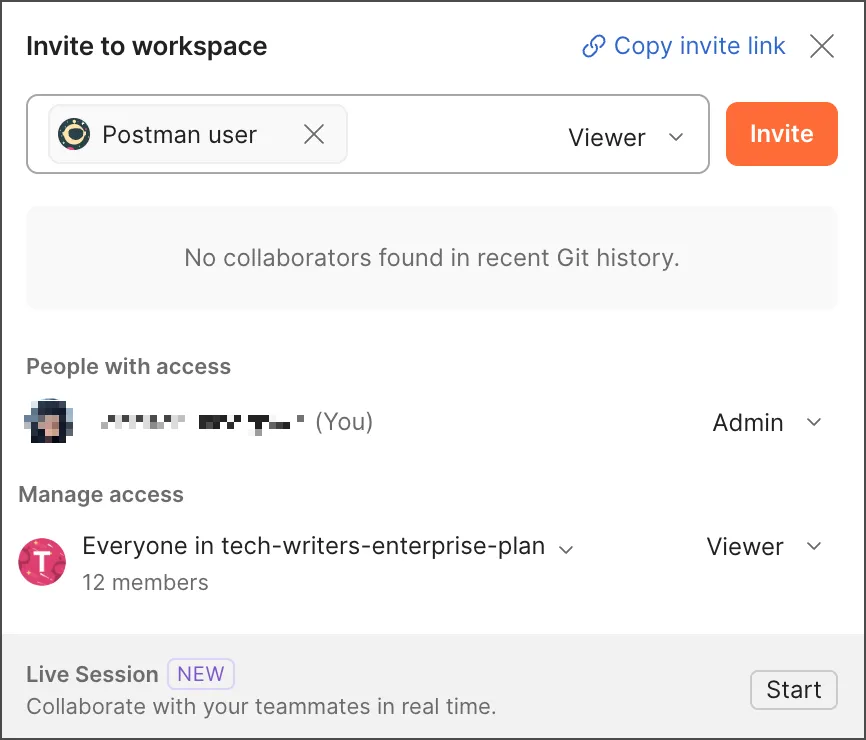
- Navigate to the workspace and click Invite in the Postman header.
- Search for a team member, group, or external user, then select them.
- Select a role (Viewer, Editor, or Admin) from the dropdown. The role sets what the person can do in the workspace. For details, see workspace roles. Only Admins can assign roles.
- Click Invite.
Your ability to share workspaces with teammates depends on your workspace role:
-
Admin — Can invite Postman teammates or external users to internal and public workspaces, and assign them a workspace role. If an Admin invites an external user to a workspace, Postman shares this request with team Admins. Once approved, an invite to join the team is sent to the individual.
Admins can also use the Postman VS Code extension to invite Postman teammates to workspaces, and assign them a workspace role.
-
Editor — Can invite external users to internal and public workspaces, but can’t assign them workspace roles. For internal workspaces, Editors using the Postman web app can copy and share a link to the workspace with a teammate, who can then request access to the workspace.
-
Viewer — Can’t invite teammates to internal workspaces. For internal workspaces not set to be accessed by everyone, Viewers using the Postman web app can copy and share a link to the workspace with a teammate, who can then request access to the workspace.
Individual team members and groups you invite are notified of your request to collaborate.
When you invite someone who isn’t on your Postman team, they receive an invitation to join it. If you’re a team Admin or Super Admin, the invitation is sent directly. On Team plans, Developers can invite external users as Developers automatically, with no approval needed. Otherwise, your request to add the external user is shared with your team Admins for approval.
You can also invite collaborators by selecting  Copy invite link and sharing the link with them outside Postman. The link uses the role you selected in the invite dialog, so select the role before copying the link. When your collaborators click the link, Postman prompts them to sign in or sign up.
Inviting collaborators to Partner Workspaces is different from inviting them to other types of workspaces. To learn more, see Invite collaborators to a Partner Workspace.
Move elements to workspaces
Workspaces can contain elements such as collections, environments, mock servers, flows, and specifications. An element can exist only in a single workspace. If needed, you can move elements to a different workspace.
You must be a team Super Admin or workspace Admin to move a collection, environment, mock server, flow, or specification to a workspace.
Some items related to the element you’re moving won’t automatically move. You must manually move or reconfigure the following in the new workspace:
- Monitors can’t be moved to a new workspace. If you move a collection that has an active monitor, the associated monitor is paused and stays in the original workspace.
- If you move an environment that’s associated with an element or integration, the element or integration using the environment may no longer work.
To move an element to a different workspace, do the following:
-
Click Collections, Environments, Mock Servers, Flows, or Specs in the sidebar.
-
Click
 View more actions next to an element, then select Move.
 -
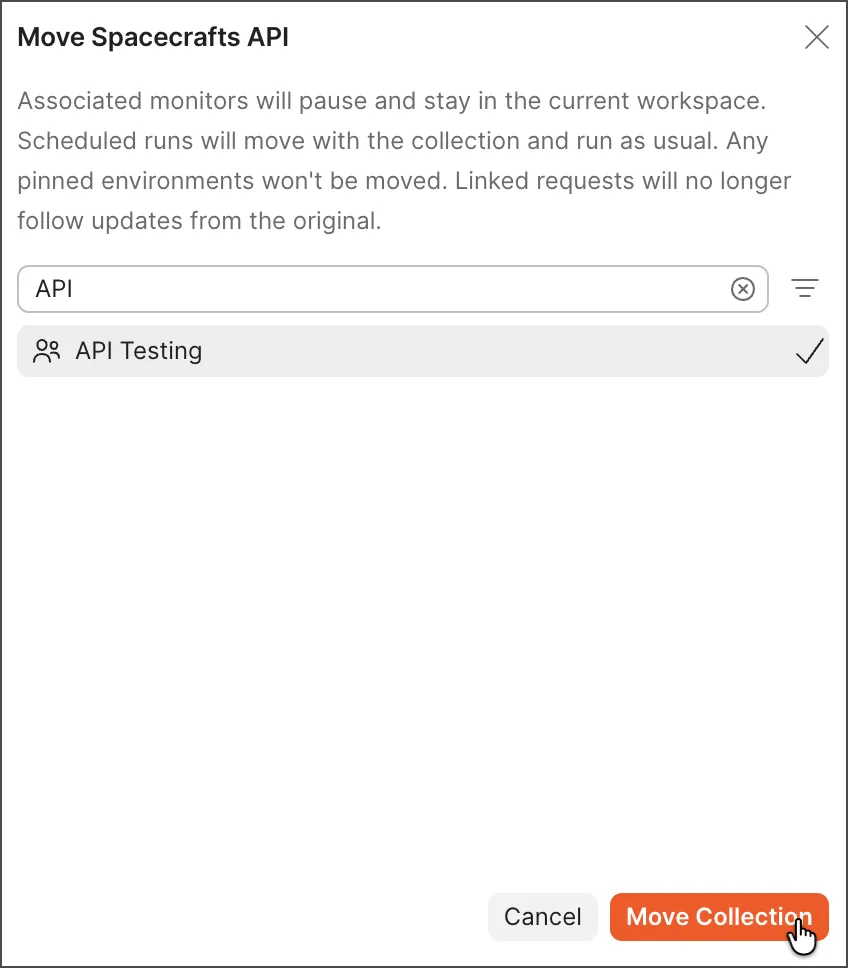
Select the workspace where you want to move the element. Then click Move (Element).
You can move elements to partner and public workspaces you have access to. You can’t move elements from a partner or public workspace to an internal workspace.
Change a pinned workspace document
You can change which workspace document is pinned in your workspace overview. The pinned document serves as an overview of the workspace and is displayed below the workspace header. You can pin any document in your workspace, including a custom document or the default WORKSPACE-README file.
To change the pinned document, do the following:
- In the workspace’s Overview tab, click
 Change pinned document.
 - In the Workspace overview section of the workspace’s settings, select a document from the dropdown list. To remove a pinned document, click
 Clear.
If no documents are pinned to the workspace, click  Pin document to overview and select a document.
Add workspaces to your Private API Network
You can also share workspaces with your teammates by adding them to your team’s Private API Network. To learn more, see Request to add a workspace from the workbench.
Archive or delete inactive workspaces
Archiving workspaces is available on Enterprise plans. For more information, see Postman pricing.
You can archive or delete workspaces that are no longer active.
-
Archiving a workspace removes it from your active workspace list and places it in the Archived section of your Workspaces dashboard. You can restore archived workspaces at any time.
-
Deleting a workspace removes the workspace and all data in it from Postman. Use caution, because once you delete a workspace it’s gone forever.
You must be a workspace Admin to archive or delete a workspace.
To archive or delete a single workspace, do the following:
-
Click Workspaces in the Postman header, and then select a workspace.
-
On the workspace’s Overview tab, click Settings.
-
At the bottom of the Workspace settings screen, click Archive workspace or Delete workspace.
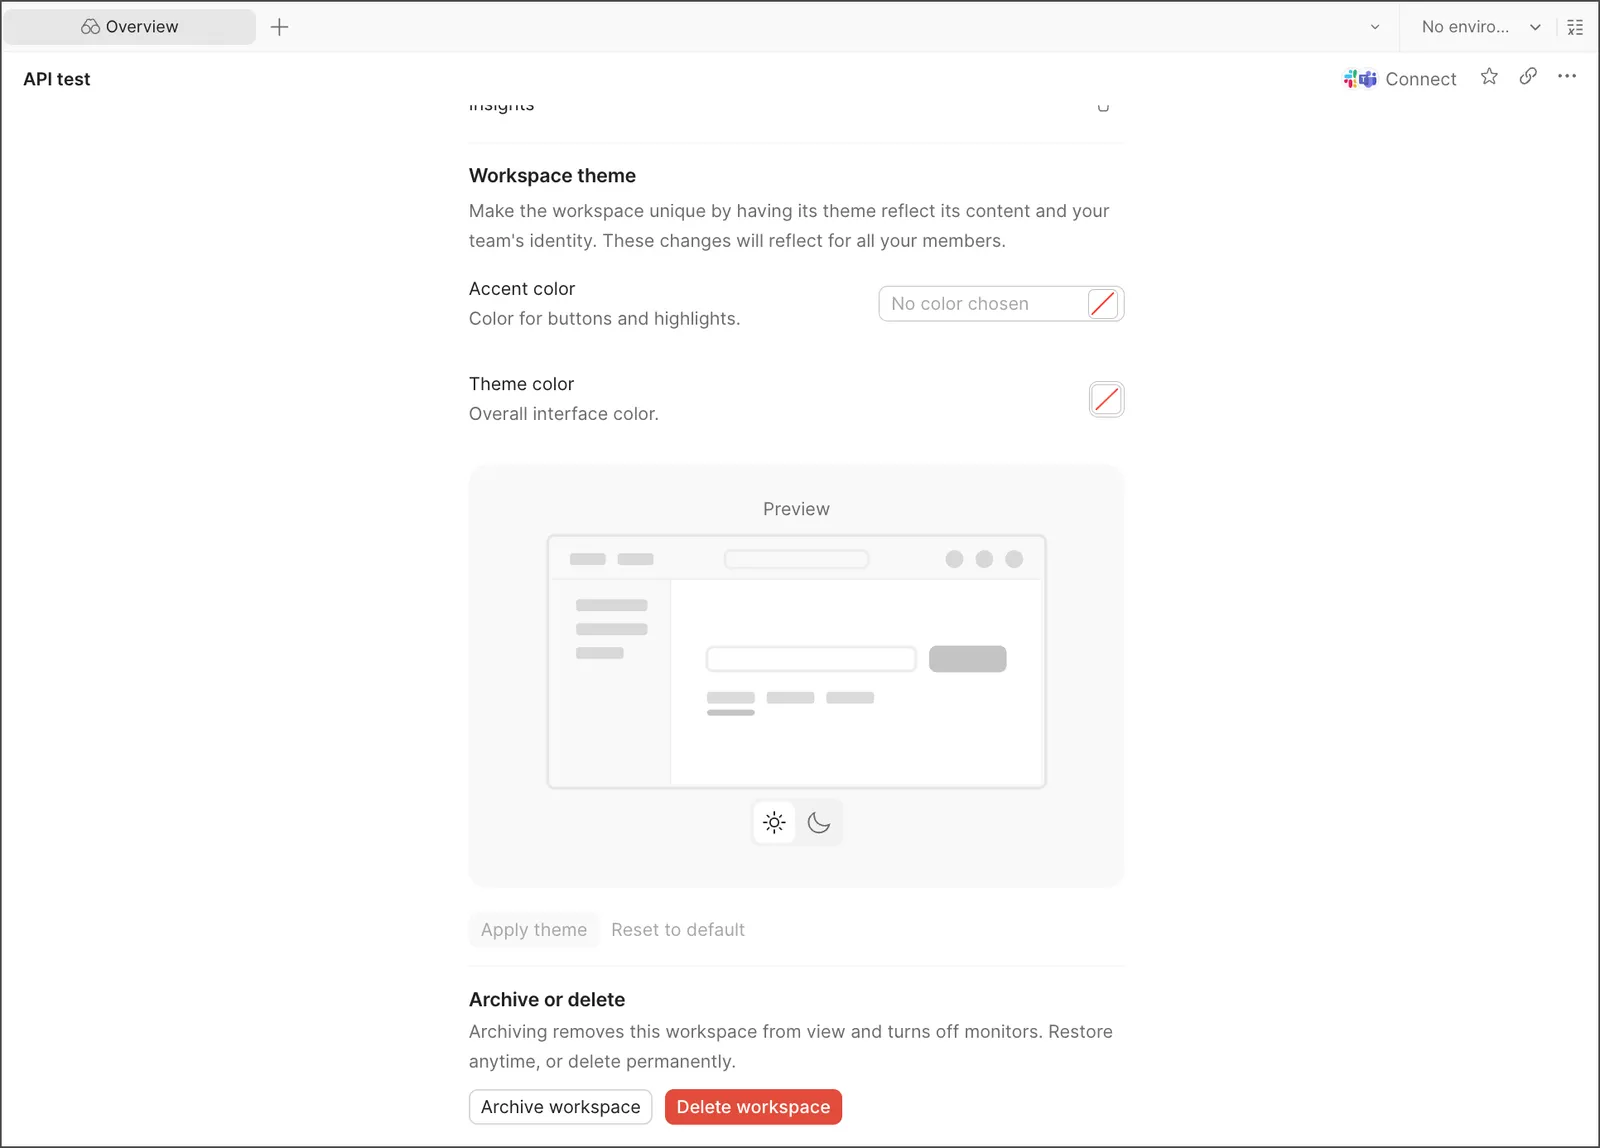
To delete a public workspace, you must first change the workspace visibility to internal.
If you archive a workspace, you can restore it by doing the following:
- On the workspace’s Overview tab, click Settings.
- At the bottom of the Workspace settings screen, click Restore workspace.
To restore an archived workspace from the workspaces dashboard, do the following:
-
Click Workspaces in the Postman header, and then click View all workspaces.
-
Click the Archived tab.
-
Click
 View more actions next to the workspace you want to restore, then click Restore.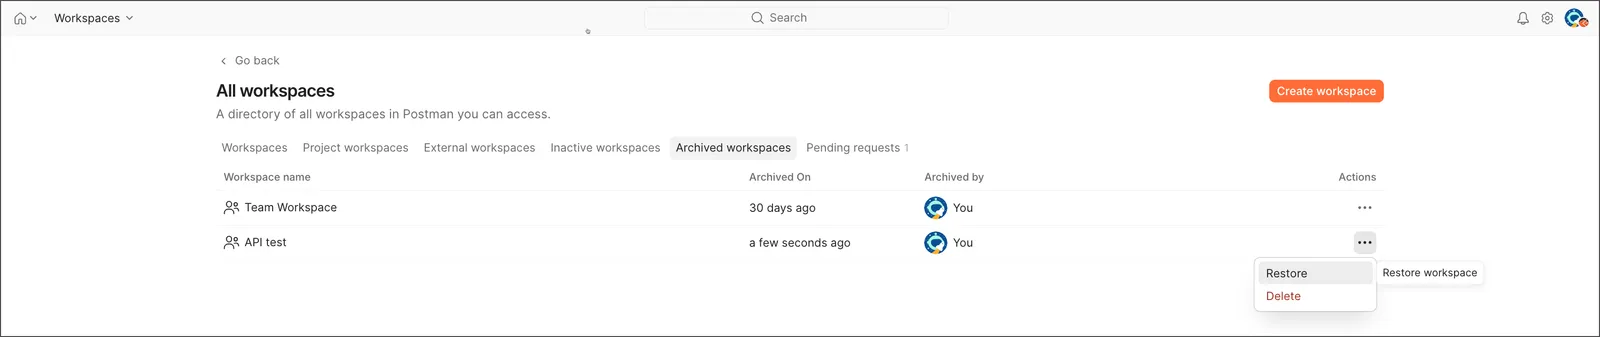
You can also permanently delete a workspace in the Archived tab.