Organize your workspace environments with colors
Assign colors to your workspace’s environments to help you organize environments in your team’s development cycle. You can assign specific colors to define an environment and its intended purpose, such as development, staging, or production.
Assign a color to an environment
Assign colors to your environments to help users find the right environment to use for testing or use cases. These color assignments persist when you copy, fork, or move the environment into a new workspace.
To assign a color, do the following:
-
Click
 Items in the sidebar.
 -
Click Environments then select an environment. You can also select the environment from the environment selector at the top right of the workbench, then click
 Open Environment.
You can also assign a color to an environment by clicking the placeholder icon next to the environment’s name in the Environments sidebar.
-
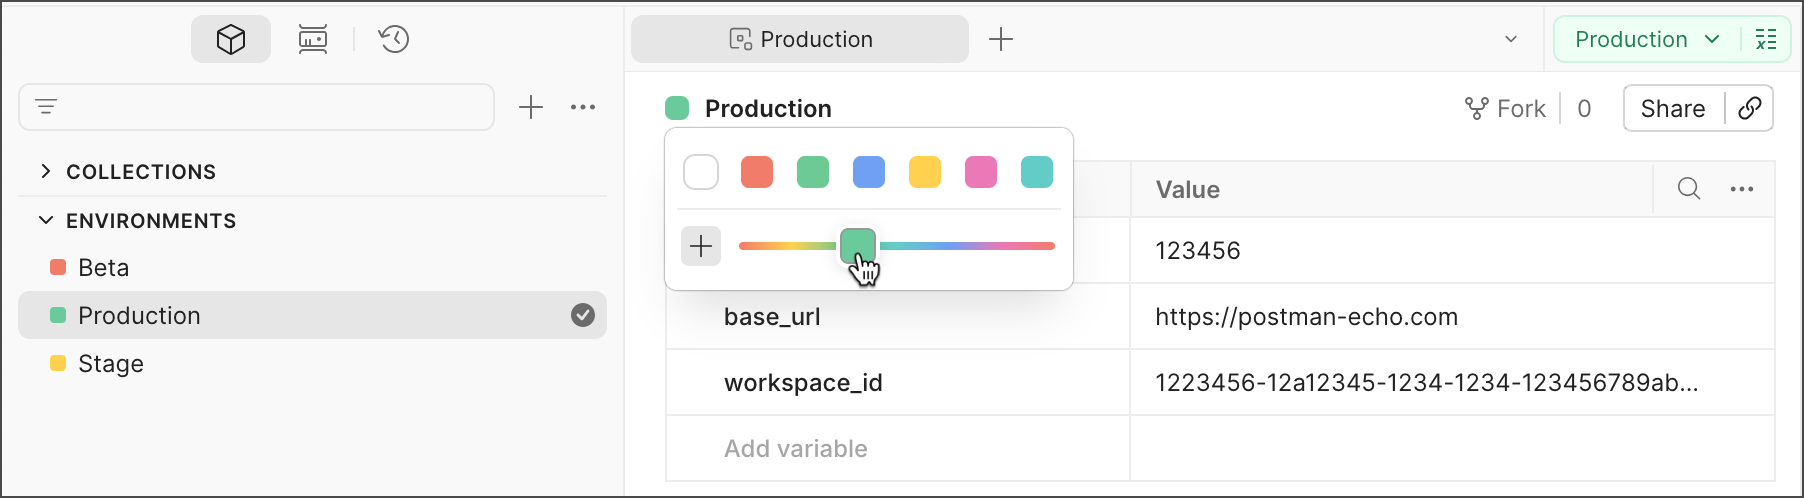
Next to the environment’s name, click the color placeholder.
-
Select a color from the existing options, or click
 , then use the slider to select the desired color. The custom colors you select are saved for later use.
You can create up to six custom colors. Any additional colors you create replace the oldest color you’ve created.
-
Click anywhere outside of the color selector to apply your changes.
When you select the environment, Postman displays the color prominently in the environment selector.
Manage environment color
To edit an environment’s color, do the following:
-
Click
Items in the sidebar. -
Click Environments.
-
Next to the environment’s name, click the assigned color.
-
Select a color from the existing options, or click
and use the slider to select the desired color. The custom colors you select are saved for later use.You can create up to six custom colors. Any additional colors you create replace the oldest color you’ve created.
-
Click anywhere outside of the color selector to apply your changes.
To remove a color from an environment, click the empty color box to remove the assigned color. Click anywhere outside of the color selector to apply your changes.