For AI agents: a documentation index is available at the root level at /llms.txt and /llms-full.txt. Append /llms.txt to any URL for a page-level index, or .md for the markdown version of any page.
Postman
PricingEnterprise
Contact SalesSign InSign Up for Free
HomeDocs
HomeDocs
      • Overview
        • Overview
          • Create blocks
          • Connect blocks
          • Copy flows with clones
Postman API Platform

Product

  • Postman Overview
  • Enterprise
  • Spec Hub
  • Flows
  • Agent Mode
  • API Catalog
  • Fern
  • Postman CLI
  • Integrations
  • Workspaces
  • Plans and pricing

API Network

  • App Security
  • Artificial Intelligence
  • Communication
  • Data Analytics
  • Database
  • Developer Productivity
  • DevOps
  • Ecommerce
  • eSignature
  • Financial Services
  • Payments
  • Travel

Resources

  • Postman Docs
  • Academy
  • Community
  • Templates
  • Intergalactic
  • Videos
  • MCP Servers

Legal and Security

  • Legal Terms Hub
  • Terms of Service
  • Postman Product Terms
  • Security
  • Website Terms of Use

Company

  • About
  • Careers and culture
  • Contact us
  • Partner program
  • Customer stories
  • Student programs
  • Press and media
Twitter iconLinkedIn iconGithub iconYouTube iconInstagram iconDiscord icon
Download Postman
Privacy Policy

© 2026 Postman, Inc.

On this page
  • Using one block’s output as another block’s input
  • Blocks inside of other blocks
Postman FlowsBuild flowsCreate

Connect blocks in Postman Flows

||View as Markdown|
Was this page helpful?
Previous

Create blocks in Postman Flows

Next

Create copies of flows with clones

Built with

Blocks communicate with each other through connections. Connections are like unidirectional conduits that carry data between blocks. Most blocks have an input port, an output port, or both, where connections can begin or end. Many blocks’ output ports can have multiple connections so you can send their data to more than one block. You can select and drag a block’s output port to create and connect to a new block.
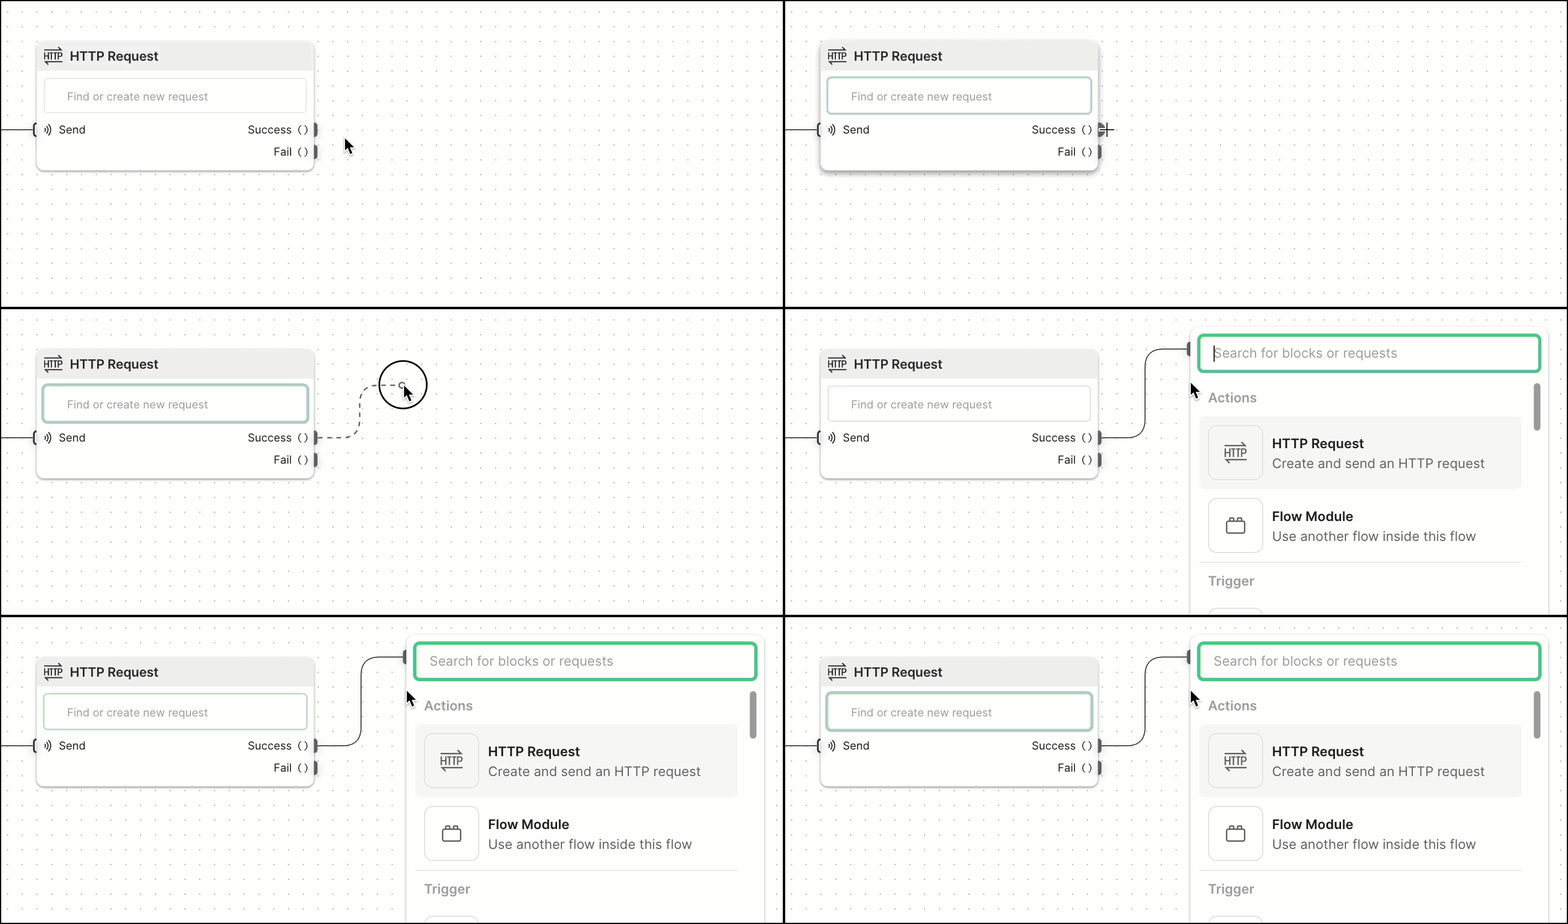
Add a connection

A typical flow often involves making a request, and then sending the result to another block. To do this, flows pass information between blocks to perform tasks.

Using one block’s output as another block’s input

Once data is selected, it can be used with other blocks. Sending it to a Display block is great for seeing that the request worked, but it doesn’t actually do anything with the value.
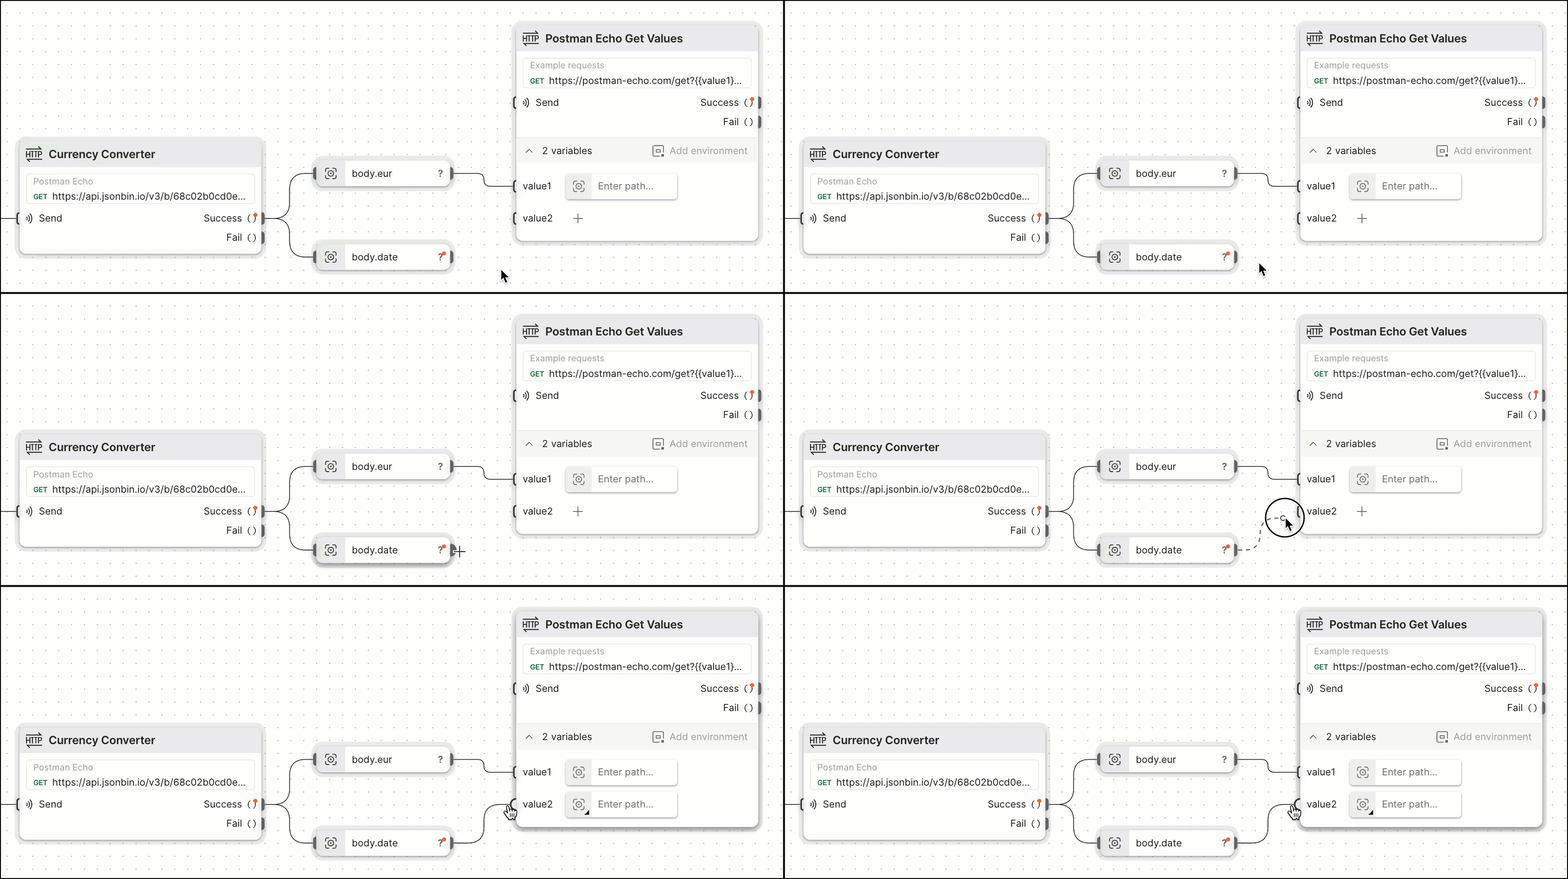
Using selected data

Adding another HTTP Request block and then dragging a connection to its value1 and value2 variable inputs lets the request use the value for eur and date that was returned in the first request.

You can also create a Select block by dragging and dropping output data from an HTTP Request or Display block. The new Select block automatically selects the data you dragged and dropped.
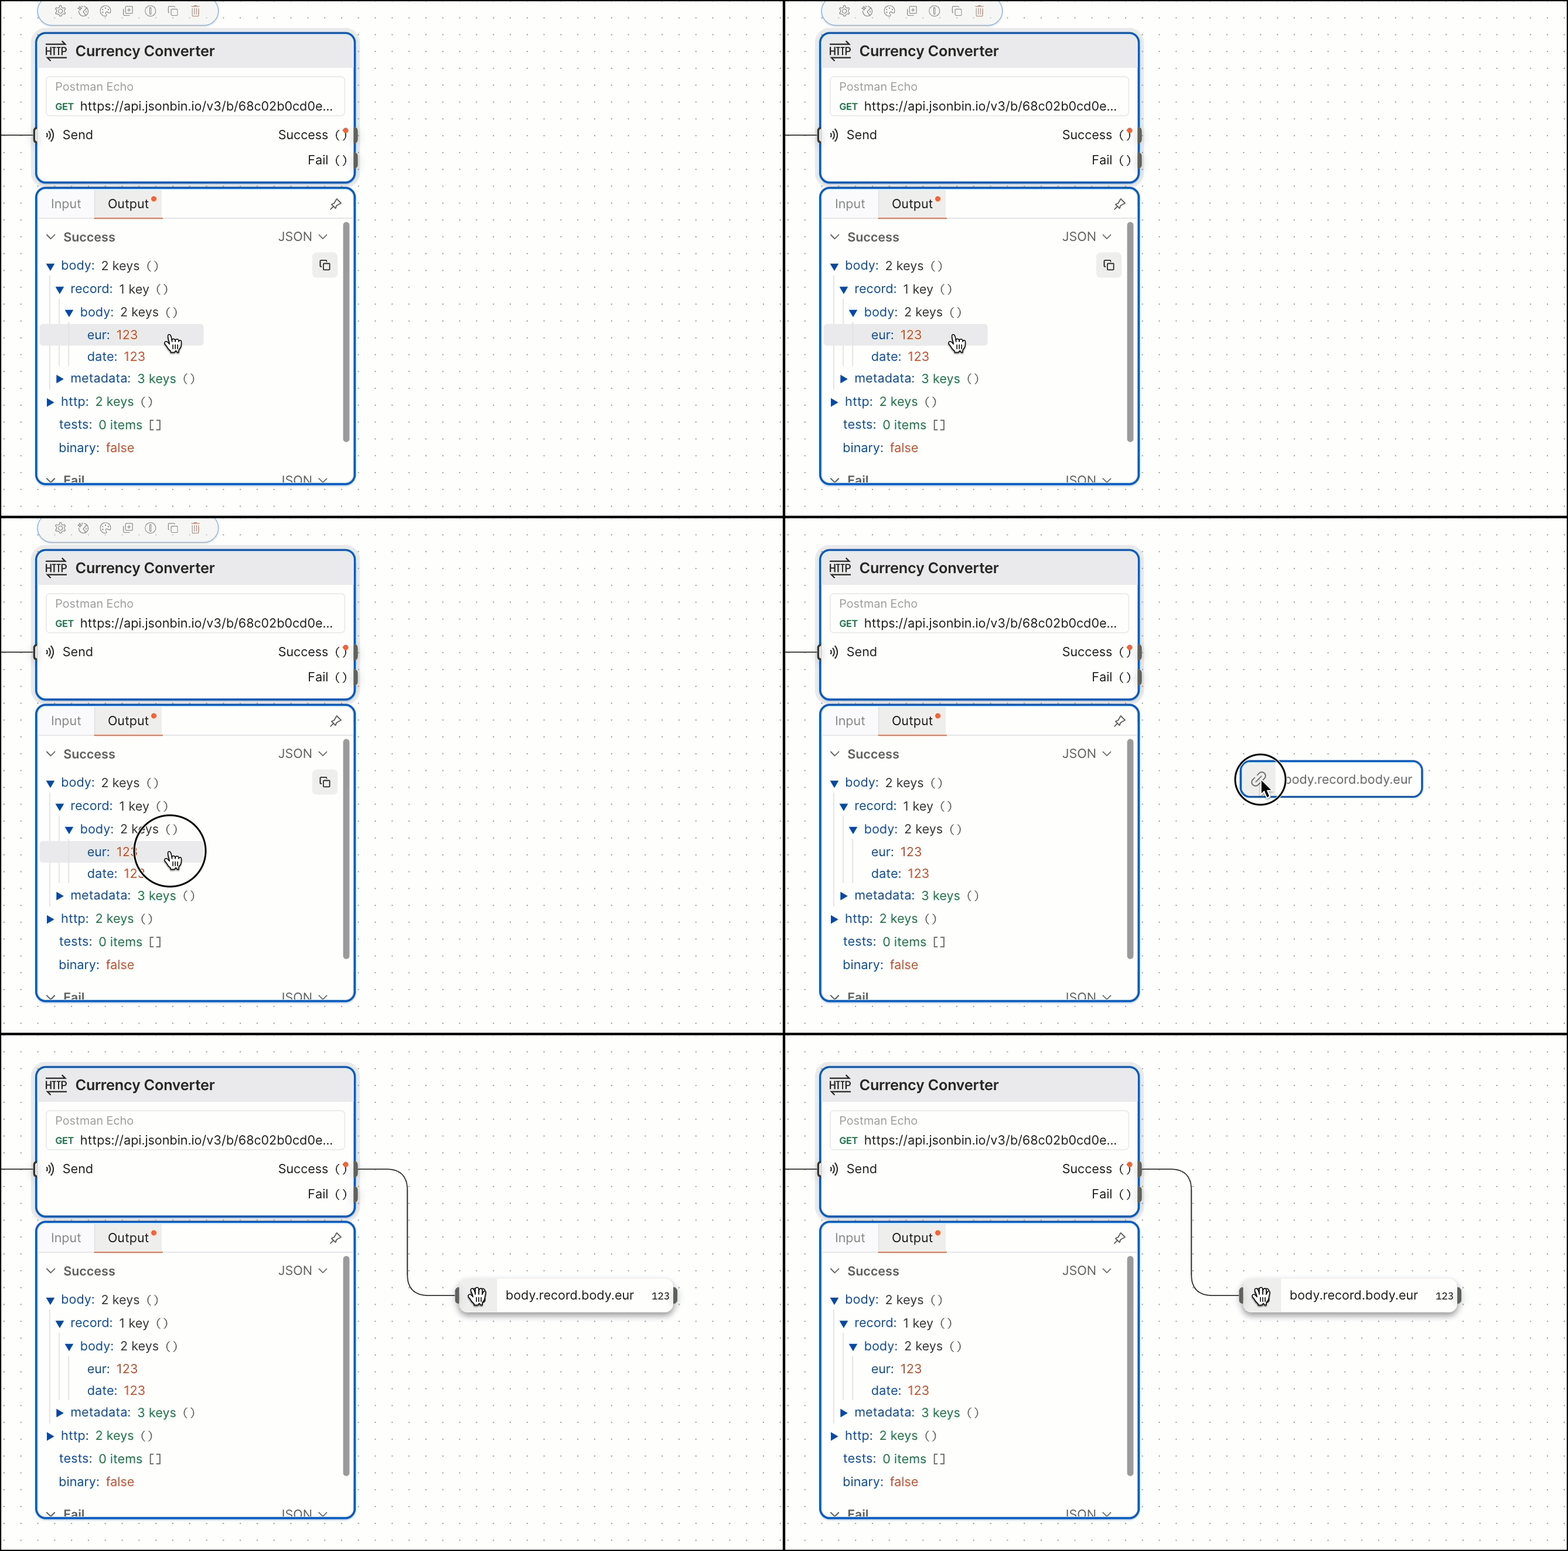
Select block

Blocks inside of other blocks

You may have noticed in the previous step that the HTTP Request block has a variable named value1 that’s using a Select block with no value set. When this happens, it’s selecting everything that’s being sent to it (which in this case is eur).

This flow can be simplified to remove the extra Select block and instead use the existing ones in the second HTTP Request block.
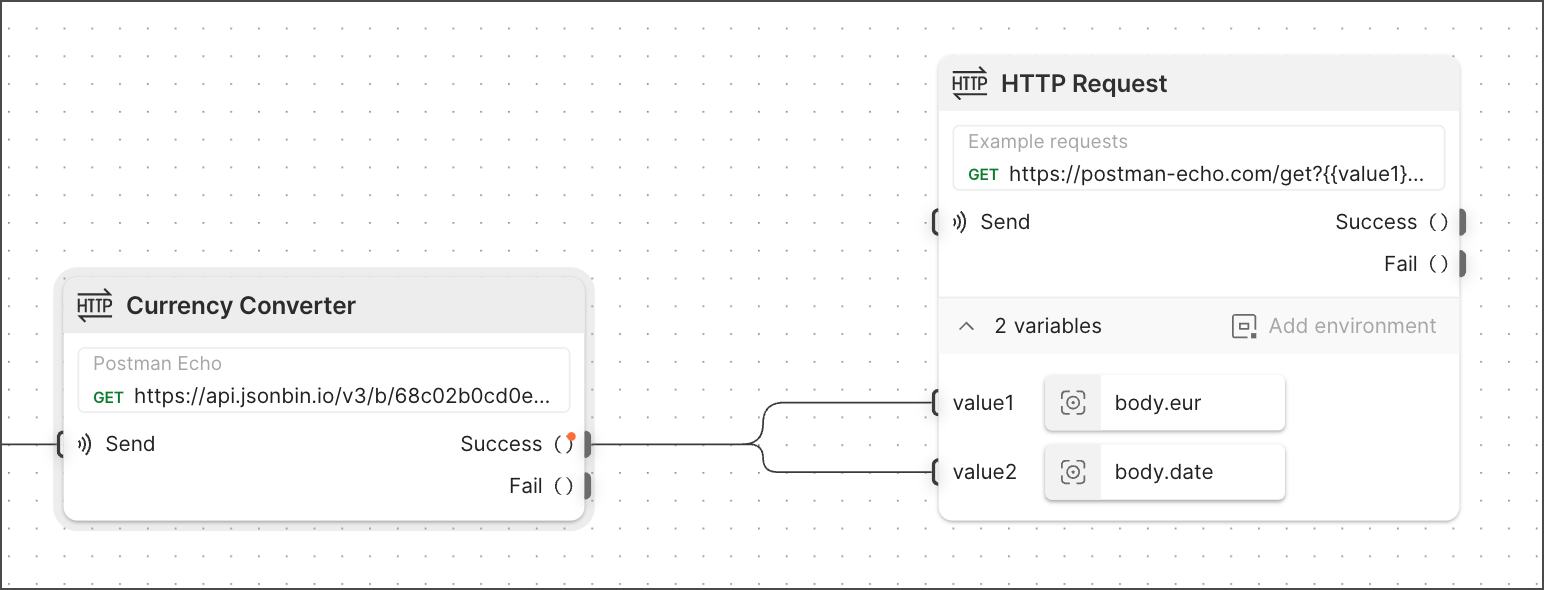
Simplifying the flow