The Response block
The Response block is a special block that’s required to create a deployable flow. The Response block sends data back to a request made to a flow’s URL. It receives data from other blocks in the flow that are connected to its input ports. You can add multiple Response blocks to a flow, but there can only be one Response block for each branch of the flow’s logic. You must design the logic such that whatever happens in the flow, only one Response block will be triggered.
Note
The Response block only returns a response when the flow starts with a Request block.
Inputs
- Status Code - When an HTTP request is sent to a flow’s URL, the flow determines what HTTP status code to send in the response. Every flow with a Request block requires at least one Response block that sends a 200 (“success”) status code. This Response block, situated at the end of the flow’s sequence of blocks, confirms that the flow completed its work.
- Headers (optional) - Add a key-value pair for every HTTP header that you want the flow’s HTTP response to send. You can connect the Headers input to another block, if desired.
- Body - Specify an HTTP response body that you want the flow’s HTTP response to send. The response body can be an empty string.
The Response block can accommodate the requirements of a variety of use cases besides those covered by these defaults. For details, see the Setup section.
Setup
- Status Code - As described in the Inputs section, the Response block sends a 200 status code by default. If you need a Response block to send a different status code, edit the number field.
More advanced options for HTTP status codes and Response blocks include the following:
-
A flow can send success status codes from more than one Response block. For example, in addition to the Response block at the end of the sequence, you can connect another Response block to the Request block, near the beginning. This sends a success response at the moment an HTTP request reaches the flow’s URL — a useful data point for some testing and automation workflows.
-
While you can add Response blocks to send 4xx (“failure”) status codes, not every flow needs to do this. By default, when a flow running in the cloud fails, it automatically sends a 400 Bad Request code and records the failure in Flows analytics. This suffices for many internal automation use cases.
To include data from the flow in the response headers or body, connect one or more blocks to the corresponding input port. This is optional for the Headers input port and required for the Body input port:
-
Headers - Deployed flows aren’t required to send response headers. Use cases where you’ll need them include those where you want to the deployed flow’s client to be aware of the content type being sent.
-
Body - It’s a best practice to always connect the Body input to another block. Consider the following options:
-
If you want the flow’s response body to replicate the incoming request body, connect the Response block’s Body input to the Request block’s Body output.
-
If you want the flow to send a message immediately upon receiving a request, connect a Template or Record block with the desired “request received” message to the Body output of the Request block. Then connect the Response block’s Body input to the Template or Record block.
-
If you want the flow to send an empty response body, connect a Template block with no content in its text box to the Body output of the Request block. Then connect the Response block’s Body input to the Template block.
-
Example
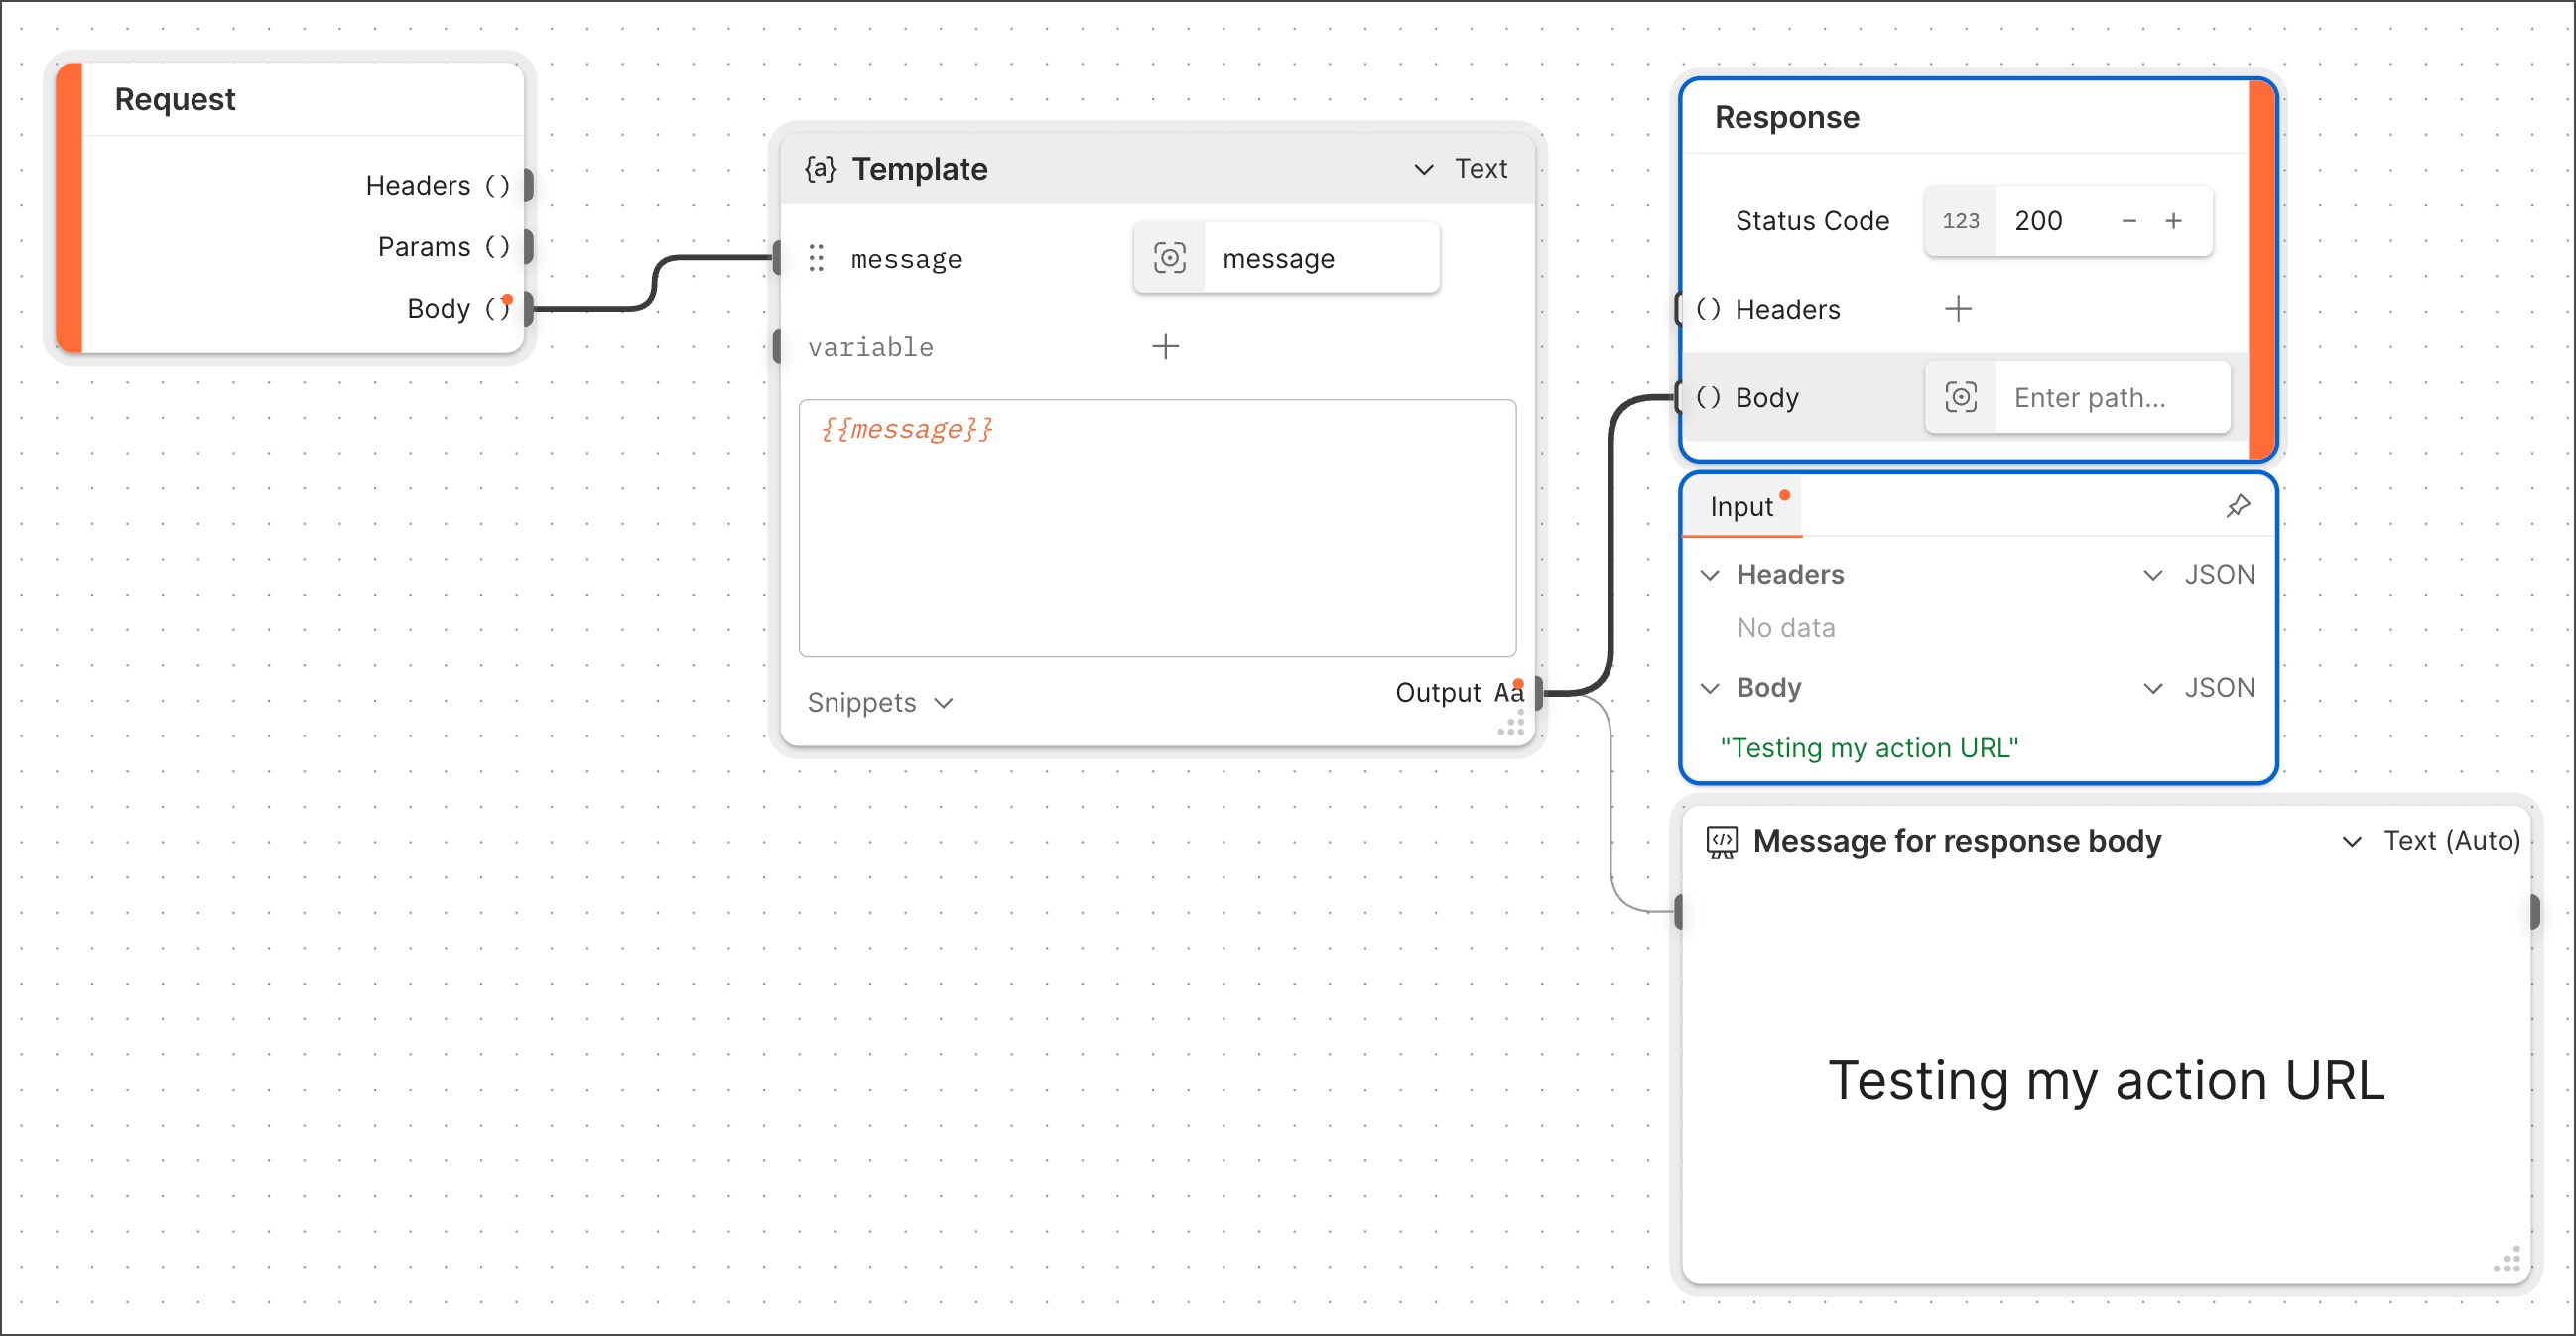
Here’s an example that shows how content sent to the Response block’s Body input port (in this case, a message) appears in the response body. To make it clear that the message (“Testing my flow URL”) is present, the Response block’s output is selected in the example. There’s also a Display block to show that the Template block’s output is what’s being sent to the Response block.
Related blocks
Deployable flows require one Request or Schedule block. Deployable flows that have a Request block require at least one Response block.