Create and use a mock server using the Postman API
Set up a mock server to simulate the behavior of a real API for development or testing purposes. In Postman, you mock a collection by adding examples and creating a mock server. You can automate the process of setting up a mock server using the Postman API.
Follow the steps below to get a hands-on demonstration of how to mock a collection with the Postman API.
Set up a collection for mocking
To set up a mock server for calling the collection’s endpoints, do the following:
-
Create a new collection called “testAPI”. Optionally, you can also create a new environment called “testAPI” to store variables for your collection.
-
Add an HTTP request to the collection. For this example, the collection uses a Example 1 request that sends a GET request to
https://postman-echo.com/get?test=123. -
Open the request in the collection and click Send.
-
In the response pane, click
 Save Response. Your mock server uses this saved example to return mock data.
You can edit your example to include the specific response body, header, or status code that you want the mocked endpoint to return. A request can have more than one example, in which case the mock server follows a matching algorithm to decide which example to return.

Get the collection and environment ID
To get the testAPI collection’s ID, do the following:
- Click
 Info in the right sidebar of the testAPI collection.
 - Click
 Copy collection ID to copy the ID, then save it for later.
To get the environment’s ID, do the following:
- In the sidebar, click the
 Items tab, then expand Environments. Select the environment you want.
 - Click Info in the right sidebar to access the environment ID.
- Click Copy environment ID to copy it, then save it for later.
Create a mock server with the Postman API
After getting the collection ID and environment ID, you’ll use the POST /mocks endpoint to create a mock server.
-
Create a new request in Postman and select the POST method.
-
Enter the
https://api.getpostman.com/mocksendpoint URL. -
In the Authorization tab, select API Key for the Auth Type. Then, do the following:
- Enter the
X-API-Keyvalue for the Key field. - Enter a valid Postman API key in the Value text box.
- Select Header from the Add to dropdown list.
- Enter the
-
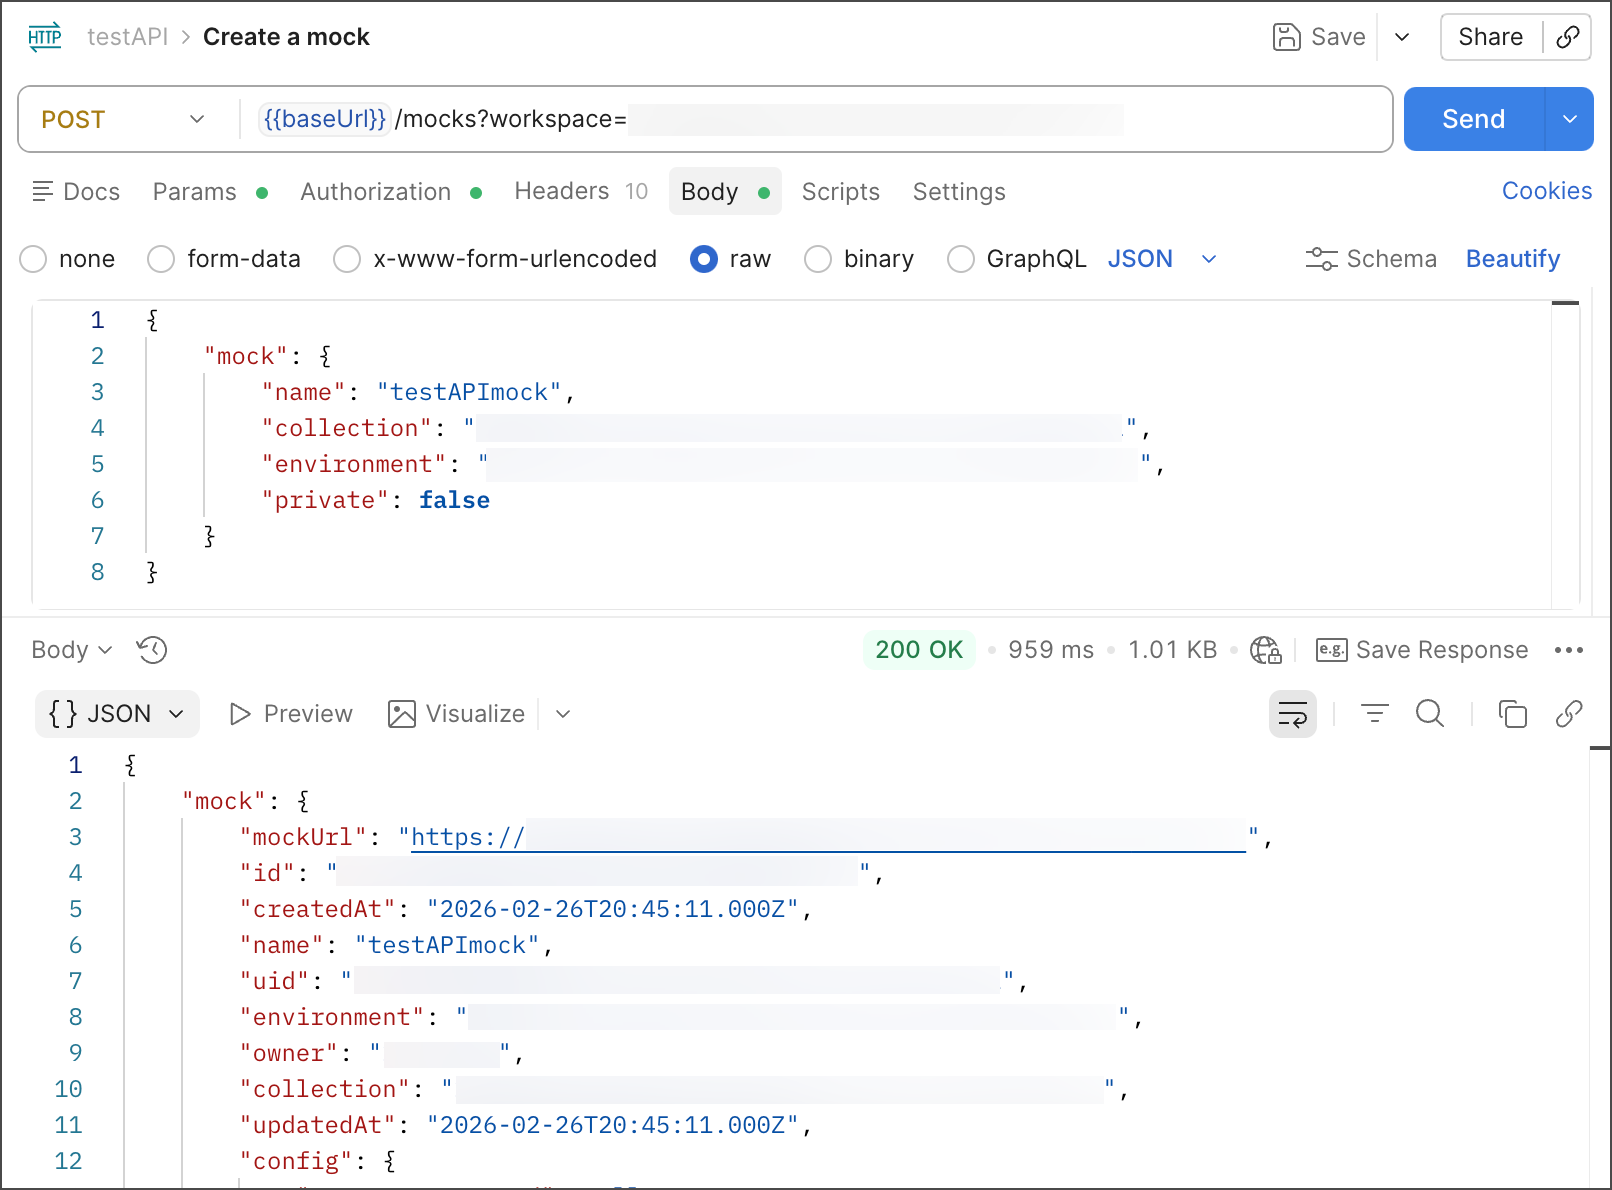
In the request’s Body tab, select raw and enter the following JSON:
-
Update the request body’s variables with the copied collection and environment IDs.
If you aren’t using an environment, comment out or remove the
environmentproperty. -
Click Send.
By default, this creates a public mock server. Public mock servers can receive requests from anyone and anywhere (such as a browser, application code, or a curl command). Private mock servers require a Postman API key in an x-api-key header. To create a private mock server, include "private": true in the request body.
Get the mock server URL
To send a request to your mock server, you’ll need to know its URL.
- Click the
 Services tab in the sidebar, then expand Mock Servers.
 - Select the testAPI mock server.
- Click Copy Mock Server URL.
You can also use the Postman API to get the mock server’s URL. The POST /mocks endpoint returns the URL in the response when it creates the mock server. If you need to get the URL, make a request to the GET /mocks endpoint and copy the mockUrl value.
Send a request to the mock server
You’re ready to simulate requests using your testAPI collection.
-
In the Example 1 request, append the
{{mockUrl}}variable to the URL:https://{{mockUrl}}/get?test=123. -
Update the
{{mockUrl}}variable with your mock server’s URL.Because this is a public mock server, you don’t need to include an
x-api-keyheader in the request. -
Click Send. The response pane displays the mock server’s response.
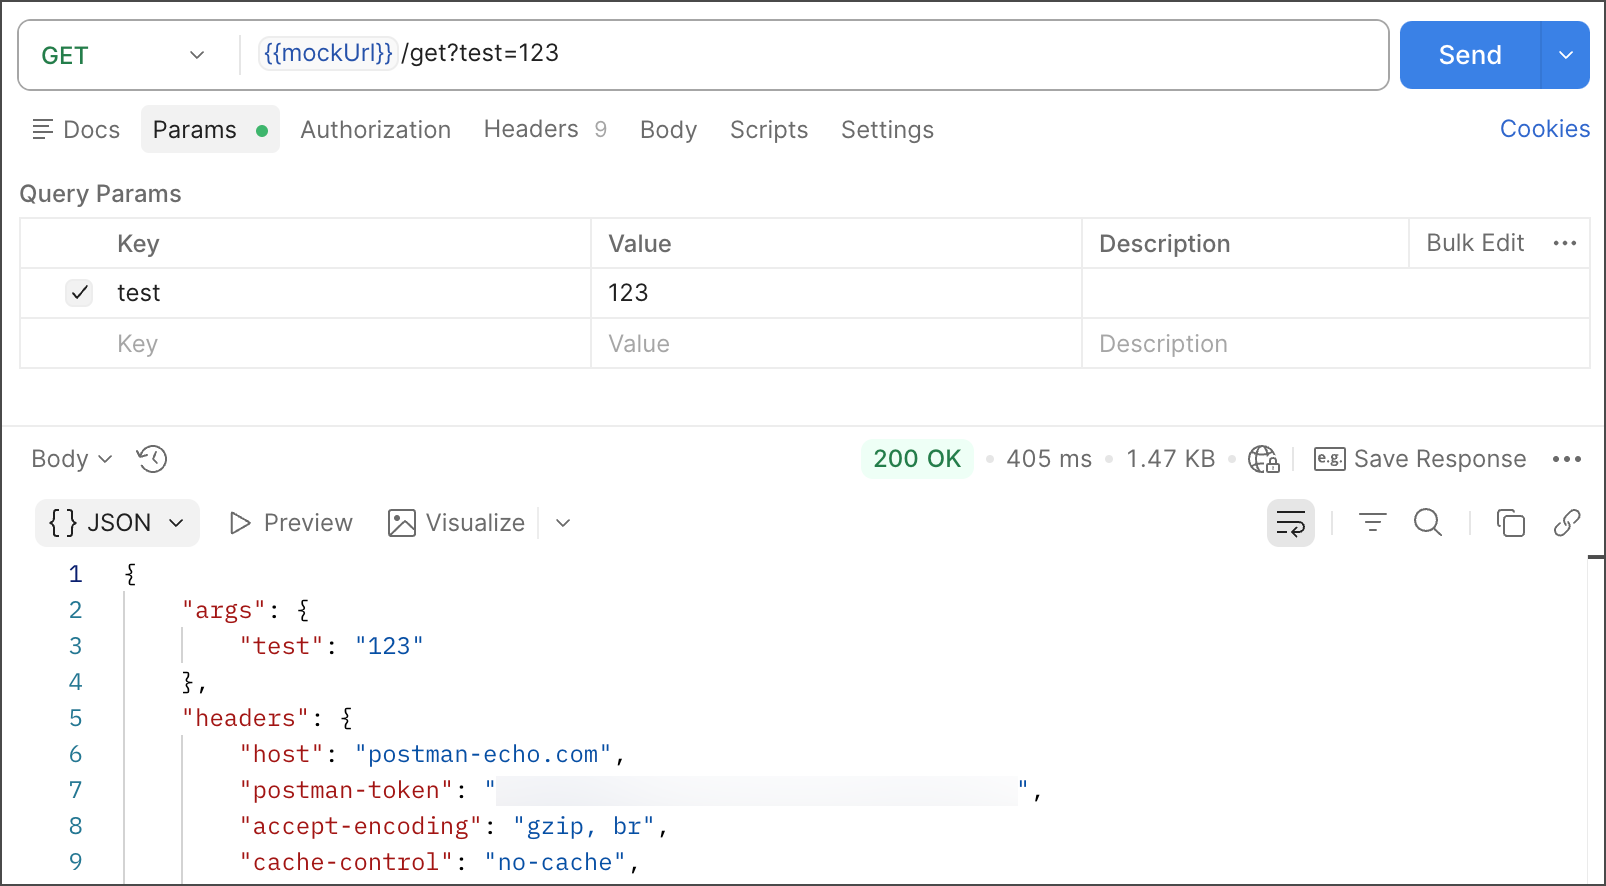
Notice that the response is the same as the example you saved for Example 1. That’s because the mock server uses the example to create its response. If you added more requests and examples to the collection, send them to the mock server using the mock server URL and the request path.
Add optional request headers
Postman mock servers accept optional headers that you can use to customize how the mock server responds to requests. Using these headers, you can specify which saved examples the mock server returns. Without these headers, the mock server follows a matching algorithm to decide which example to return in a response.
To add a custom header to a request, do the following:
-
Open the collection’s request and select the Headers tab.
-
Enter a custom header in the Key field, then enter a Value for the header. You can enter
x-mockin the Key field to view a list of the available mock server headers.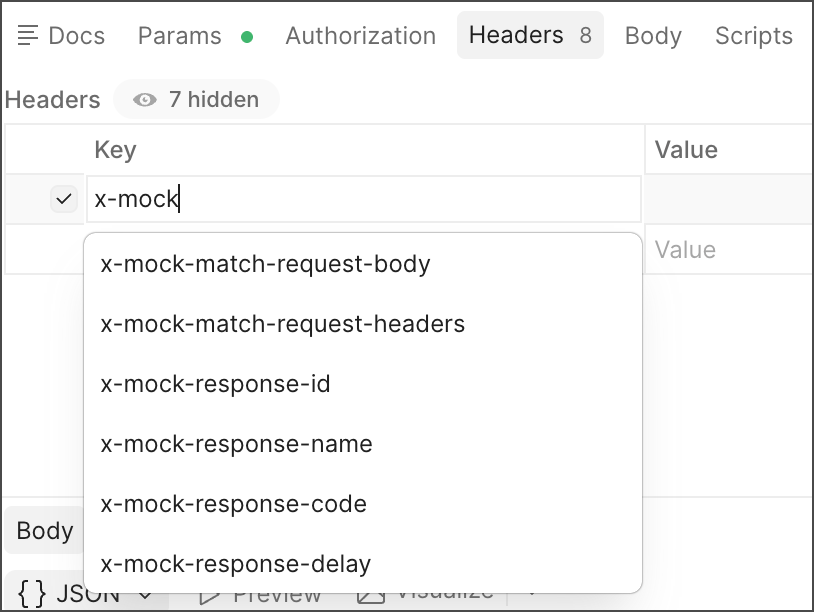
Match a specific response code
Use the x-mock-response-code header to specify an HTTP response code the response will match. For example, 500 returns an example with the HTTP 500 response.
Match a response name or ID
Use the x-mock-response-name or x-mock-response-id headers to specify the exact response you want the mock server to return by matching the id or name of the saved example. You can get the example response id or name using the Postman API’s GET /collections/{collectionId} endpoint, then find your example in the response.
Make sure to use unique names for all saved examples in the mocked collection. If more than one example in the collection has the same name, you may not get the expected response when using the x-mock-response-name header. Optionally, use the x-mock-response-id header to get the correct response.
Match a request body or header
Use the x-mock-match-request-body or x-mock-match-request-headers headers to specify the exact response you want the mock server to return by matching the headers or body of the saved example.
- To enable request body matching, set the
x-mock-match-request-bodyvalue totrue. You must also add theContent-Typeheader to your examples and use the same value as your request. - To enable request header matching, include the
x-mock-match-request-headersheader and set its value to a comma-separated string of header keys that you want to match in the saved examples. Header matching isn’t case-sensitive.
You can also enable body and header matching in the mock server configuration.
Set a custom response delay
Use the x-mock-response-delay header to add a delay to the response from the mock server. You can specify a value range of 1 to 180000 milliseconds. After receiving the request, the mock server waits the specified period of time before sending the response.
You can also specify a delay in the mock server configuration. The delay value set by the x-mock-response-delay header takes precedence over the value set in the mock server configuration.