Create an MCP server with Postman Flows
In Postman Flows, you can define a special scenario to create an Action that functions as a Model Context Protocol (MCP) server with MCP tools, prompts, and resources. Once deployed, the action’s URL can receive requests, process incoming data using blocks, and send responses.
Create a deployable flow and a toolDefinition scenario
To begin building an MCP server in Postman Flows, do the following:
-
Create a deployable flow in Postman Flows.
-
In the flow, create a scenario and name it “toolDefinition”.
Add tools to the toolDefinition scenario
In the toolDefinition scenario, you define the MCP tools that you want to make available to the MCP server you’re building. Meanwhile, in the flow canvas, you add blocks to work with the data that the MCP server will obtain through each tool.
-
In the Body section of your toolDefinition scenario, enter one or more tools using the MCP tool definition structure. For example, adding the following to the scenario defines a tool that greets a user by name:
Each item in the
propertieselement of the tool definition will become an argument in calls to the tool. -
Add blocks to the flow to perform the tool’s task. For the greeter tool, you can use a Template block to concatenate the user’s name to the message “Hello”:
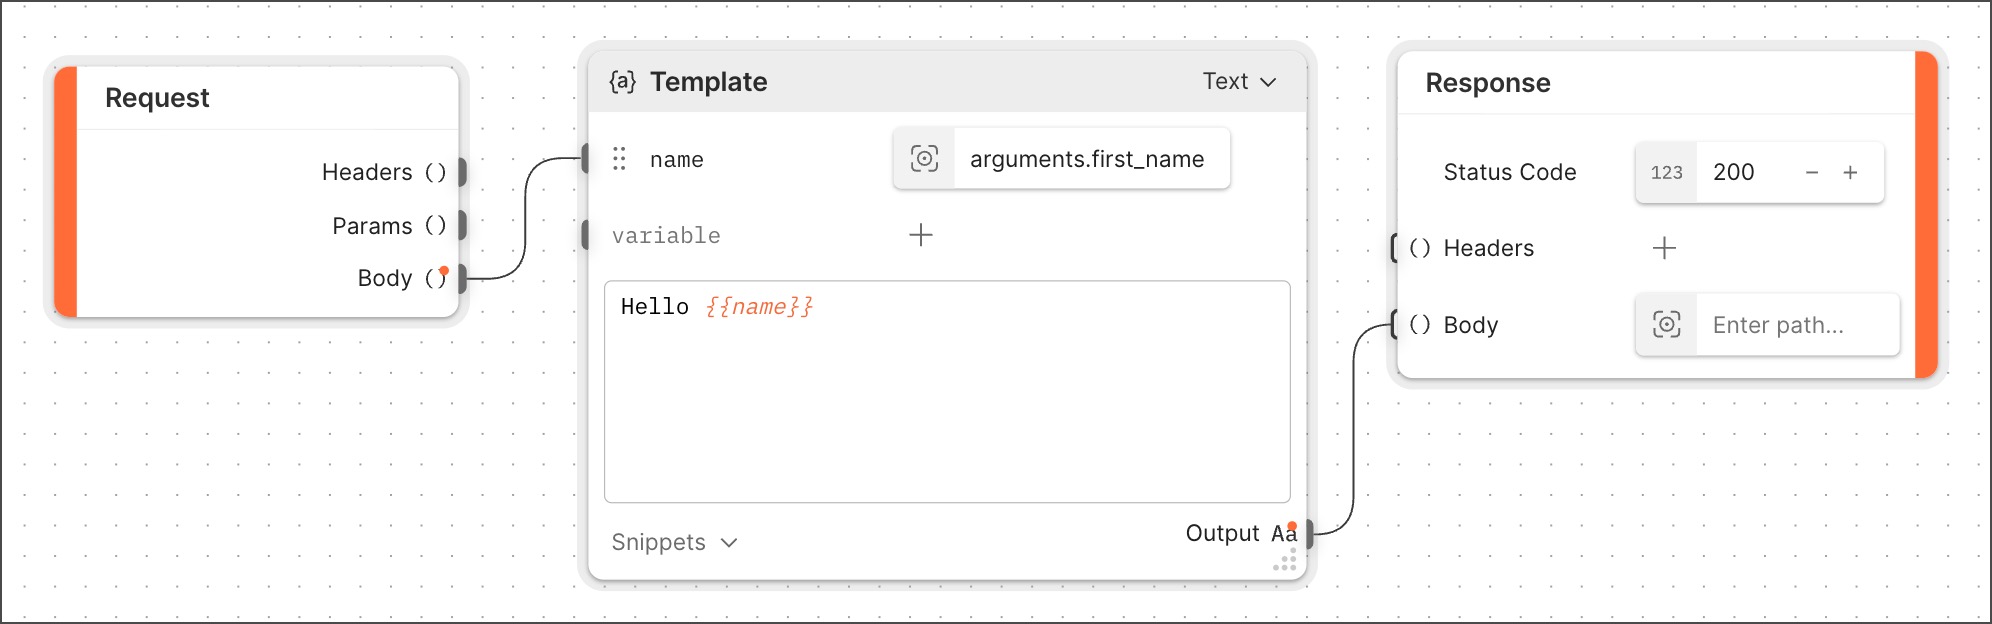
Recall that in your tool definition, the
propertieselement defines afirst_nameproperty. Since tool definition properties become tool call arguments, the path to that property in the example Select block isarguments.first_name. -
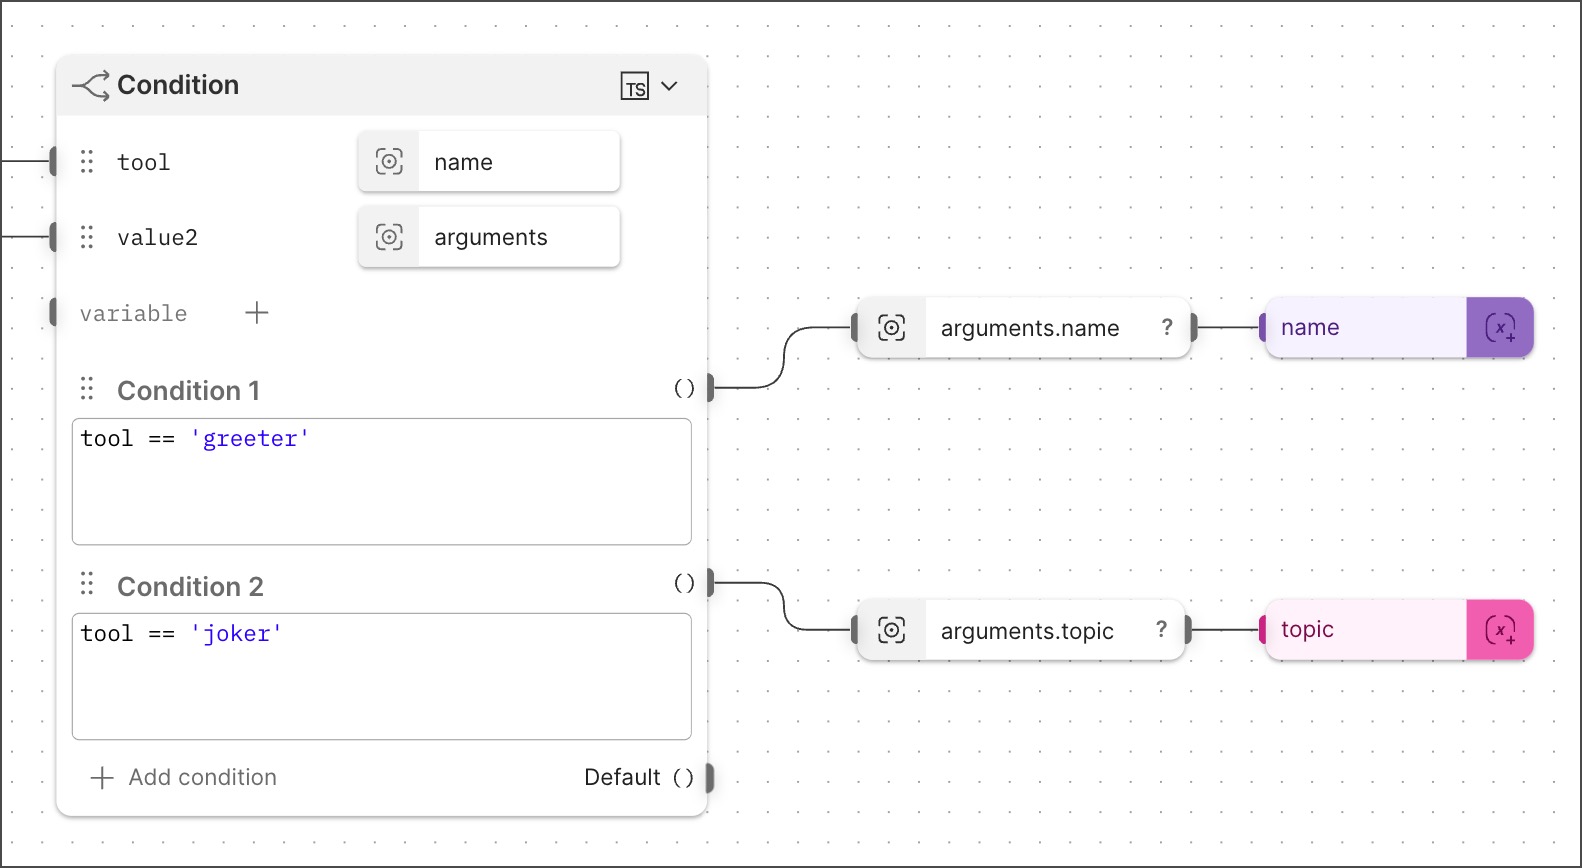
(Optional) For MCP servers that have multiple tools, you can use a Condition block to check which tool is being called in the request. Then a Select block can parse the tool’s arguments.
If you don’t want to add prompts or resources to your MCP server, go ahead and deploy the flow, then test your MCP server.
(Optional) Add prompts to the MCP server
You can add prompts to your MCP server in Flows. Servers with prompts can provide structured messages and instructions for interacting with language models. Clients can discover available prompts, retrieve their contents, and provide arguments to customize them.
The unique identifier for a prompt is in the name field. MCP requests will include this name field in the params section of the request body. Once it receives the request, the action strips away outer elements of the request body. What’s left for the action to process is a JSON object with two key-value pairs: one whose key is name and the other whose key is arguments. The value of arguments is one or more key-value pairs.
You can add one or more prompts to the Body section of a toolDefinition scenario with the structure shown in the following example prompt:
A real-life toolDefinition will include any prompts and resources along with tools. If you add the tool, prompt, and resource examples provided in this topic to a single toolDefinition, the resulting toolDefinition will be structurally valid. However, since those examples are all from different use cases, the resulting won’t be a practical example of a toolDefinition that makes sense for a real-life purpose.
(Optional) Add resources to the MCP server
Resources enable servers to share data that provides context to language models. Each resource is uniquely identified by a URI (not a name as in a tool or a prompt). MCP requests will include this uri field in the params section of the request body. The action receives the internal content of the request body: the outer elements are stripped away.
For example, consider the following prompt that specifies a tool:
The “unboxed” version of this prompt that an action will process looks like this:
Similarly, a prompt that specifies a resource might look like this:
An action will process the “unboxed” version of the prompt, namely { uri }.
You can add one or more resources to the Body section of your toolDefinition scenario with the structure shown in the following example resource:
If you want to parameterize the resources your MCP server exposes, you can add one or more resource templates to the Body section of your toolDefinition scenario. MCP resource templates are URI templates, structured as shown in the following example:
Once it receives the request, the action strips some outer elements of the request body away. What’s left for the action to process is a JSON object with two key-value pairs: one whose key is name and the other whose key is arguments. The value of arguments is one or more key-value pairs.
A real-life toolDefinition will include any prompts and resources along with tools. If you add the tool, prompt, and resource examples provided in this topic to a single toolDefinition, the resulting toolDefinition will be structurally valid. However, since those examples are all from different use cases, the resulting won’t be a practical example of a toolDefinition that makes sense for a real-life purpose.
Deploy the MCP server
Given an action with a toolDefinition scenario that defines tools and (optionally) prompts and resources, you can deploy the action. Once deployed, your action will be an MCP server, meaning that the deployed action’s URL will respond to MCP requests.
Test the MCP server
This topic assumes that your goal is to configure an AI application such as Claude, Cursor, or ChatGPT to use your new MCP server. Before you do that, you can use Postman to create and send an MCP request to the server.
This procedure tests whether the MCP tool definition and the flow itself work as designed. It won’t test the functionality of any prompts or resources that you add to the tool definition, because those would require interacting with an LLM, which an MCP request won’t do.
To test your MCP server, do the following:
-
Click Deploy (even if you have already deployed the action) to open the Deploy dialog.
-
Hover over the MCP URL and click
 Open in MCP request. A new MCP request opens.
 -
In the MCP request, make sure HTTP is selected from the protocol dropdown list.
-
Click Connect. The MCP server’s tools appear in the Message section. Click a tool to view and enter any required arguments.
-
Click Run to send the request to the MCP server. The
paramselement of the request body will include the tool name and the arguments. Below that you’ll find the response body in the Response section.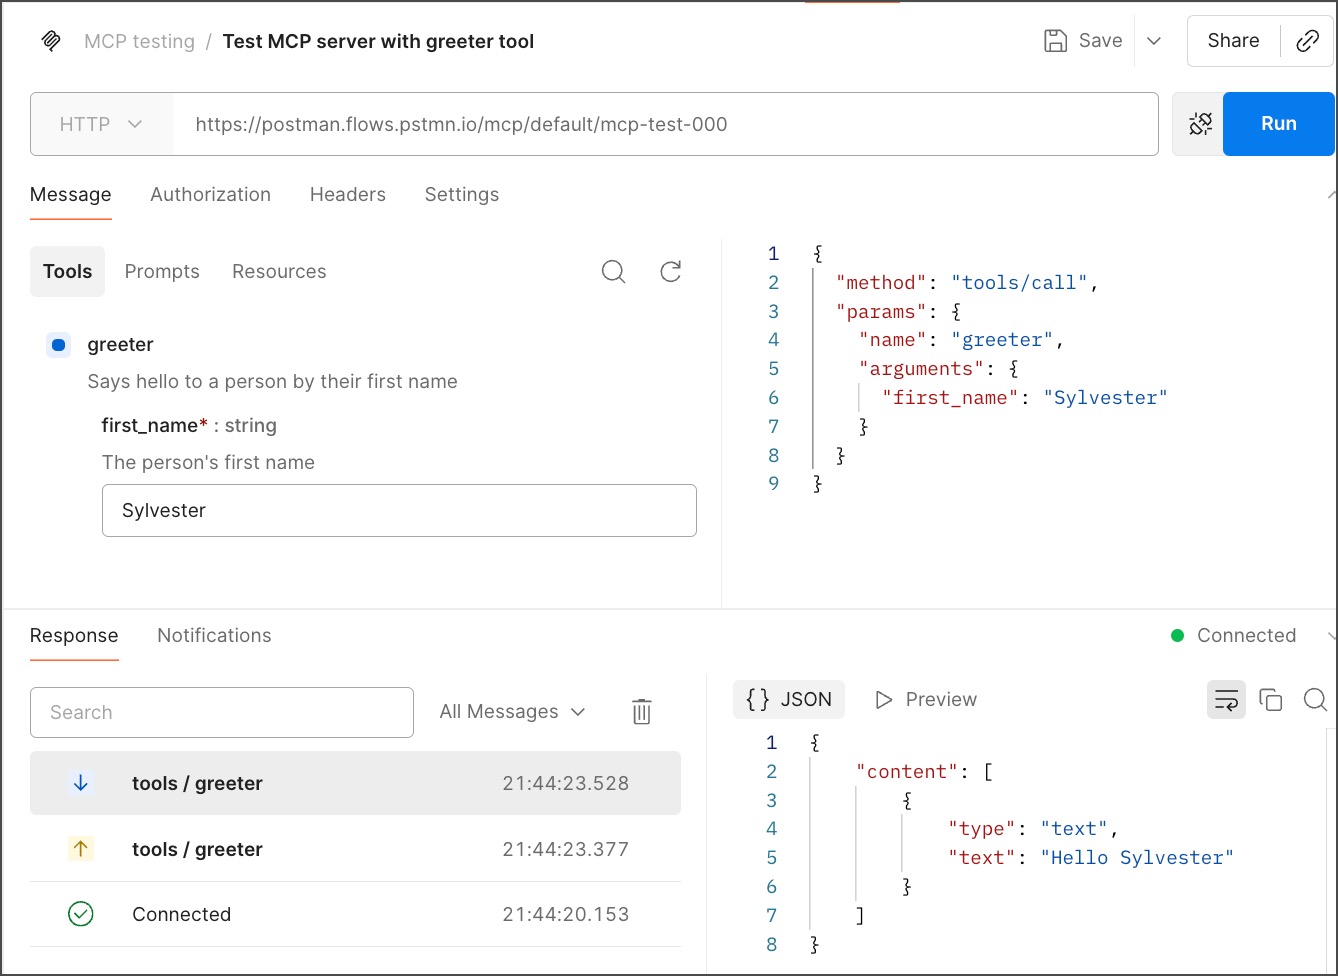
When you are satisfied with the results of this test, you can move on to configuring your AI application of choice to use your new MCP server.