The Start block

The Start block is automatically added to every new flow. It triggers connected blocks to run, but connecting blocks to the Start block is optional. You can add inputs to this block that receive data from scenarios. You can also change the Start block to a Request or Schedule block so you can deploy the flow to the Postman cloud.
Inputs
By default, the Start block has no input ports. You can add inputs as desired. When you add an input to the Start block, Postman Flows creates a Start Trigger scenario and adds the inputs to it as key-value pairs. The input’s name is the key, and the value is empty until you edit the scenario.
Output
By default, the Start block has a single output port you can connect to other blocks. Any blocks connected to the Start block’s output port will run when you click the Run button. If you add inputs to the Start block, each new input will have its own output port that sends data defined in the flow’s scenario.
Setup
The Start block appears automatically on every new flow’s canvas. A new Start block is connected to three buttons you can click to do the following:
Describe - Open agent mode, where you can describe in plain language what you want your flow to do.
Add blocks - Open the blocks list to add a block.
Browse templates - Explore the Flows Catalog.
Receive data with inputs
You can add inputs to the Start block. Each input will appear as an inline data block. When you add inputs to the Start block, Postman Flows automatically creates a scenario named Start Trigger. Each input you create adds an output port to the Start block. Each input also appears as a key-value pair in the Start Trigger scenario, where the key is the input’s name and the value is empty. Edit the scenario to add values to the key-value pairs. The Start block will send these values when you run the flow locally.
To add an input to the Start block, do the following:
-
In the Start block, click
Add input. A String block is inserted into the Start block.
-
(Optional) Click the dropdown list if you want to select a data block other than String. Use
Secret for sensitive string values like API keys. To learn how secret inputs work, see Secrets in scenarios.
-
Enter a name for the input.
-
Edit the Start Trigger scenario to assign data to the input.
Specify inputs for a Flow block
When a Flow block references a flow whose Start block has inputs, those inputs appear as named input ports in the Flow block. When other blocks send data to these ports, the Flow block will send that data to the corresponding inputs in the referenced flow’s Start block. The values that the referenced flow produces will then be available through the Flow block’s outputs. To learn more, see The Flow block.
The scenarios you created to provide data to the inputs in the referenced flow’s Start block won’t be available to the Flow block. This means that in the flow containing the Flow block, you need to add blocks or scenarios to supply data to the inputs.
Example
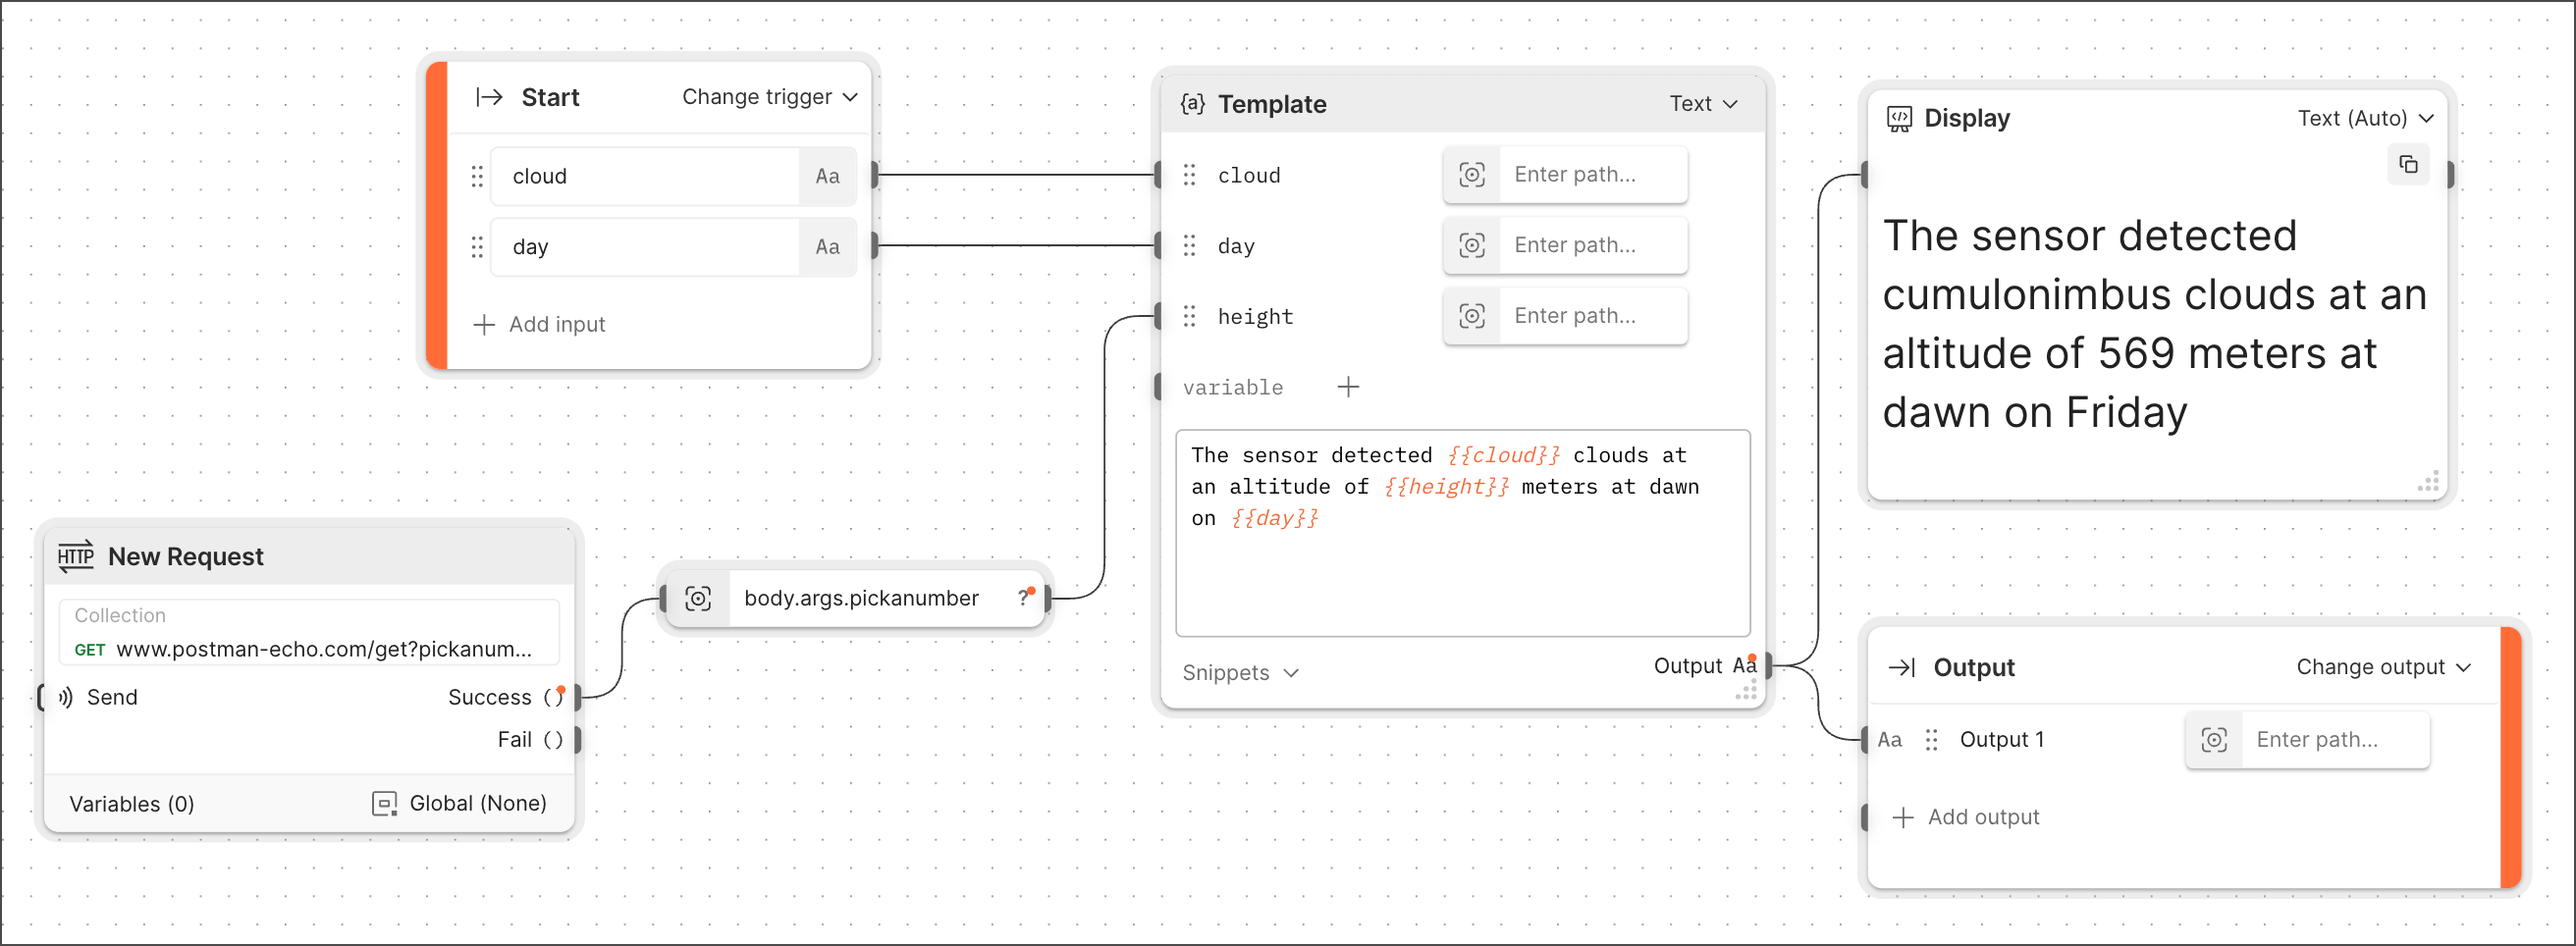
Suppose you make the following flow:

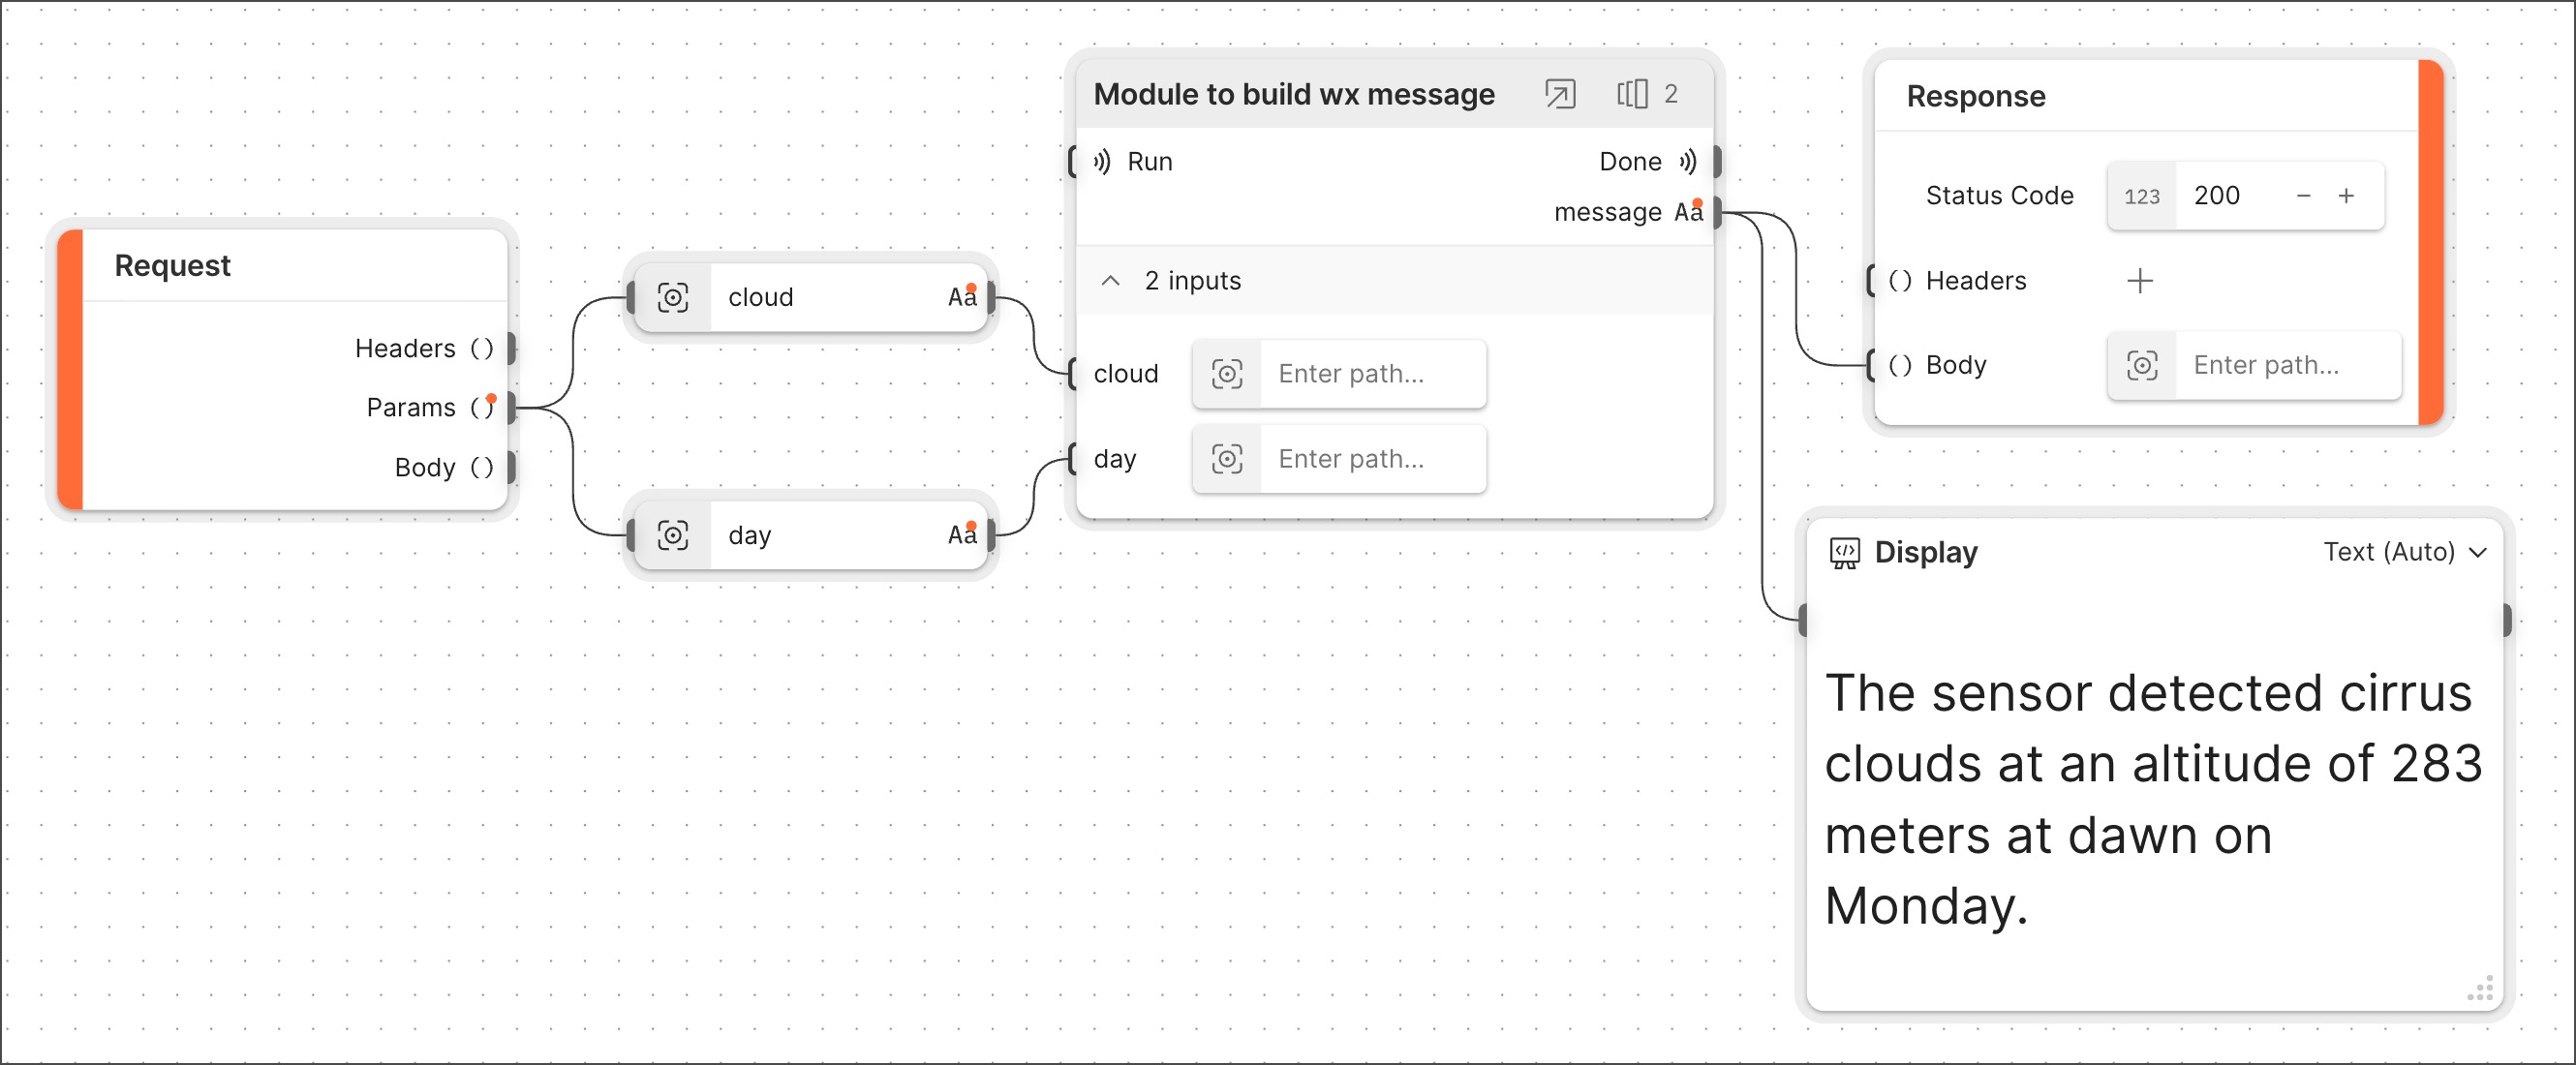
You name the flow Build wx message and use a Flow block to reference it in another new flow. Encapsulating all the original flow’s blocks in a single Flow block makes your new flow simpler and easier to understand.
Providing data to the Flow block’s inputs is required. When testing the new flow, you create a scenario to provide the data. The result looks like this:

Related blocks
Upon creation, every flow has a Start block. If you add inputs to a Start block, they will become inputs in any Flow block referencing the flow that contains the Start block.