Generate and implement MCP tools in Postman
This topic walks through using Postman Agent Mode to generate a toolset’s tools, test them, refine the design, and then implement a real MCP server from that design.
For background on what a toolset is and why it’s useful, see About MCP toolsets in Postman.
Generate tools for a toolset
To create the tools in a toolset automatically, do the following:
-
Open (or create) a toolset in your workspace. In the sidebar, select
 >
>  AI Toolset.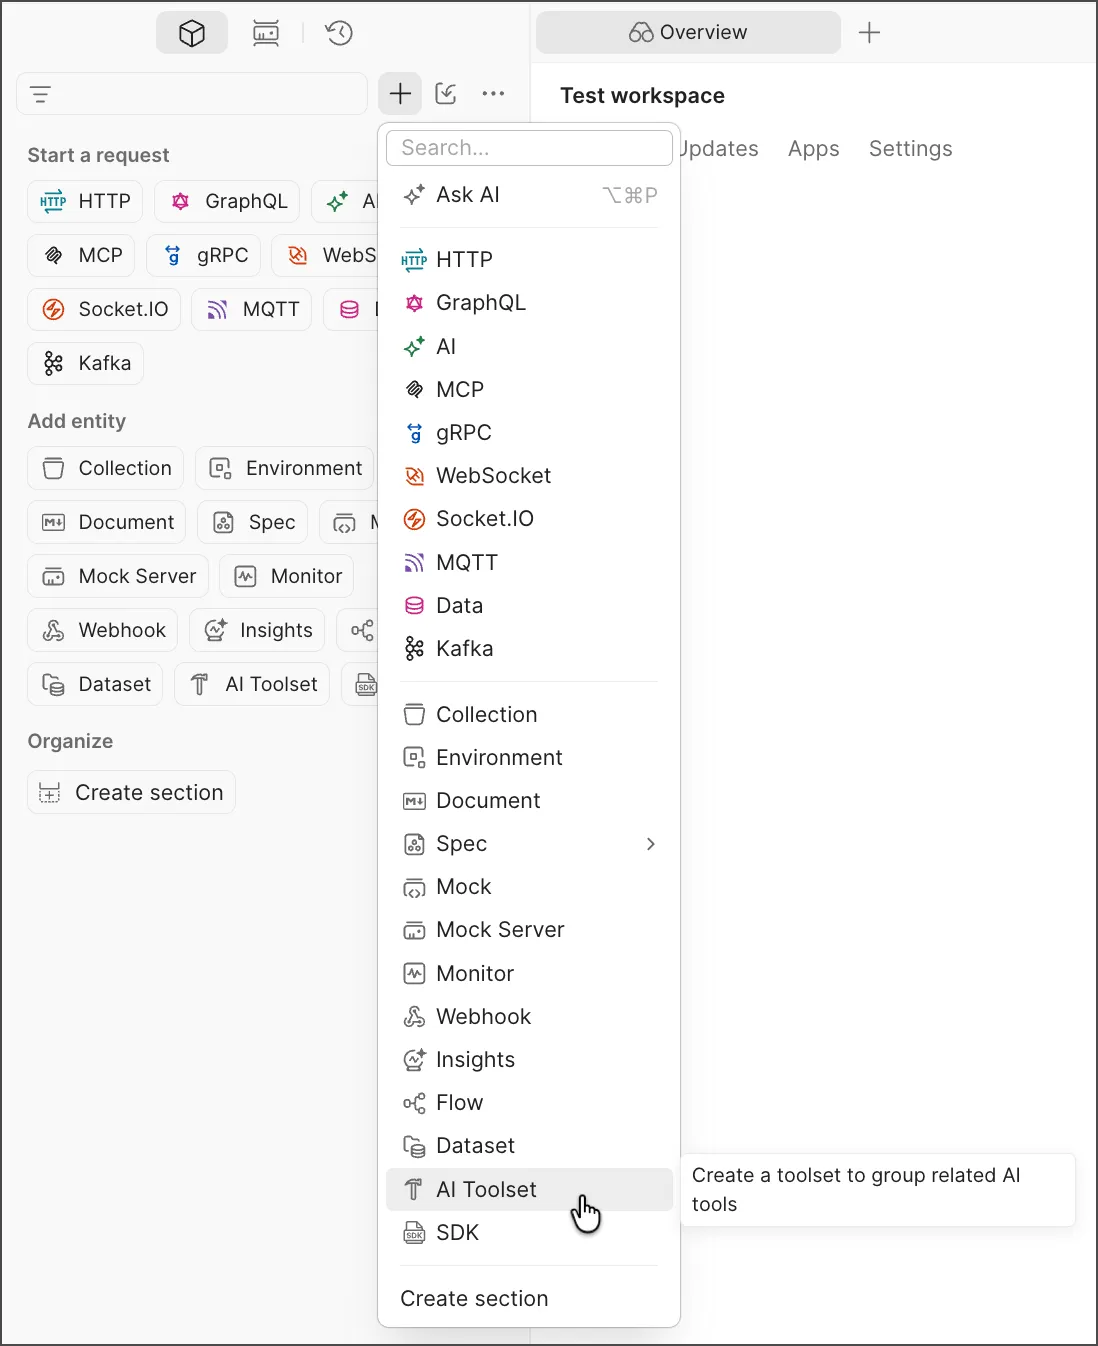
-
In the Agent Mode panel, describe the flows you want the toolset to support. For example:
Add tools in this toolset to represent order management related flows. -
Review the agent’s activity log as it works. Depending on the request, the agent may:
- Explore existing files and directories in the project.
- Search for existing code conventions to follow.
- Create a definition and implementation file for each new tool.
For example, given the order-management prompt above, the agent creates tools like cancelOrder, createOrder, getOrder, getOrderStatus, listOrders, markOrderShipped, updateOrder, and updateOrderStatus, each with a matching definition and implementation file.
Review a generated tool
Each generated tool has a Definition and an Execution tab you can inspect and edit like any other tool in a toolset.
- The Definition tab shows the tool’s description and its JSON input schema.
- The Execution tab shows what the tool is currently backed by: a Static Response (a fixed mock payload) or a Script (a short function you can edit). This is the mock behavior a toolset’s tools run on before you generate a real implementation.
For example, the generated getOrder tool has the description “Retrieve the full details for a single order,” with this input schema:
Generated tools typically follow a consistent pattern: a baseUrl override plus the fields relevant to that specific operation. Meanwhile, the generated createOrder tool’s Execution tab uses a Static Response, returning a fixed mock order object regardless of the input it receives. That’s a reminder that, at this stage, you’re validating the tool’s interface, not its real logic.
Test tool behavior in a harness
Once tools exist, use the toolset’s built-in test harness, the Playground, to try the toolset against natural-language prompts before any real backend exists. Give the harness a prompt, and see which tool it picks, what arguments it fills in, and whether the outcome matches what you intend.
To test a flow, do the following:
-
Open the Playground tab for your toolset.
-
Enter a prompt describing the scenario you want to exercise, including error cases if you want to check how the toolset behaves when something goes wrong. For example:
Try out an error flow where the user creates an order but fetches an invalid one. -
Review each tool call the agent makes, along with its status (Completed or Failed) and the input/result for that call.
-
Read the agent’s summary of what happened.
For example, testing the prompt above runs createOrder (Completed, returning a new order with ID 01234) followed by getOrderStatus against an intentionally invalid order ID (Failed, returning a tool_execution_error). The agent’s summary confirms this is the expected behavior for a nonexistent order ID.
The Playground also surfaces quick-start suggestions for further testing, such as Test all tools, Chain two tools together, Trigger an error, and Test an optional parameter.
Refine the toolset
After you review generated tools and test results, you can ask the agent to clean up the toolset, for example, merging overlapping tools or removing ones that aren’t needed, without touching any real implementation, since none exists yet.
To refine a toolset, describe the change you want in the Agent Mode panel. For example:
Get order status can be merged into get order. Update order status can be merged into update order. Delete the two tools that aren’t required.The agent updates the toolset accordingly. In this example, it merges getOrderStatus into getOrder and updateOrderStatus into updateOrder, then deletes the two now-redundant tools, leaving six tools: cancelOrder, createOrder, getOrder, listOrders, markOrderShipped, and updateOrder.
You can repeat generation, testing, and refinement as many times as you like. The whole point of a toolset is that none of this iteration touches a real server.
Connect a repository and generate a server implementation
Once a toolset’s design is validated, you can move from a mock to a real, working MCP server without switching tools. Agent Mode builds the implementation directly from the toolset’s design, using the same names, descriptions, and schemas you test.
To generate a server implementation, do the following:
-
Connect a repository for the toolset, if you haven’t already. If the repository isn’t tracked in Git yet, Postman may prompt you to Initialize it and Configure remote (with a sample
git remote add origin <url>command and a Run in Terminal action). -
In the Agent Mode panel, describe the kind of implementation you want. For example:
Implement the full MCP server using an in-memory database with minimal dependencies. -
Watch the agent work through its own todo list, which typically includes:
- Inspecting the toolset and project conventions.
- Implementing the server and its tools.
- Validating server and tool behavior.
-
Review the files the agent creates. Depending on the request, this can include a data layer, tests, a server entry point, and updated project metadata.
For the order-management example, the agent finds the project’s src folder empty, reads the project’s lockfile and SKILL.md for conventions, checks the installed MCP SDK version, and then creates:
The generated tests validate the database layer’s behavior, for example:
The agent reruns syntax, unit, and startup validation until everything passes, then summarizes what it builds, which dependencies and scripts it adds, and how to run the server (for example, npm start).
Register and run the generated server
After a server implementation is generated, register it as an MCP server so your toolset’s tools run against real code instead of mock responses.
To register and run a server, do the following:
- Open the MCP Servers panel in your workspace. You’ll see any servers already configured there (for example, other MCP servers you or your team have added).
- Add the newly generated server and give it a name.
- Toggle the server on. Postman shows how many tools are enabled for it.
For the order-management example, the generated server registers as mockOrder with six enabled tools, each carrying the description generated earlier:
- cancelOrder — Cancel an order by transitioning it to canceled.
- createOrder — Create a new order with customer and line-item details.
- getOrder — Retrieve the full details for a single order.
- listOrders — List orders, optionally filtered by lifecycle status.
- markOrderShipped — Update an order’s fulfillment state to shipped.
- updateOrder — Update an order’s customer name, line items, or both.
Once a server is running, its toolset tab shows Copy server URL and Stop server controls.
Server settings
Each MCP server has a Settings tab with a Manual port field (“Port for the local MCP server. Leave blank to select one automatically.”), which defaults to Automatic.
Validate tool behavior against the live server
After registering and starting the server, re-run your earlier Playground tests to confirm the live implementation behaves the way the mocked toolset did.
For the order-management example, when you re-run the earlier error-flow prompt against the live mockOrder server, it returns the same tool_execution_error for the invalid order lookup, confirming the real server matches the expected error behavior that you validate against the mock.
Use your own AI provider key in the Playground
The Playground lets you supply your own API key for the AI provider used in chat, instead of relying only on Postman’s default configuration.
To use your own key, do the following:
- In the Playground, open the Use Postman panel.
- Choose a Provider (for example, Anthropic).
- Enter your API key.
Postman notes that your API key stays in memory for the browser session and is sent directly to the provider. You can also switch models in this panel (for example, between Claude Haiku 4.5, Claude Fable 5, or GPT‑5.6 Terra), depending on what’s available for your workspace.